All the ways to import from Genspark to Figma
Genspark can generate everything from full websites and landing pages to professional presentations from a single prompt. But once the design is live in Genspark’s preview, there’s no direct path into Figma — and manually rebuilding what the AI just created is the last thing you want to do. This guide covers how to import your website designs or slide decks from Genspark into Figma as fully editable layers.
⬇️ Jump to Genspark AI Developer guide
⬇️ Jump to Genspark AI Slides guide
Import Genspark into Figma - Quick Guide
- Generate a website design in Genspark using the AI Developer agent or AI Slides
- Open the html.to.design plugin in Figma
- While previewing your Genspark designs, open the html.to.design Chrome extension from your browser toolbar and click “Capture”
- The design appears automatically in Figma, fully editable — no file download needed
💡 Pro tip: Opening the Figma plugin first enables direct transfer when you capture with the extension.
Import website designs from Genspark AI Developer to Figma
The html.to.design browser extension captures any rendered webpage — including Genspark’s live previews — and converts it to editable Figma layers. This is the fastest way to import Genspark designs into Figma. There’s no setup beyond installing the extension, and it works with anything that renders in the browser.
Step 1: Generate your web design in Genspark
Open Genspark and use the AI Developer agent to create a website design. Genspark can generate complete websites, landing pages, and multi-section layouts from natural language prompts, with the result rendering as a live interactive preview.
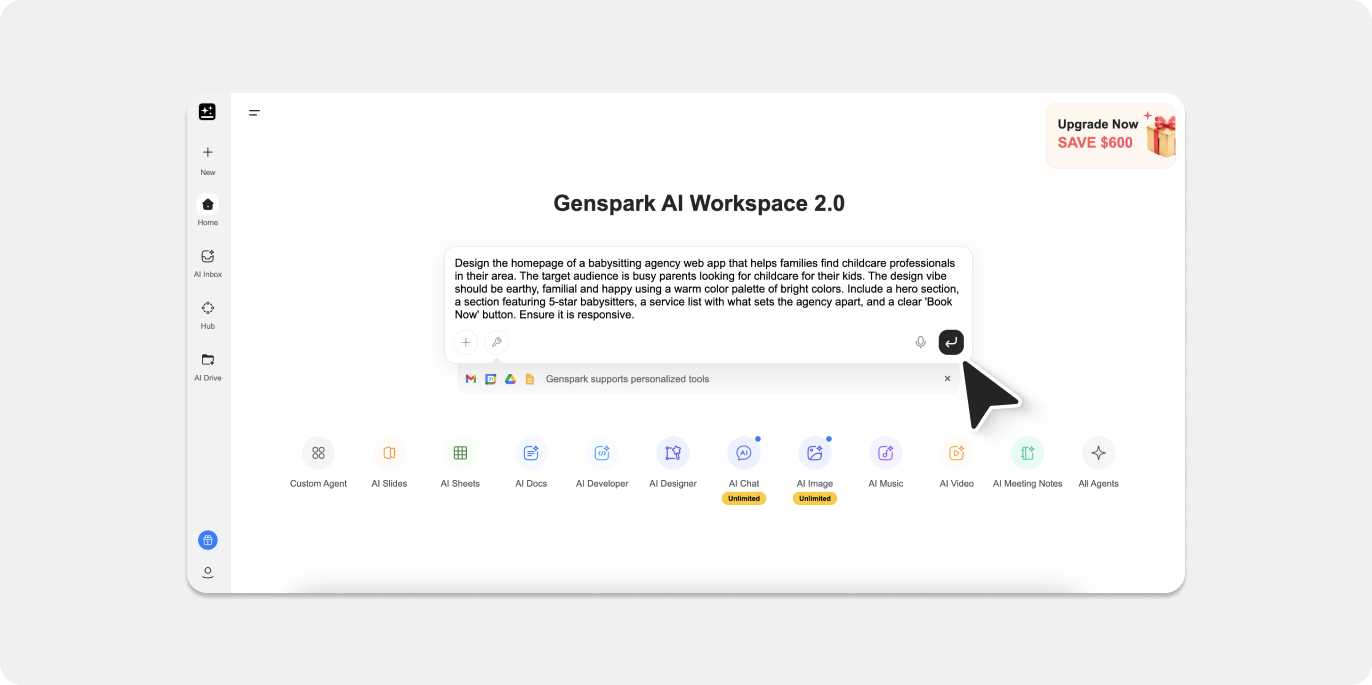
For this example, we used the following prompt:
“Design the homepage of a babysitting agency web app that helps families find childcare professionals in their area. The target audience is busy parents looking for childcare for their kids. The design vibe should be earthy, familial and happy using a warm color palette of bright colors. Include a hero section, a section featuring 5-star babysitters, a service list with what sets the agency apart, and a clear ‘Book Now’ button. Ensure it is responsive.”
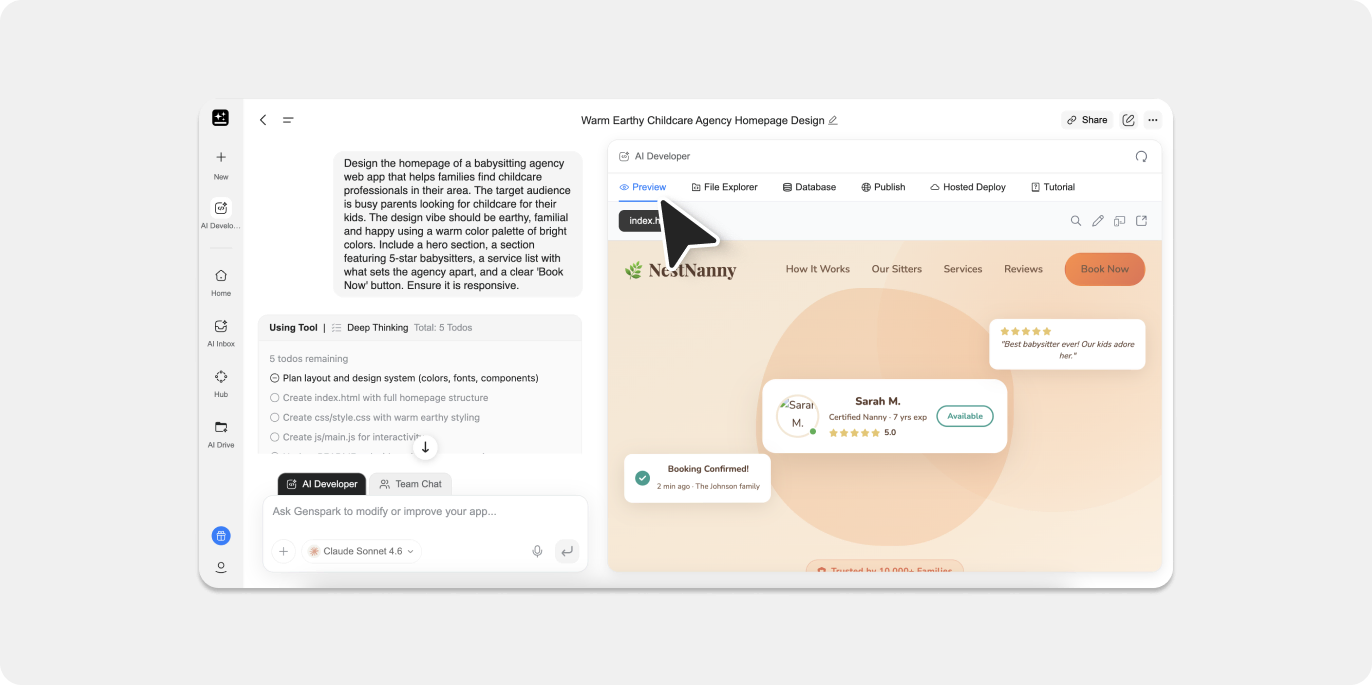
Step 2: Preview your Genspark design
Once Genspark has generated the page, click on Preview tab to see your full website design. Make sure the design looks the way you want before capturing — the extension captures exactly what you see.
Step 3: Capture with the html.to.design browser extension
With the preview of your Genspark open in the browser, click the html.to.design Chrome extension icon in your toolbar. The extension captures the rendered page, including all styles, layouts, and assets.
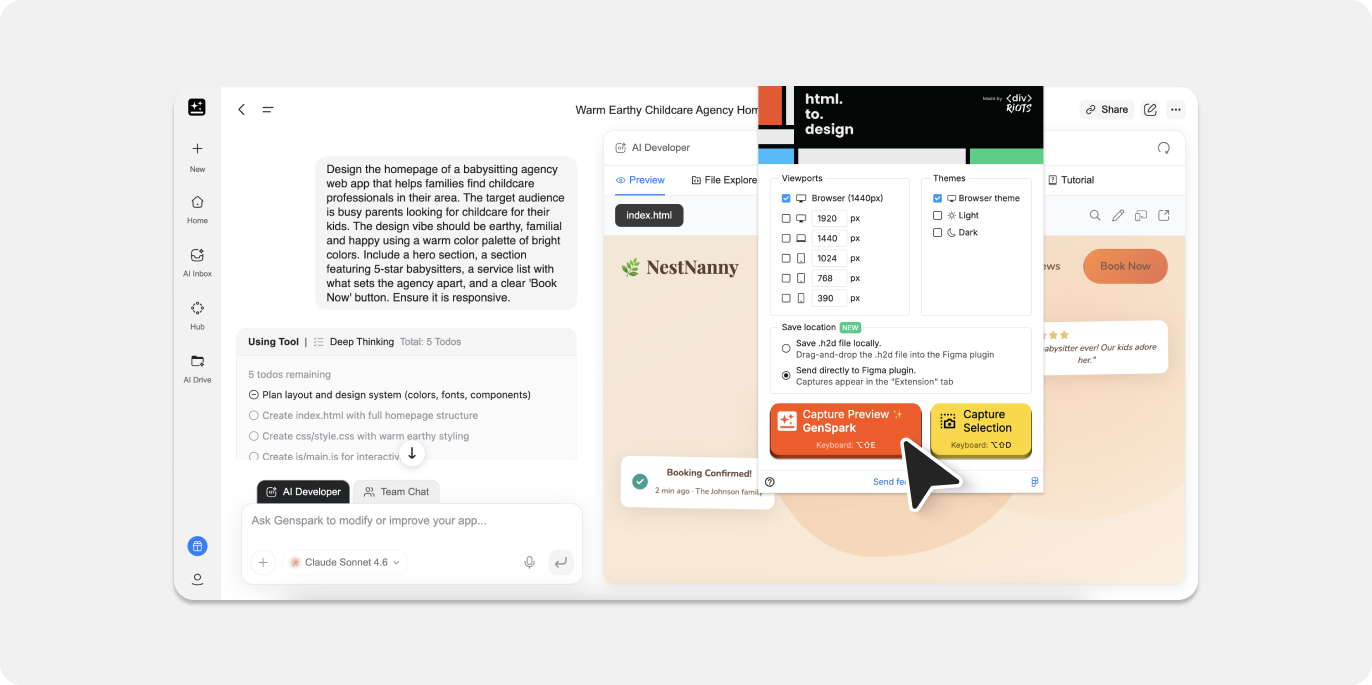
You have two options for getting the captured design into Figma:
Option A (Fastest): Open the html.to.design plugin in Figma before capturing. When you click ‘Capture’, the import transfers directly to the plugin — no file download, no drag-and-drop. The design appears on your canvas automatically.
Option B: The extension can also save designs as an .h2d file. Drag this file into the html.to.design plugin window to complete the import.
💡 Pro tip: Keep the Figma plugin open while working in Genspark. This way, every capture lands in Figma instantly.
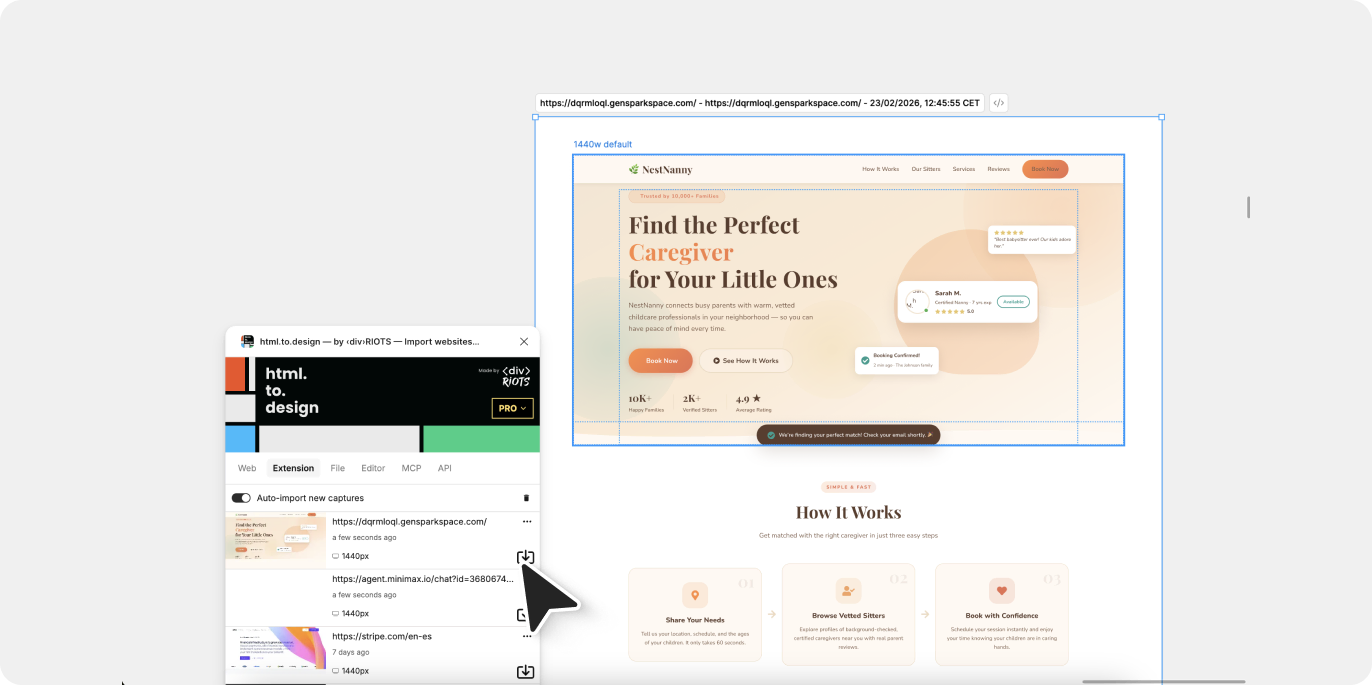
Step 4: Edit your web design in Figma
The import produces fully editable layers with autolayout applied where applicable. Text remains editable, colors are extracted as local Figma styles, and the layer hierarchy reflects the original page structure.
From here you can rename layers, build components, connect your design system, and hand off to developers — all without having to rebuild anything manually.
Import presentations from Genspark AI Slides to Figma
If you’re using Genspark to create slide decks, the html.to.design browser extension can also capture them to bring them into Figma and Figma Slides.
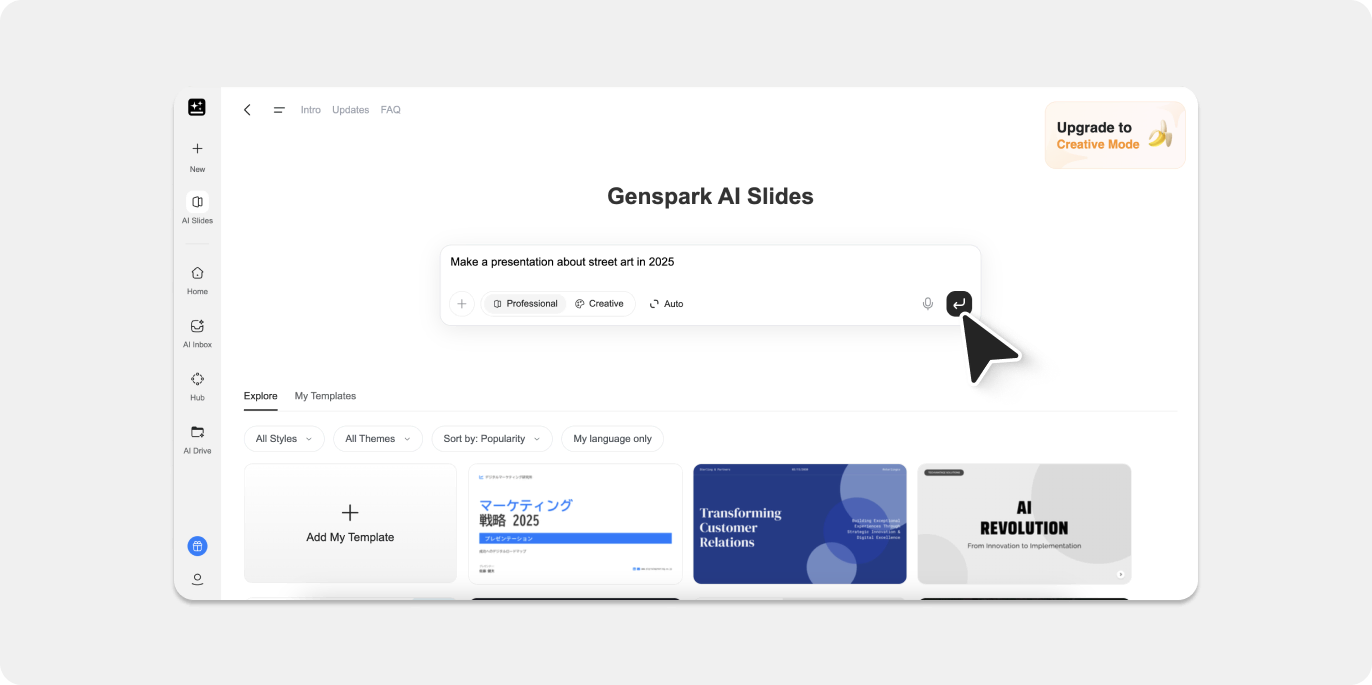
Step 1: Generate your slides in Genspark
Open Genspark and use the AI Slides agent to create a presention. Genspark can generate slide decks on practically any topic from natural language prompts, with the result rendering as a live interactive preview.
Step 2: Preview your Genspark presentation
Once Genspark has generated the slides, click on Preview tab to see an overview visual of your full presentation. Make sure the slide design is the way you want before capturing — the extension captures exactly what you see.
Step 3: Capture your slide deck with the html.to.design browser extension
With the preview of your Genspark slides open in the browser, click the html.to.design Chrome extension icon in your toolbar. The extension captures the rendered page, including all styles, layouts, and assets.
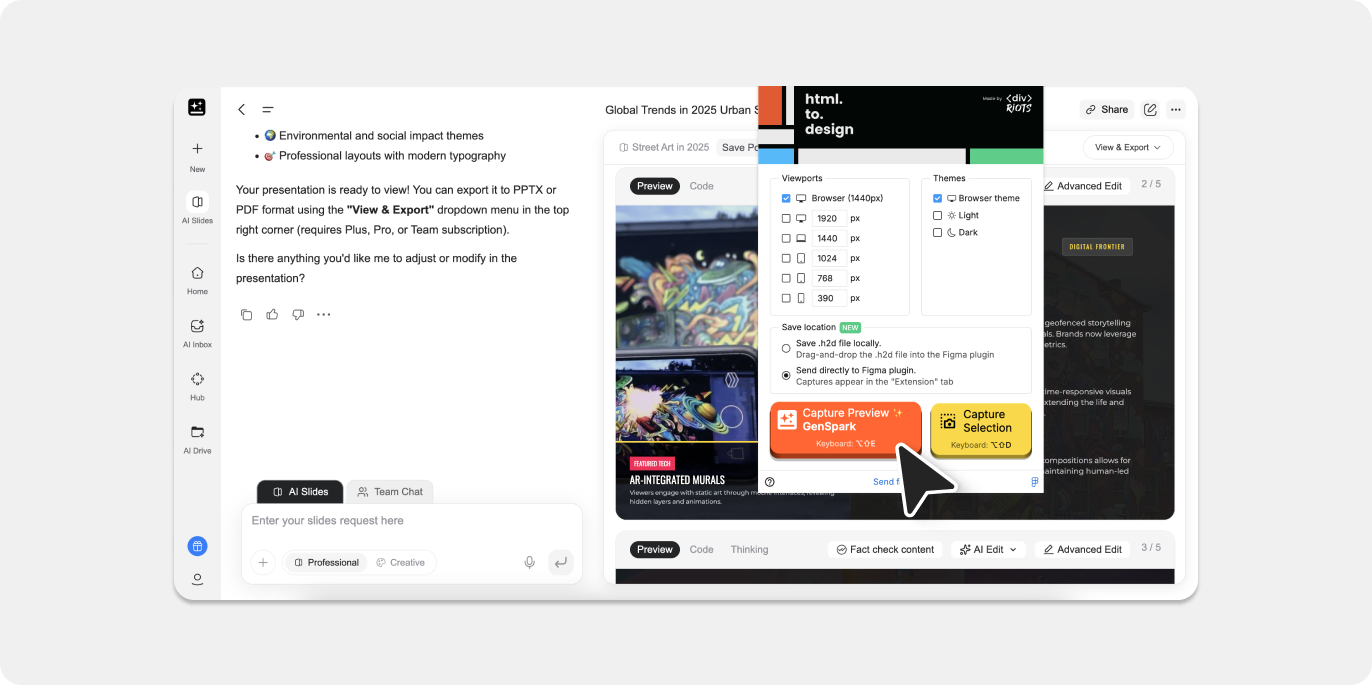
You have two options for getting the captured slide deck into Figma:
Option A (Fastest): Open the html.to.design plugin in Figma before capturing. When you click ‘Capture’, the import transfers directly to the plugin — no file download, no drag-and-drop. The design appears on your canvas automatically.
Option B: The extension can also save your presentation as an .h2d file. Drag this file into the html.to.design plugin window to complete the import.
💡 Pro tip: Keep the Figma plugin open while working in Genspark. This way, every capture lands in Figma instantly.
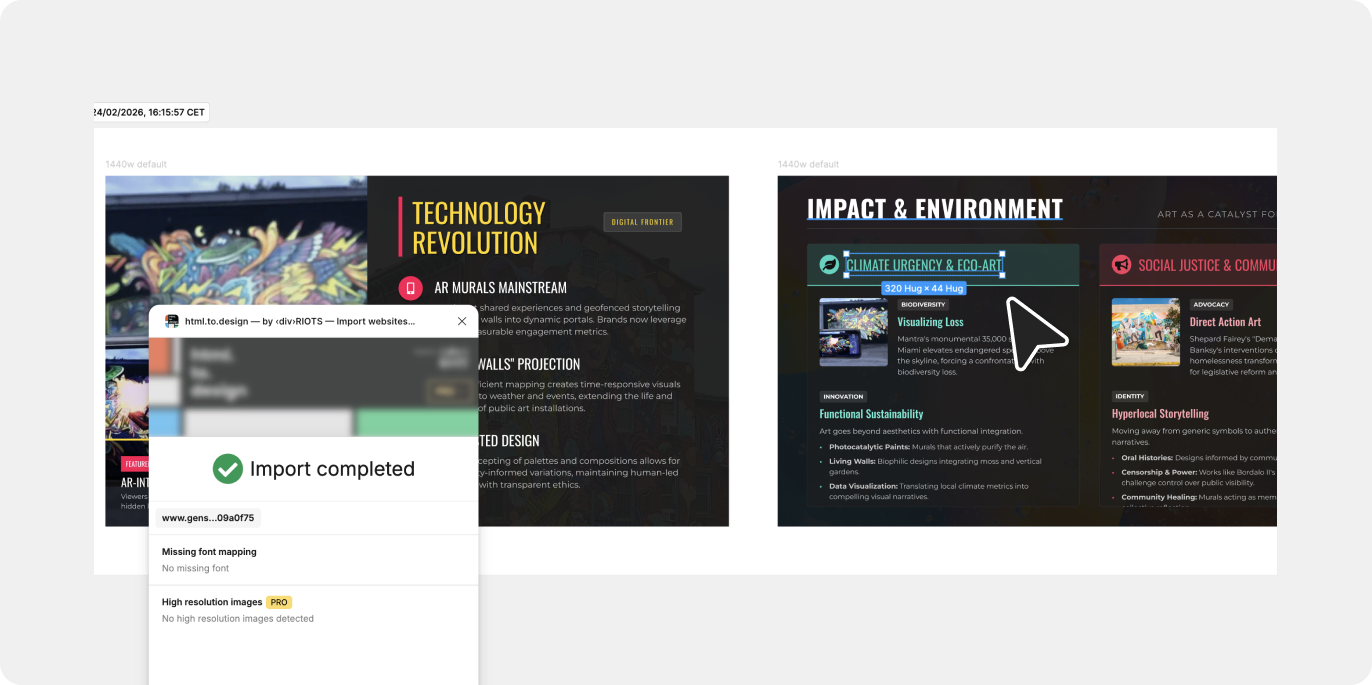
Step 4: Edit your slides in Figma
The import transforms your Genspark Slides into fully editable layers with autolayout applied where applicable. You can also run html.to.design in Figma Slides to bring your Genspark slide deck directly into Figma Slides. Text remains editable, colors are extracted as local Figma styles, and the layer hierarchy reflects the original page structure.
From here you can edit content, change color schemes, collaborate with your team — all without having to rebuild anything manually.
What gets converted when you import Genspark to Figma
Preserved elements:
- Layer hierarchy matching the page structure
- Autolayout applied to flex & grid containers (if selected in html.to.design’s settings)
- Text remains fully editable
- Colors extracted as local Figma styles
- Images and SVGs imported as fills or separate layers
- Fonts mapped to available Figma fonts (can be re-mapped if needed)
A few limitations:
- Complex animations don’t transfer (Figma doesn’t support CSS animations)
- Custom fonts require manual installation in Figma
Tips for best results
✅ Set your viewport before capturing: Resize your browser to the breakpoint you want to work with in Figma before using the extension. The capture reflects exactly what’s visible. You can also select various breakpoints from the extension dialog to import multiple in one go.
✅ Capture states and components: If your Genspark design has interactive states (open menus, modals) or hover effects — you can capture each state individually for a complete set of design layers, and import hover states as full-fledged Figma components.
✅ Use local styles from your design system: Once your design is in Figma, you can select the option ‘Use existing local styles’ to apply colors and text styles from your design system in Figma.
You’re all set to import from Genspark to Figma!
Whether you’re creating a landing page for your project, or a sales pitch presentation for a new client, this method brings anything you generate in Genspark into Figma as editable layers, without any manual rebuilding. The html.to.design Chrome extension handles most situations — open the Figma plugin, capture your Genspark preview, and you’re done.
html.to.design includes free imports every month. Install the Chrome extension and test it with your next Genspark project.
Related guides
- From Claude AI to Figma — Import AI-generated designs from Claude artifacts
- From Lovable to Figma — Import React apps built with Lovable
- Import from other tools — Full list of AI tools html.to.design supports
FAQ
Q: Can I import Genspark-generated websites that use JavaScript or dynamic content?
Yes. The html.to.design extension captures the fully rendered page — including JavaScript-driven layouts, dynamic content, and CSS-in-JS styles — the same way your browser does. What you see is what you import.
Q: What if my Genspark design uses a custom font that Figma doesn’t have?
The plugin will flag missing fonts after import, which you can then remap to an alternative and apply to your imported designs.
Q: Can I import a presentation from Genspark AI Slides directly to Figma Slides?
Yes. Simply run the html.to.design plugin in your Figma Slides project and import the slide deck you previously captured with the browser extension.