All the ways to import from Lovable to Figma
Lovable excels at rapid prototyping and generating functional React apps through AI prompts. But when you need to polish designs, hand off to design teams, or iterate on visual details, Figma remains the go-to tool. Moving between these platforms used to mean manual recreation. Now you can capture your Lovable preview and import it directly as editable Figma layers.
Import Lovable into Figma - Quick Guide
- Generate your designs in Lovable
- Open the html.to.design plugin in Figma
- While previewing your Lovable designs, click the html.to.design Chrome extension icon
- The design appears automatically in Figma—no file download needed
- Edit your fully layered design
💡 Pro tip
Opening the Figma plugin first enables direct transfer. Skip this step and the extension saves a .h2d file to drag into the plugin instead.
Method 1: Import Lovable to Figma with the Chrome extension (recommended)
The html.to.design browser extension captures any webpage—including Lovable and most AI tools—and converts it to editable Figma layers. This is the fastest way to import Lovable designs into Figma. Simply install the extension and use it to capture anything that renders in the browser.
Step 1: Generate your design in Lovable
Open Lovable and prompt it to create a design. Lovable generates a preview for more complex content like webpage layouts, UI components, and web apps. The preview appears in a dedicated window on the right side of the chat.
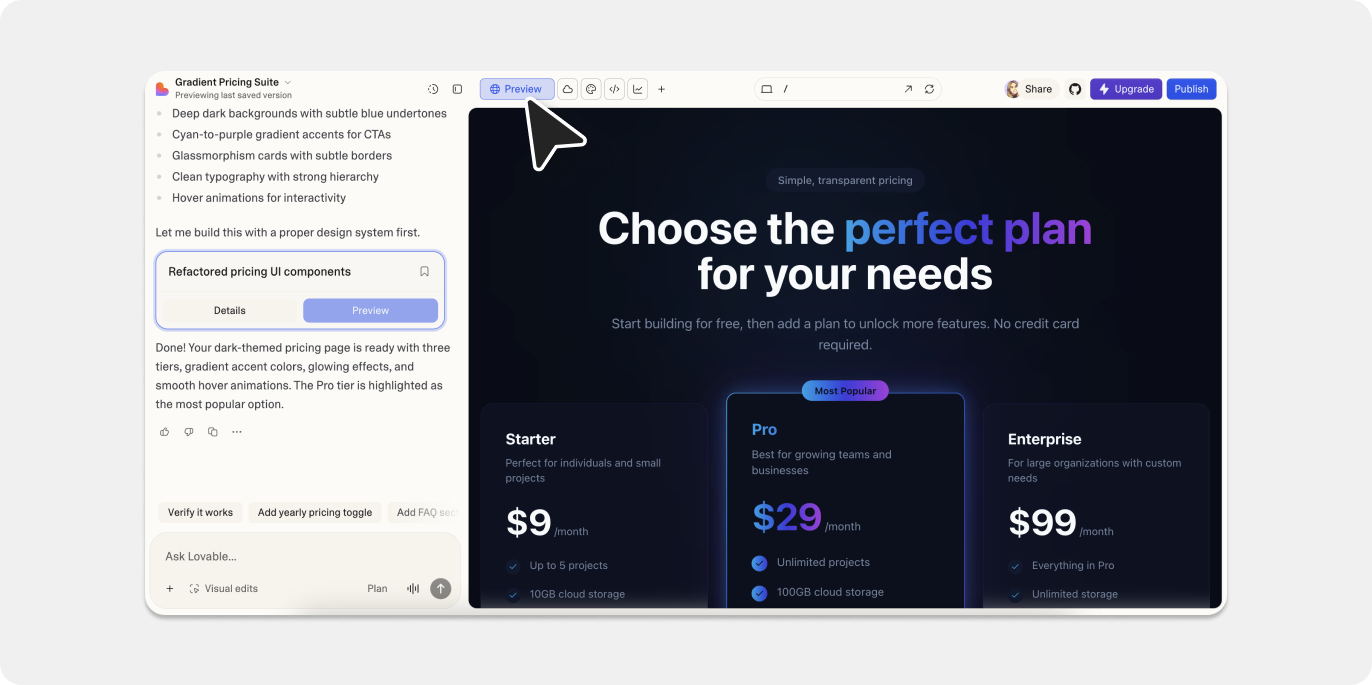
Example prompt: “Create a pricing page with three tiers, a dark theme, and gradient accent colors.”
Step 2: Preview your design
Click the “Preview” button to open a preview of your Lovable project in the right hand window. This renders the HTML/React code as a visual webpage and shows exactly what you’ll capture.
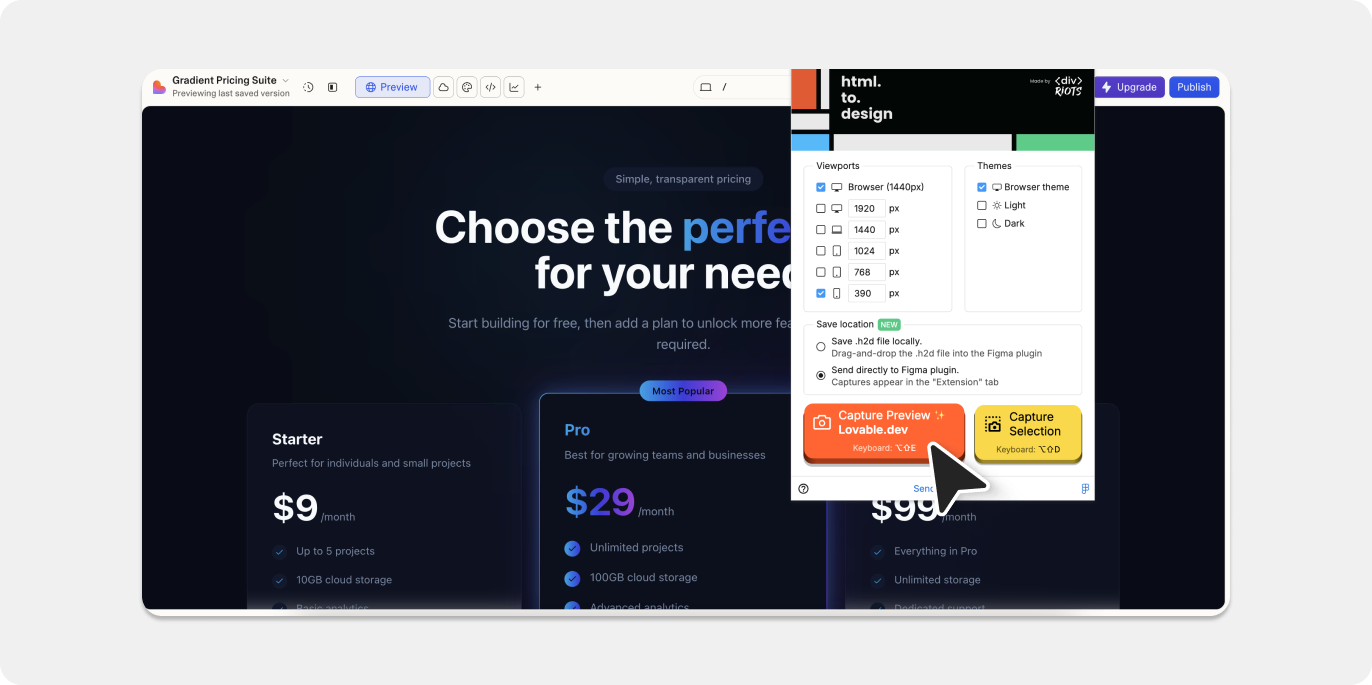
Step 3: Capture with the extension
With your Lovable project open to the preview, click the html.to.design extension icon in your Chrome toolbar. The extension will automatically capture the rendered page.
You have two options for getting the captured webpage into Figma:
Option A (Fastest): Open the html.to.design plugin in Figma before capturing so that your captured page is sent directly to the plugin—no file download needed.
Option B: If the plugin wasn’t open before capturing, the extension saves the capture as a .h2d file that you can drag into the html.to.design plugin window to import.
💡 Pro tip
Keep the Figma plugin open while working with Lovable. Every capture lands in Figma instantly.
Step 4: Edit in Figma
If you opted to save your Lovable capture as an .h2d file, finish importing it into Figma using the html.to.design plugin.
Your Lovable preview is converted into editable Figma layers, maintaining the structure, styling, and layout of your design - autolayout included!
Method 2: Publish your Lovable designs → Import URL to Figma
Lovable also lets you publish your Lovable project to a public URL. The html.to.design Figma plugin can then import that URL directly—another way to get your Lovable designs into Figma without the browser extension.
Step 1: Generate and publish
Generate or open your Lovable project. Once the design looks right, click the “Publish” button at the top of the preview window to generate a public link.
Note: Published Lovable designs are visible to anyone with the link. Your chat conversation remains private.
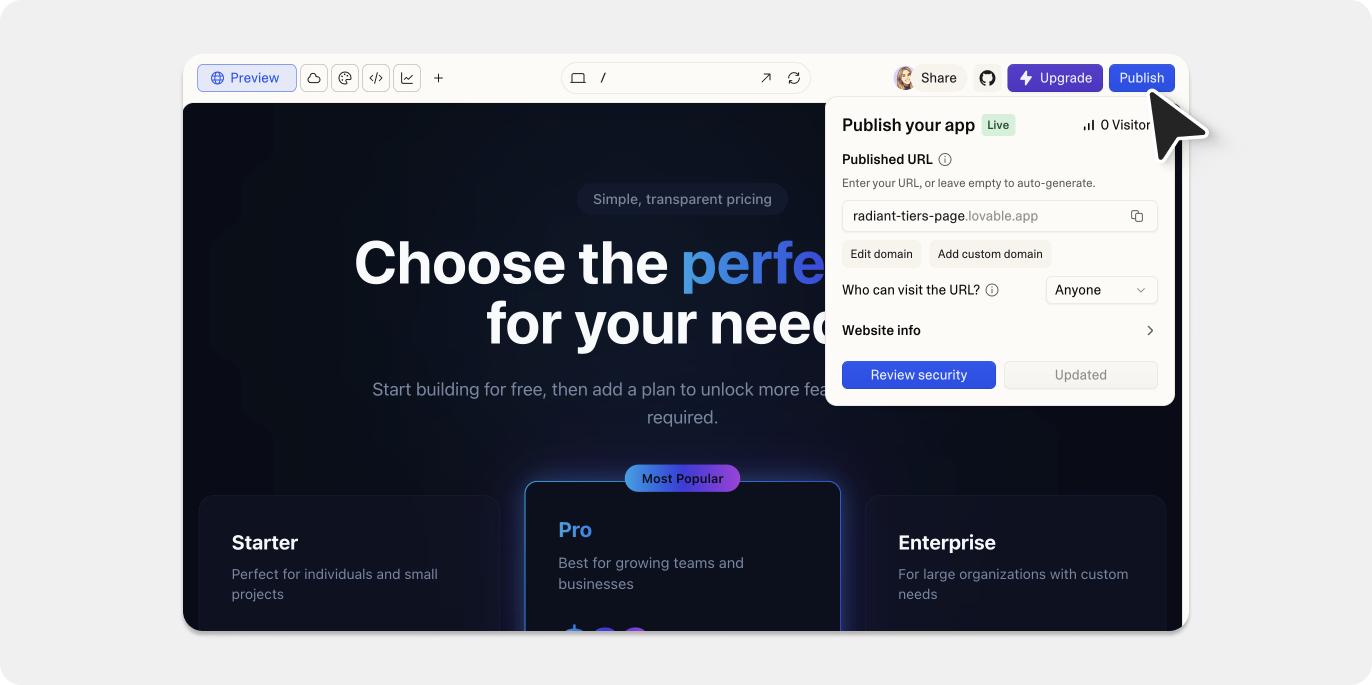
Step 2: Copy the URL
After publishing, click “Copy link” to get the public URL. It follows the format ...lovable.app
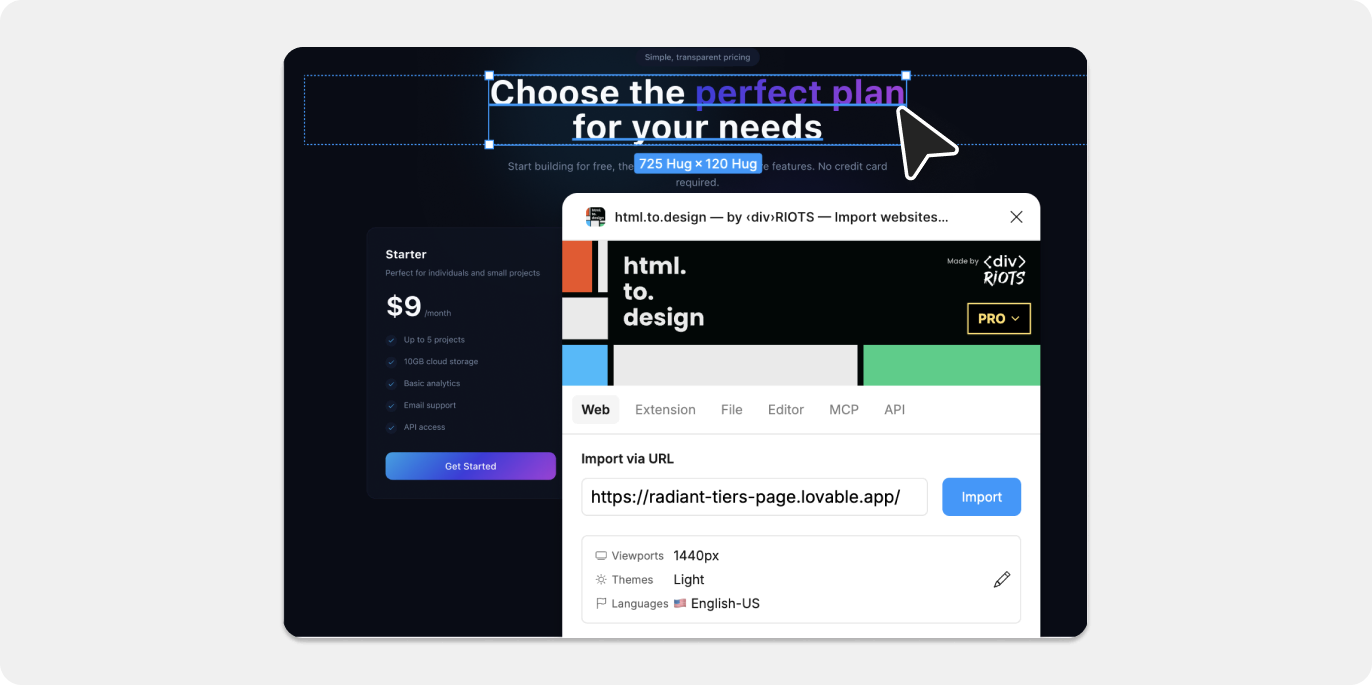
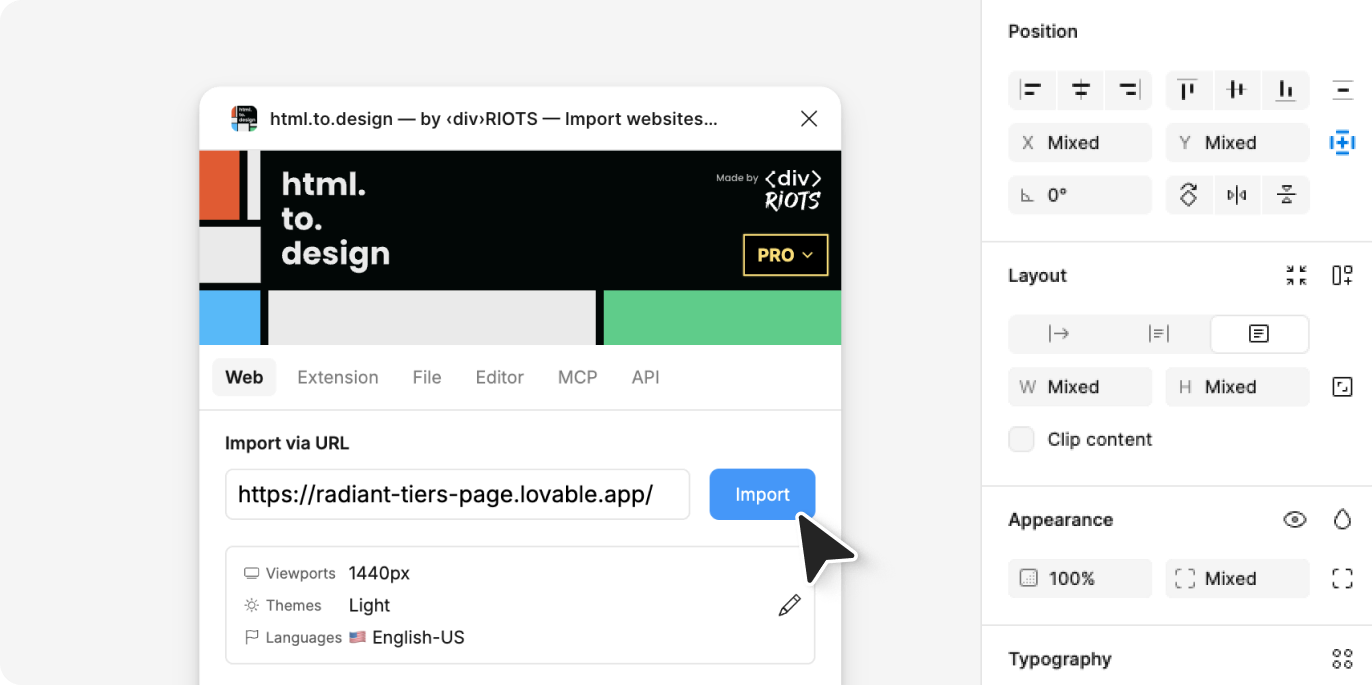
Step 3: Import via the plugin
Next, open Figma and run the html.to.design plugin. Paste the published URL into the input field and click “Import.”
The plugin fetches the page and converts it to editable Figma designs—same result as the extension method, but using the URL workflow.
When to use this method?
This approach works best when you want to share the Lovable URL with others or when the browser extension isn’t available. The published page also serves as a live preview that stakeholders can view before the Figma import.
What gets converted from Lovable to Figma
When you import from Lovable to Figma, you’ll get:
- Layout structures as Figma frames and groups
- Text content as editable text layers
- Colors and styling properties
- Component arrangements
- Responsive design spacing
The import creates fully editable layers, so you can adjust colors, typography, spacing, and layout directly in Figma.
A few limitations:
- Complex animations don’t transfer (Figma doesn’t support CSS animations)
- Custom fonts require manual installation in Figma
Tips for best results
✅ Prepare your Lovable preview: Before capturing, set your browser to the viewport size you want to work with in Figma. The extension captures what you see.
✅ Capture key states: If your design has different states (logged in/out, expanded menus, modals), capture each state separately for a complete design system.
✅ Clean up after import: Once in Figma, you may want to rename layers, create components, and organize the structure for easier collaboration.