All the ways to import from Claude AI to Figma
Claude AI generates HTML, React components, and full webpage layouts from text prompts. However, Figma doesn’t accept HTML code directly—you can’t paste Claude’s output and get editable layers. This gap between AI-generated code and design tools creates extra steps for anyone trying to import Claude AI into Figma.
This guide covers four methods to import Claude to Figma as editable layers. The fastest approach takes under 30 seconds using the html.to.design Chrome extension. The other two methods suit different workflows—publishing artifacts to a URL or connecting Claude directly to Figma via MCP.
Import from Claude to Figma - Quick Guide
- Generate your prototype or UI in Claude Design (recommended)
- Capture your Claude Design with the html.to.design Chrome extension
- Copy to clipboard
- Paste in Figma—no file download needed
- Edit your fully layered design
Method 1: Import Claude Design to Figma (Recommended)
Claude Design is Anthropic’s dedicated design product, launched in April 2026 as a research preview for Pro, Max, Team, and Enterprise subscribers. You describe a layout, prototype, slide deck, or marketing page — Claude builds a polished first version in seconds and you refine through conversation, inline edits, or custom sliders.
Claude Design exports to PDF, PPTX, HTML, and Canva — but not directly to Figma. html.to.design bridges this gap in two ways.
Option A: Chrome extension with Copy to Clipboard (Fastest)
The html.to.design Chrome extension captures any live webpage as Figma-ready layers. The ‘Copy to Clipboard’ feature skips file downloads and plugin windows entirely: copy in the browser, paste in Figma.
Step 1: Install the Chrome extension
Install html.to.design from the Chrome Web Store. It pins to your Chrome toolbar automatically.
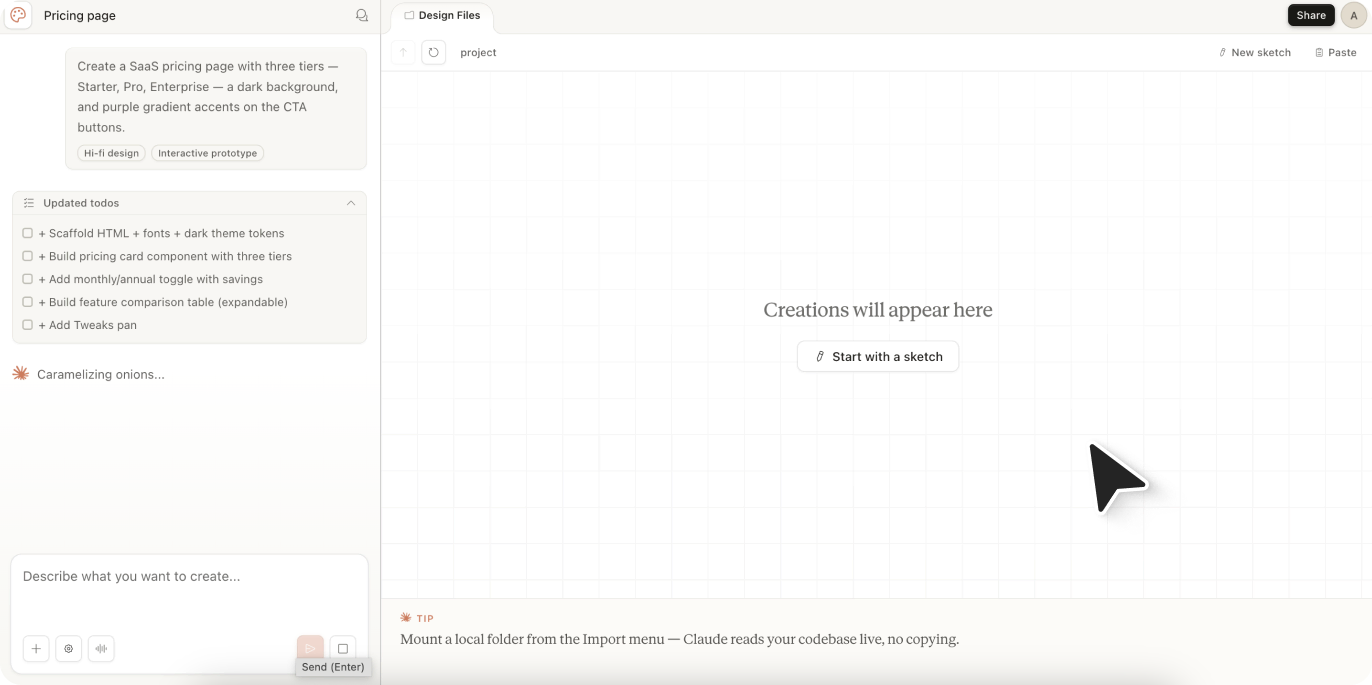
Step 2: Create your design in Claude Design
Open claude.ai/design in Chrome and prompt Claude. Example: “Create a SaaS pricing page with three tiers — Starter, Pro, Enterprise — a dark background, and purple gradient accents on the CTA buttons.”
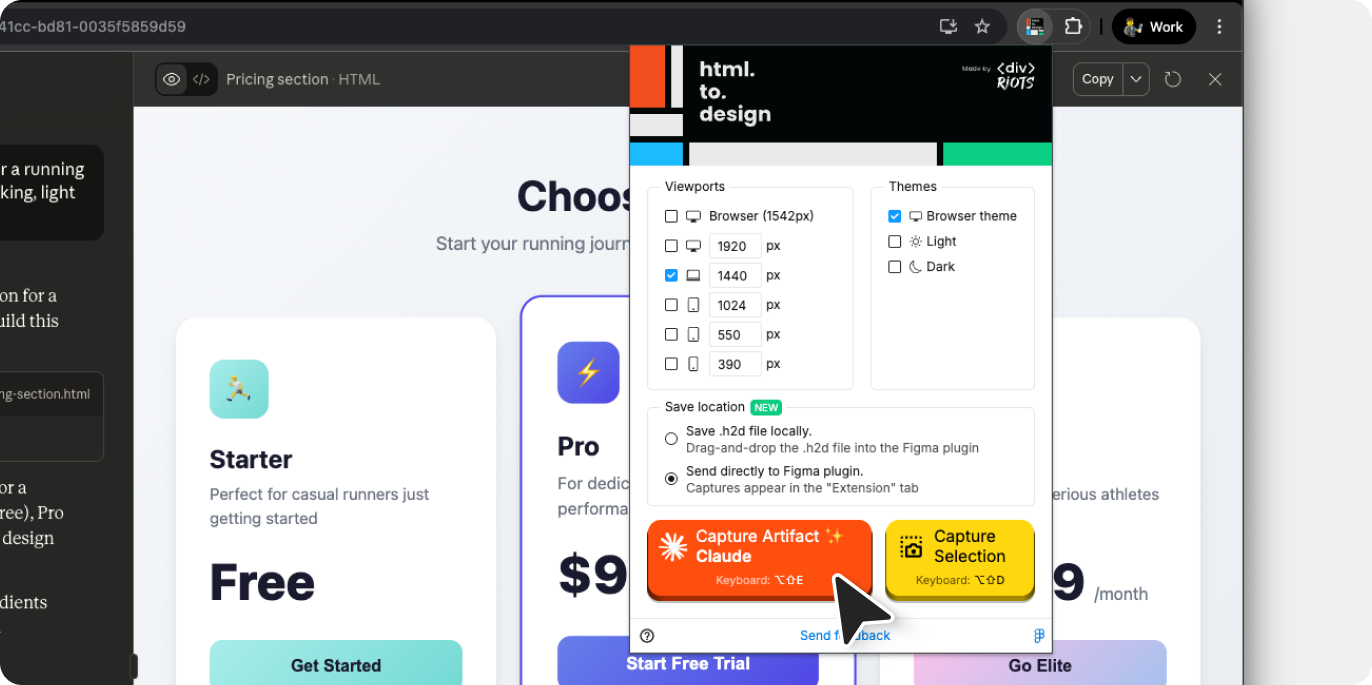
Step 3: Capture the page with the extension
Click the html.to.design extension icon in the Chrome toolbar. Choose your viewports and themes and capture the full layout or just a selection.
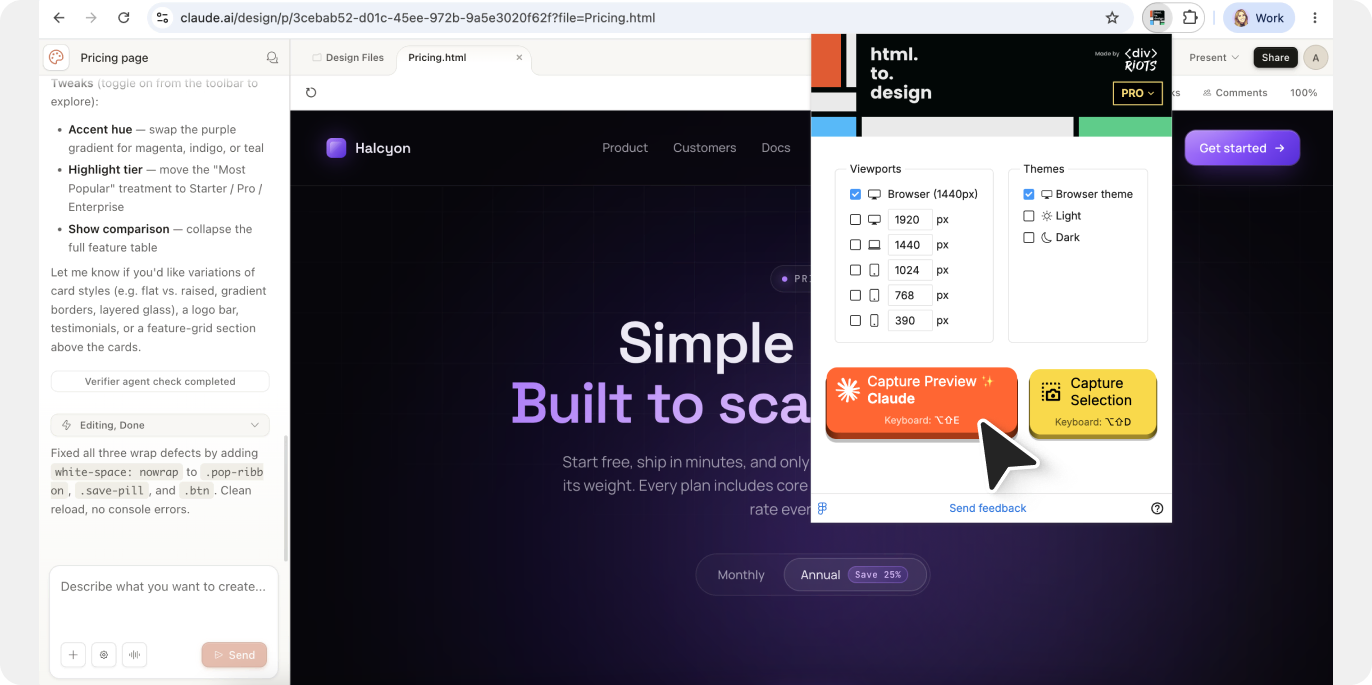
ℹ️ Tip: Close the “Tweaks” pop-up before capturing your page.
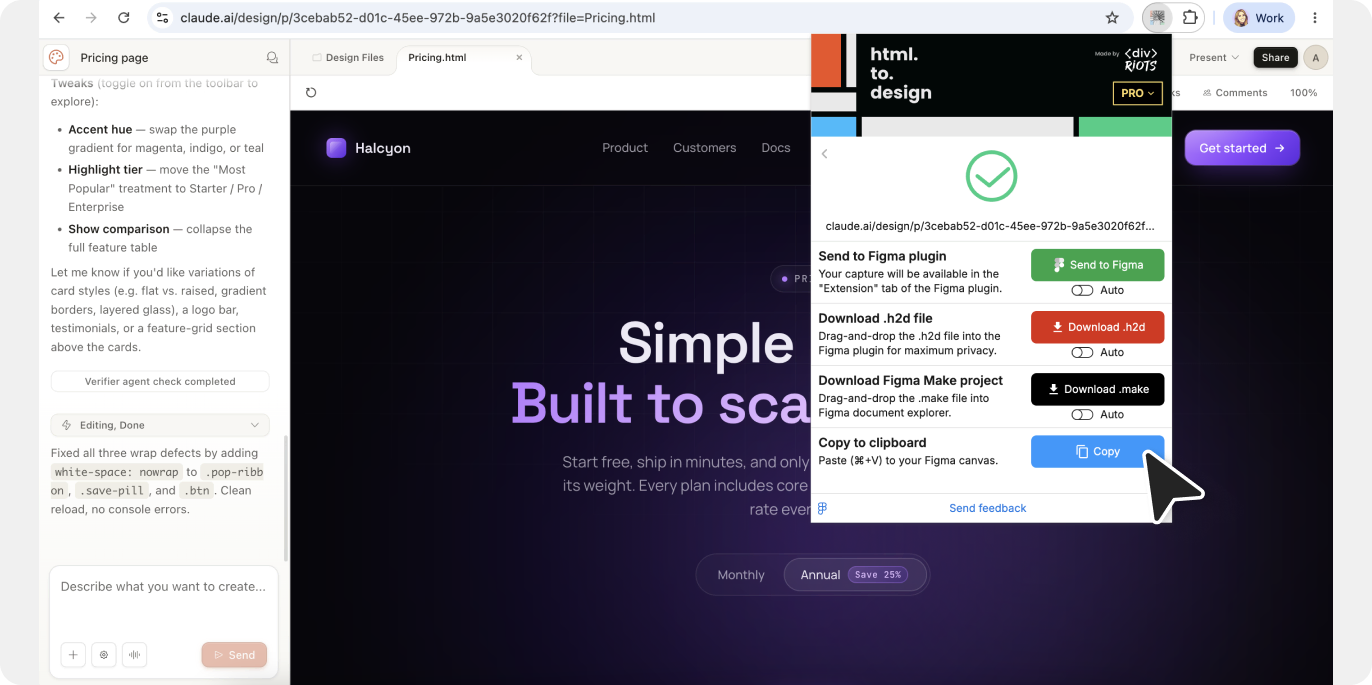
Step 4: Click Copy to Clipboard
After capturing, click Copy to Clipboard in the extension popup. The selection writes to your clipboard in a format Figma reads natively.
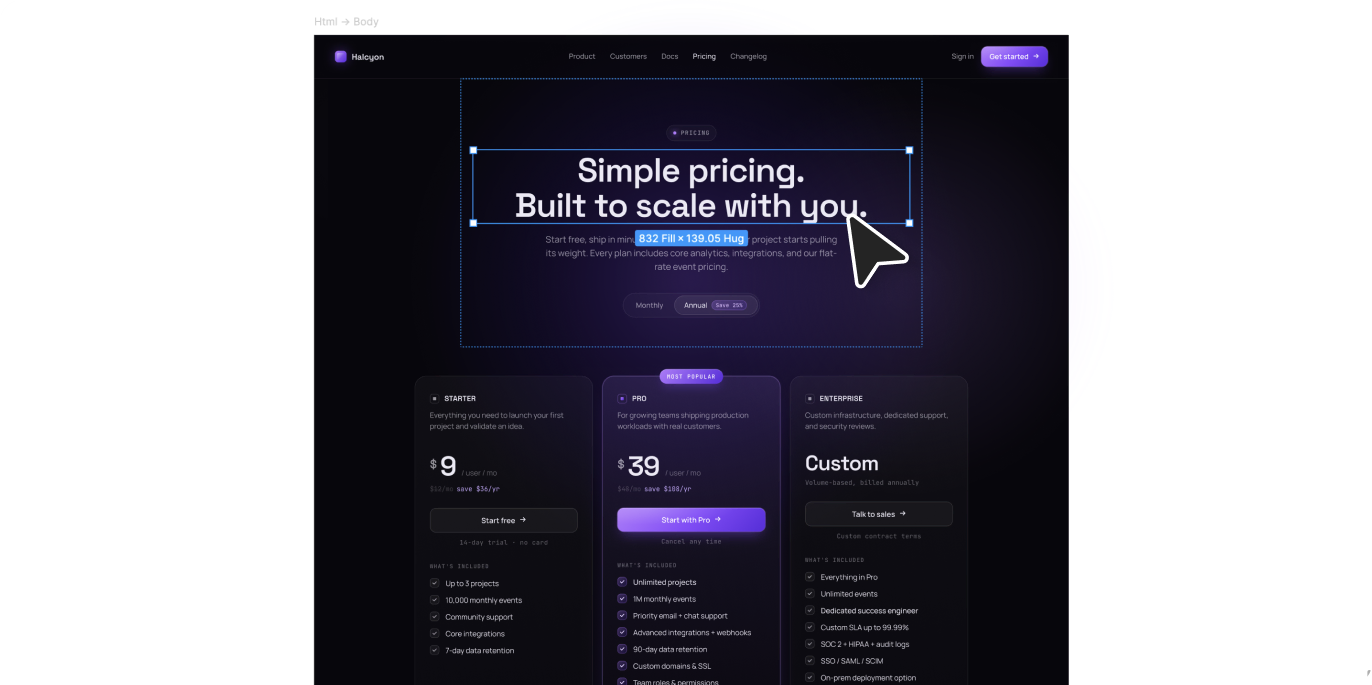
Step 5: Paste into Figma
Open your Figma file, click the canvas, and press Ctrl+V (Windows) or Cmd+V (Mac). The design lands as a layered Figma frame: autolayout applied, text editable, colors imported as local styles, images as separate layers.
Option B: Export HTML, import via plugin
If you want a versioned HTML file — for archiving, sharing, or reuse — export it from Claude Design and import through the Figma plugin instead.
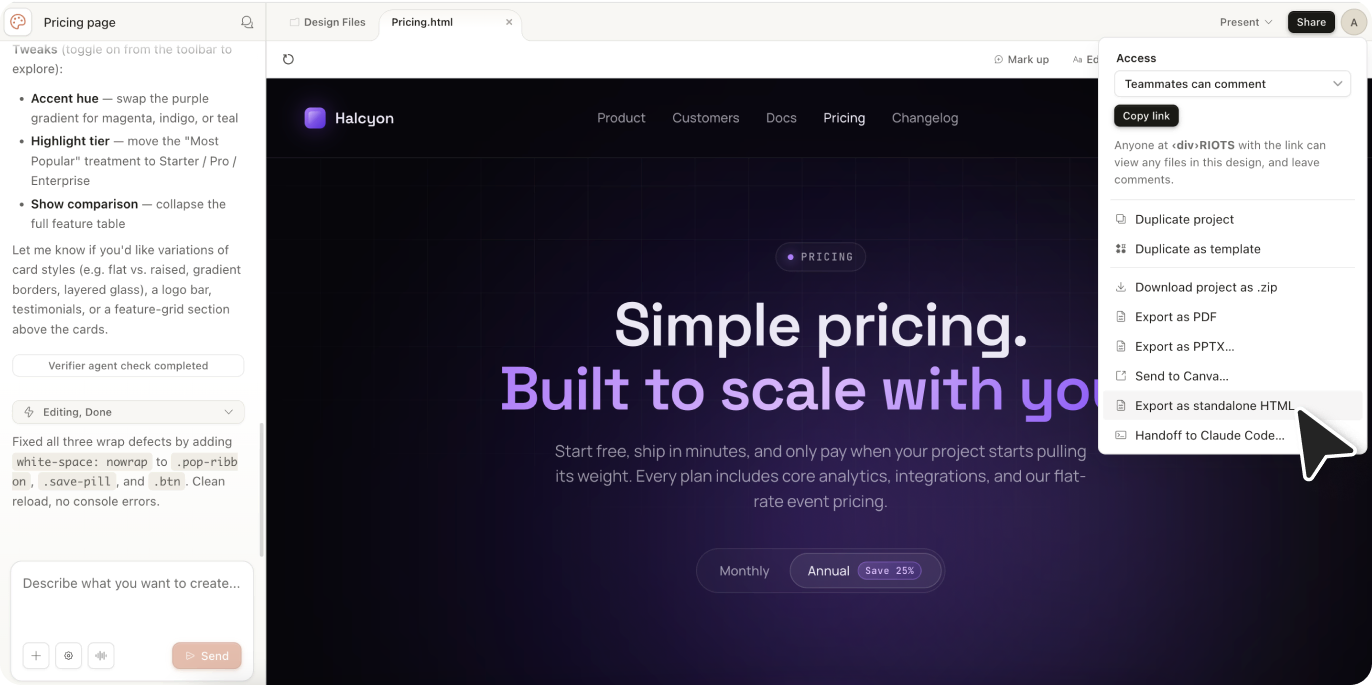
Step 1: Export standalone HTML from Claude Design
In Claude Design, open the Share/Export menu and choose Standalone HTML. Save the file locally.
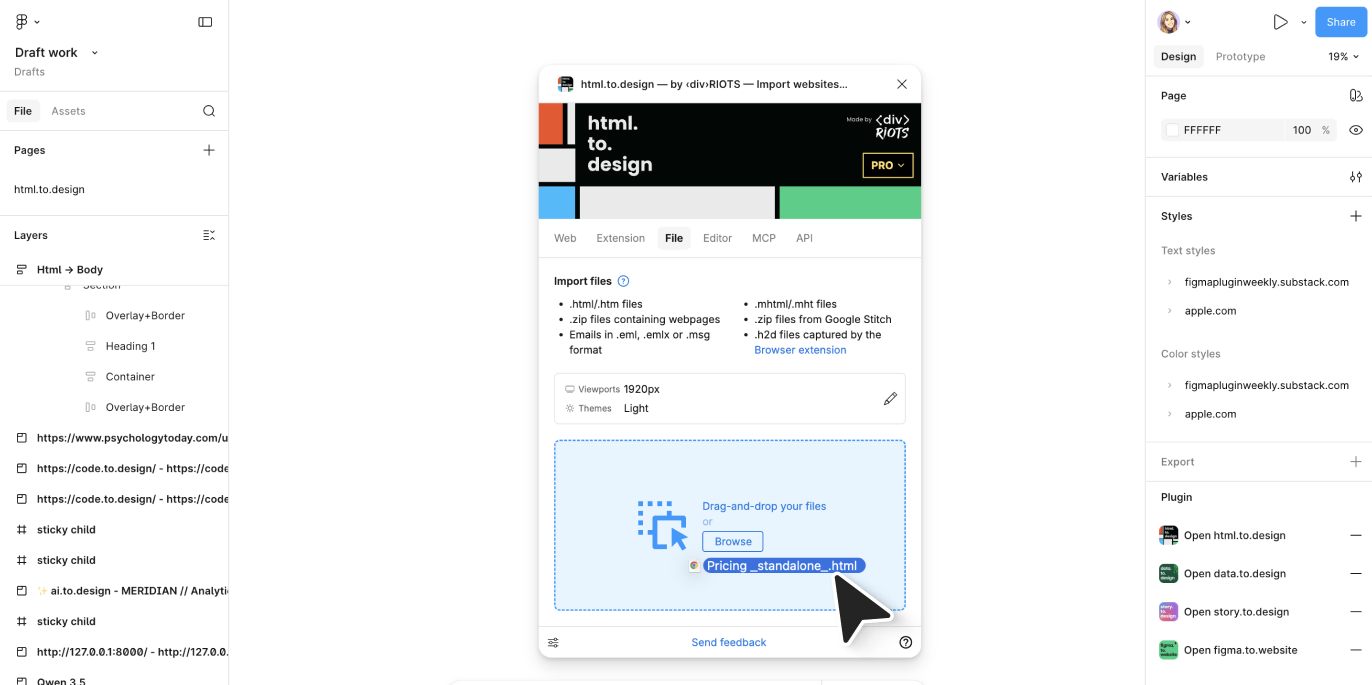
Step 2: Open the html.to.design plugin in Figma
In Figma: Plugins → html.to.design. The plugin window opens on your canvas.
Step 3: Drop the file or paste the code
Two options inside the plugin:
- Drop the file: Drag the .html file into the plugin drop zone.
- Paste the code: Open the HTML file in a text editor, copy the source, switch to the plugin’s raw HTML tab, paste.
The plugin parses the HTML and renders the design as structured Figma layers — same output as the clipboard method.
Method 2: Import from Claude Artifacts to Figma with the browser extension
The html.to.design browser extension captures any webpage—including Claude’s artifact preview and most AI tools—and converts it to editable Figma layers. This is the fastest way to import Claude AI designs into Figma. There is no setup beyond installing the extension and it works with any artifact that renders in the browser.
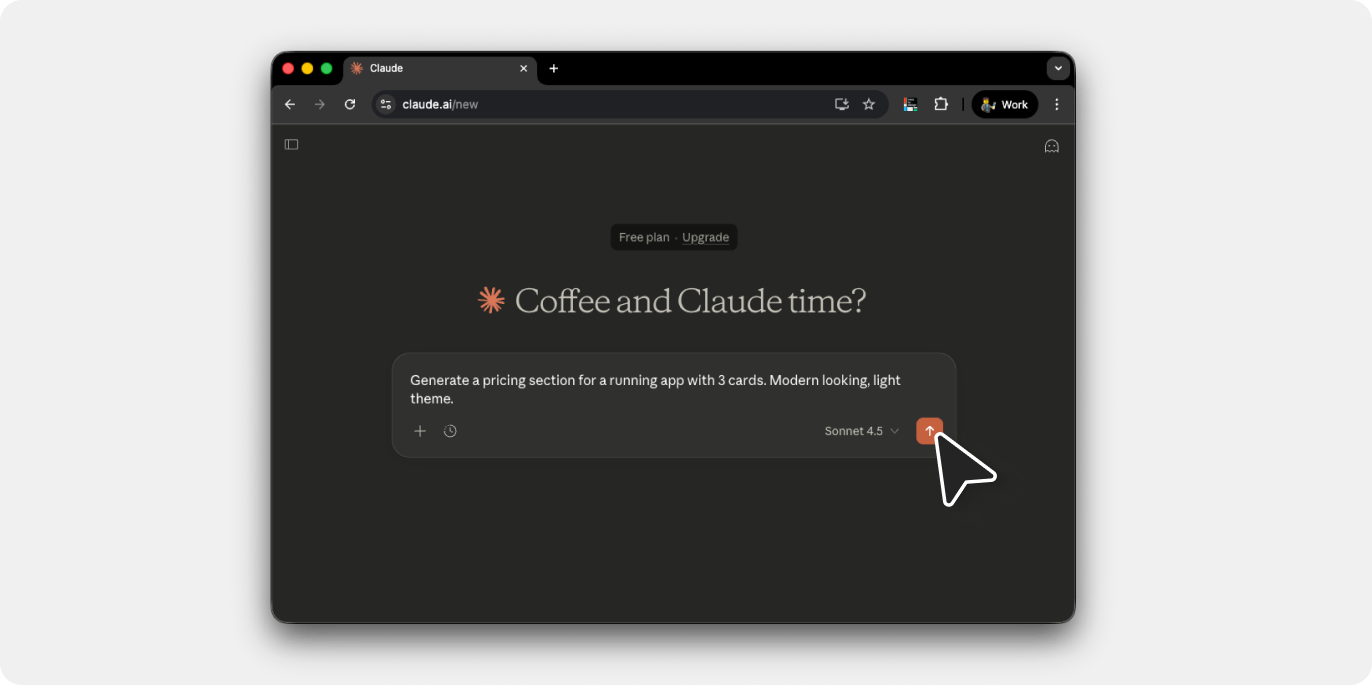
Step 1: Generate your design in Claude
Open Claude and prompt it to create a design. Claude generates artifacts for substantial content like webpage layouts, UI components, and interactive elements. The artifact appears in a dedicated window on the right side of the chat.
Example prompt: “Create a pricing page with three tiers, a dark theme, and gradient accent colors.”
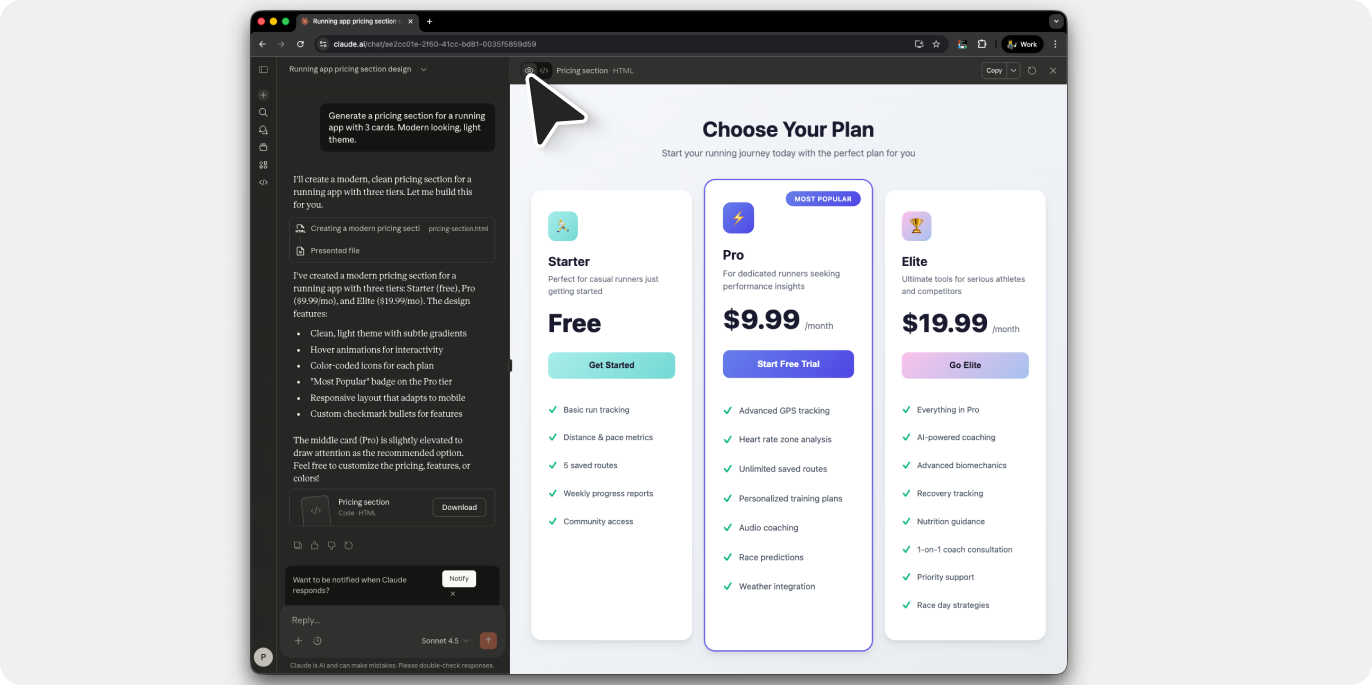
Step 2: Preview the artifact
Click the “Preview” toggle at the top of the artifact window. This renders the HTML/React code as a visual webpage. The preview shows exactly what you’ll capture.
Step 3: Capture with the extension
Click the html.to.design extension icon in your browser toolbar and select the viewports to import into Figma. html.to.design supports Claude artifacts natively—it detects AI tool outputs, including all styles, layouts, and assets.
There are then two options for getting the captured webpage into Figma:
Option A (Fastest): Open the html.to.design plugin in Figma before capturing. That way, when you click ‘Capture’, your import is transferred directly to the plugin—no file download, no drag-and-drop. The design appears on your canvas automatically.
Option B: If the plugin wasn’t open before capturing, the extension saves a .h2d file. Drag this file into the html.to.design plugin window to import.
💡 Pro tip
Keep the Figma plugin open while working with Claude. Every capture lands in Figma instantly.
Step 4: Edit in Figma
The import produces fully editable layers with auto-layout applied. Text remains editable, colors become local styles, and the layer hierarchy matches the original HTML structure.

Method 3: Publish Claude Artifact → Import URL to Figma
Claude also lets you publish artifacts to a public URL. The html.to.design Figma plugin can then import that URL directly—another way to get Claude designs into Figma without the browser extension.
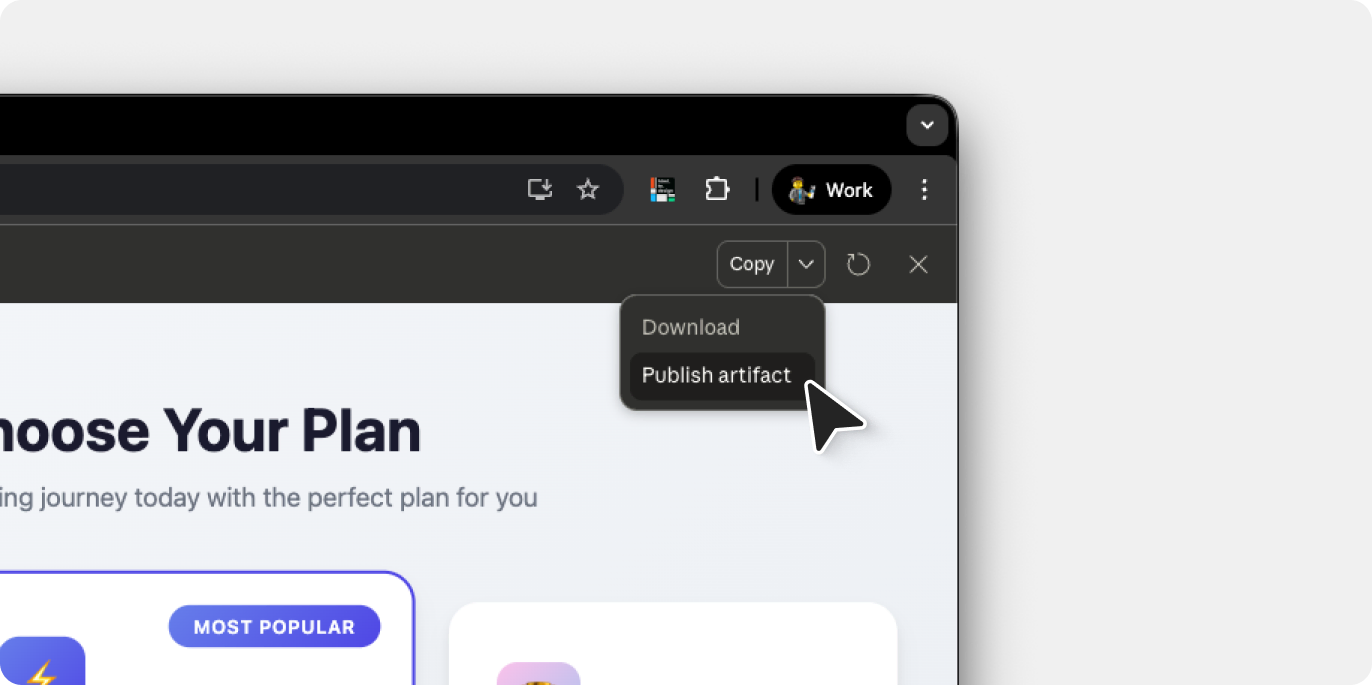
Step 1: Generate and publish
Create your design in Claude. Once the artifact looks right, click the “Publish” button at the top of the artifact window. Claude generates a public link.
Note: Published artifacts are visible to anyone with the link. Your chat conversation remains private.
Step 2: Copy the URL
After publishing, click “Copy link” to get the public URL. It follows the format: claude.ai/public/artifacts/...
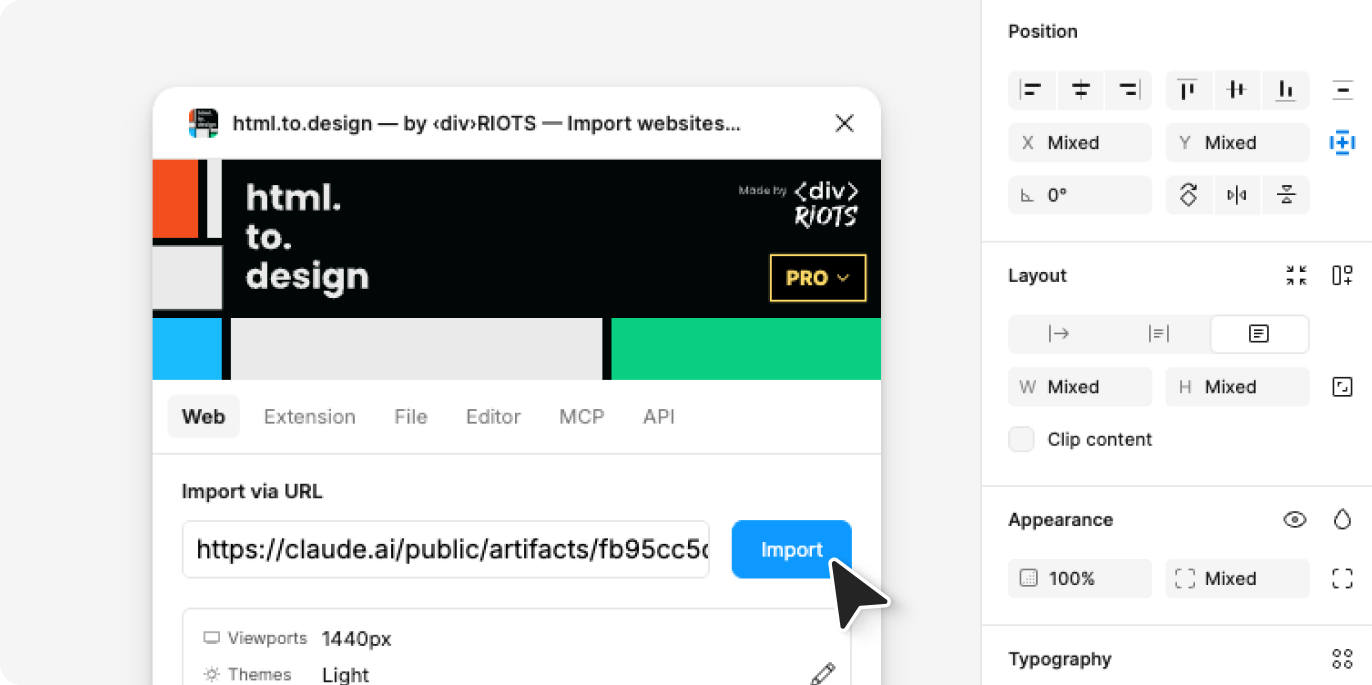
Step 3: Import via the plugin
Next, open Figma and run the html.to.design plugin. Paste the published URL into the input field and click “Import.”
The plugin fetches the page and converts it to editable Figma designs—same result as the extension method, but using the URL workflow.
When to use this method?
This approach works best when you want to share the artifact URL with others or when the browser extension isn’t available. The published page also serves as a live preview that stakeholders can view before the Figma import.
Method 4: Import Claude to Figma via MCP (direct connection)
MCP (Model Context Protocol) is an open standard that lets AI tools connect directly to external applications. The html.to.design MCP creates a direct link between Claude and Figma—designs appear on your canvas without any export/import steps.
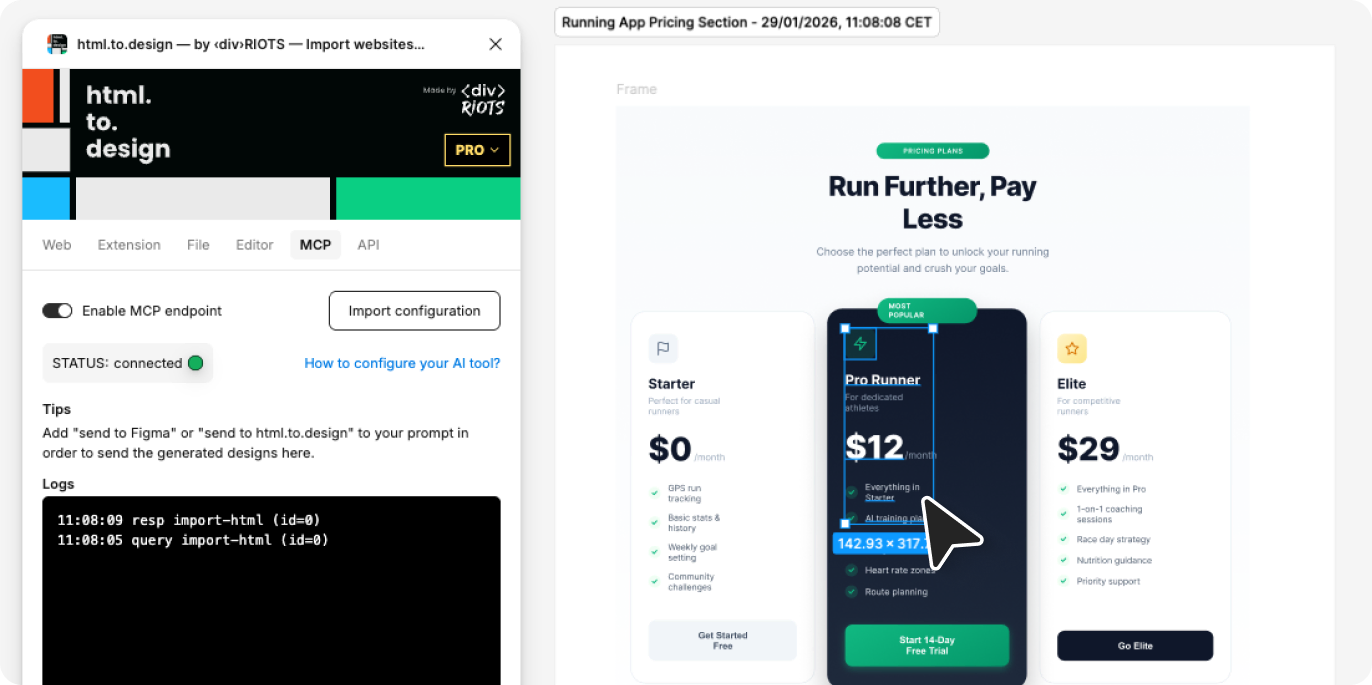
Step 1: Set up the MCP
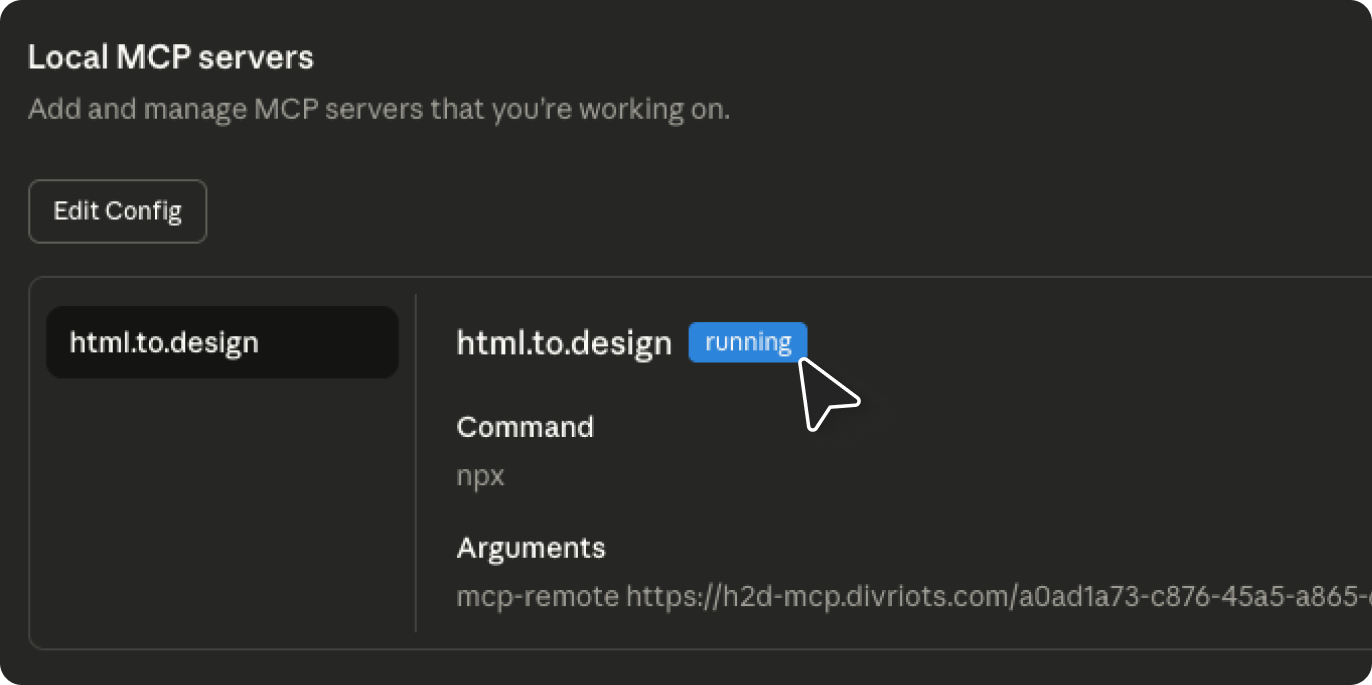
For this method, you’ll need to use the Claude desktop app. Follow the html.to.design MCP setup guide to connect the MCP server.
After configuration, html.to.design appears in your Claude desktop app settings under connected servers.
Step 2: Prompt Claude to design
With the MCP connected, prompt Claude to create your design. Use detailed descriptions for better results.
Example: “Design a visual and abstract hero section for a webpage, with a section of frosted glass cards below and a testimonials section below that, all in an overall dark theme.”
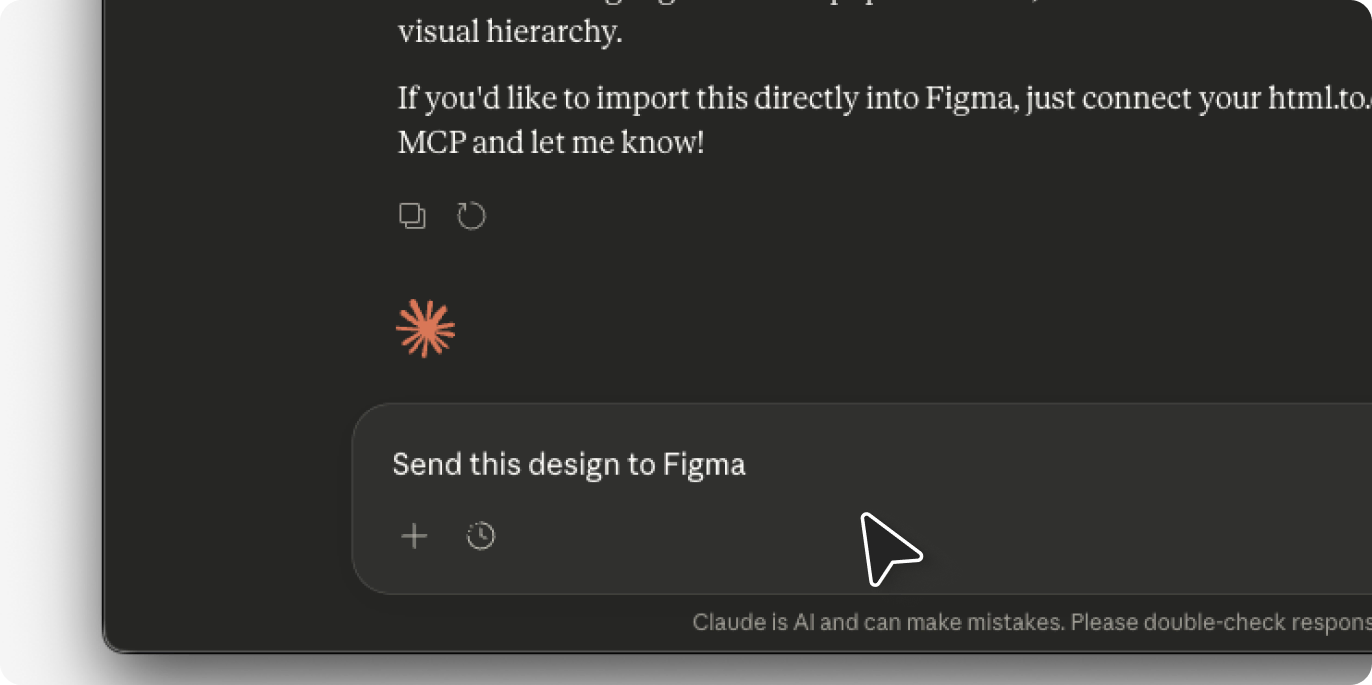
Step 3: Send to Figma
Once Claude generates the design, prompt it to send the result to Figma. Type something like: “Send this design to Figma.”
The design appears on your Figma canvas automatically—no file downloads, no copy-paste.
Step 4: Iterate from either Claude or Figma
Make changes in Claude by prompting modifications, or edit directly in Figma. The MCP connection lets you update designs from Claude and see changes reflected in Figma immediately.
When to use this method?
MCP suits workflows where you’re iterating rapidly between Claude and Figma. The direct connection eliminates friction for design exploration and concept development.
What gets converted when you import Claude to Figma
Regardless of which method you use, html.to.design converts Claude outputs into structured Figma designs:
Preserved elements:
- Layer hierarchy matching HTML structure
- Auto-layout applied to flex and grid containers (if selected in html.to.design’s import settings)
- Text remains fully editable
- Colors extracted as local Figma styles
- Images and SVGs imported as fills or separate layers
- Fonts mapped to available Figma fonts (can be re-mapped if needed)
Limitations:
- Complex animations don’t transfer (Figma doesn’t support CSS animations)
- Custom fonts require manual installation in Figma
Choosing the right method to import Claude AI into Figma
| Method | Set up requirements | Best for… |
|---|---|---|
| Extension | Install browser extension | Capturing private or more complex pages |
| Publish → URL | None; run the Figma plugin | Importing simple, public landing pages |
| MCP | A few steps to connect Claude app and Figma | Projects that need a lot of iteration with AI |
For most users, the browser extension with the Figma plugin open is the fastest path—capture and import happens in one click.
You’re all set to import from Claude to Figma!
We’ve explored four ways to move Claude-generated designs into Figma. The html.to.design Chrome extension handles most situations—open the Figma plugin, capture any artifact, and get editable layers in one click.
For workflows requiring tighter integration, the html.to.design MCP pushes designs from Claude directly to your Figma canvas without any capture step.
html.to.design includes free imports per month. Install the Chrome extension and test it with your next Claude designs.
Related guides
- From Claude Design to Figma - Import UI, prototypes and other Claude designs
- From Claude Code to Figma – Import websites built with Claude Code
- From Claude to Figma via MCP – Set up direct Claude-to-Figma connections
- How to convert a website into Figma designs – General guide for any URL import
FAQ
Q: Does Figma support importing HTML directly?
No—this is why importing Claude AI into Figma requires a conversion step. Figma imports images (PNG, JPG, SVG, GIF) and Figma-specific files (see supported formats). It cannot parse HTML, CSS, or JavaScript. Tools like html.to.design bridge this gap by converting rendered HTML to Figma’s native layer format.
Q: Which method to import Claude to Figma is best?
All html.to.design methods produce equivalent results. The Chrome extension and MCP both convert HTML to Figma layers using the same rendering engine. Choose based on workflow preference, not output quality.
Q: Can I import Claude artifacts that use React components into Figma?
Yes. Claude generates React components that render in the artifact preview. The html.to.design extension captures the rendered output, regardless of whether the underlying code is HTML, React, Vue or any other Javascript framework.