Import from your browser with the extension
Last updated
The html.to.design browser extension captures what you see in your browser and sends it to Figma as editable layers: a full page, part of a page, a click-through flow, or a live code layer. It works on private and local pages, behind a login, on AI-generated previews, and in the exact state you left the page in (a banner closed, a menu open).
Get the extension
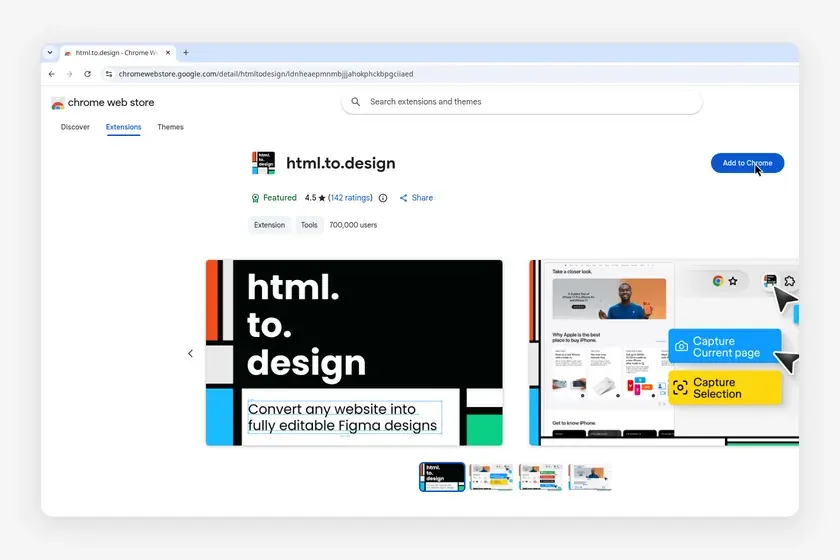
- Open html.to.design in the Chrome Web Store and click Add to Chrome (in Edge, Brave or Opera the button may say Get or Add to browser). It works in Chrome, Edge, Brave, Arc, Opera and other Chromium-based browsers.
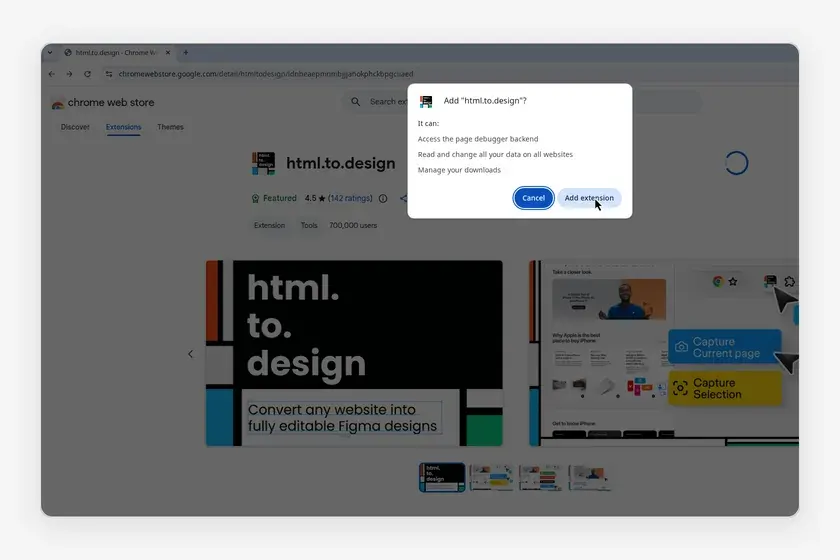
- Your browser lists what the extension can access. Click Add extension.
- Click the puzzle-piece Extensions icon in your browser toolbar, then the pin next to html.to.design so it’s one click away.
- Click the icon and sign in with Figma or ‹div›RIOTS ONE.
Capture a page
- Open the page and click the html.to.design icon.
- Tick the Viewports and Themes you need. Each combination is a separate import.
- Click Capture Full Page, or press Alt + Shift + E to capture right away with the viewports and themes you ticked last.
- Choose where the capture goes (all but the .h2d file need you to be signed in):
- Send to Figma plugin: it appears in the plugin’s Extension tab, ready to import.
- Copy to clipboard: press ⌘ + V (Ctrl + V on Windows) on your Figma canvas. More on copy and paste.
- Download .h2d file: drop it into the plugin, for maximum privacy. More on .h2d files.
- Download Figma Make file: drag the
.makefile into Figma’s file browser. More on Make files.
Also from the same screen:
- Screenshot Full Page takes one full-length PNG per viewport and theme, to download or copy. It’s free.
- On an AI builder (v0, Lovable, Bolt, Claude, ChatGPT, Figma Make…) the first button becomes Capture Preview and captures only the generated design, without the builder’s interface. Supported AI tools.
- On a PDF open in the browser, click Copy PDF to clipboard and paste it into Figma. More on PDFs.
Long pages are scrolled to load lazy images and content. Click Skip scrolling in the popup if a page scrolls forever.
Capture a selection
- Click Capture Selection, or press Alt + Shift + D.
- Hover the page to target an element.
- Fine-tune with \ (or Shift + Enter) to select the parent and Enter to select its children. Hold Shift to select several elements.
- Pick a destination in the toolbar, for example Copy to clipboard, then paste into Figma.
Hold Alt (⌥ on Mac) to click the page without capturing, for example to open a menu first. Press Esc to cancel.
You can also select text on the page, right-click and choose Copy Rich Text for Figma or Copy Selection for Figma.
👉 More on the right-click menu
Record a flow
- Click Record Flow. A recording toolbar appears at the bottom of the page.
- Click through the site as a user would. Each new screen becomes a step in the toolbar.
- Pause, remove a step, or add the current state by hand from the toolbar.
- Click Export and choose where the steps go.
When you follow a link to another site, the recording pauses until you click Allow on that site in the extension.
Copy as a code layer
- Click Capture as Code Layer.
- Click Copy code layer.
- Paste into Figma. The page becomes a live code layer: real HTML you can scroll and interact with on the canvas.
It’s free and doesn’t need an account.
Import from the Extension tab
Captures you Send to Figma plugin wait in the plugin’s Extension tab.
- Open the html.to.design Figma plugin, signed in with the same account as the extension.
- Go to the Extension tab.
- Click the import icon on a capture, or click Select to pick several and Import them at once (PRO or any ‹div›RIOTS ONE subscription). You can also drag a capture onto the canvas.
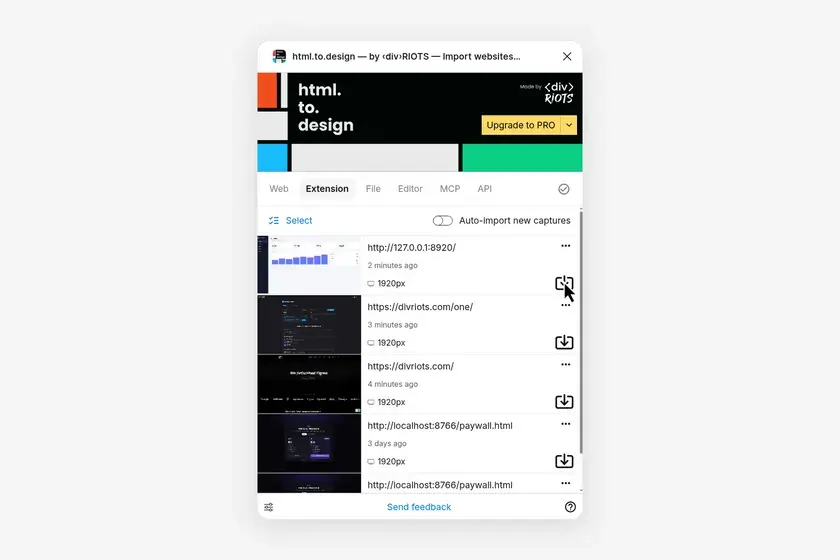
Turn on Auto-import new captures to have every capture land on the canvas as soon as it arrives. If you see Connect the plugin with your browser, follow its steps once.
Settings
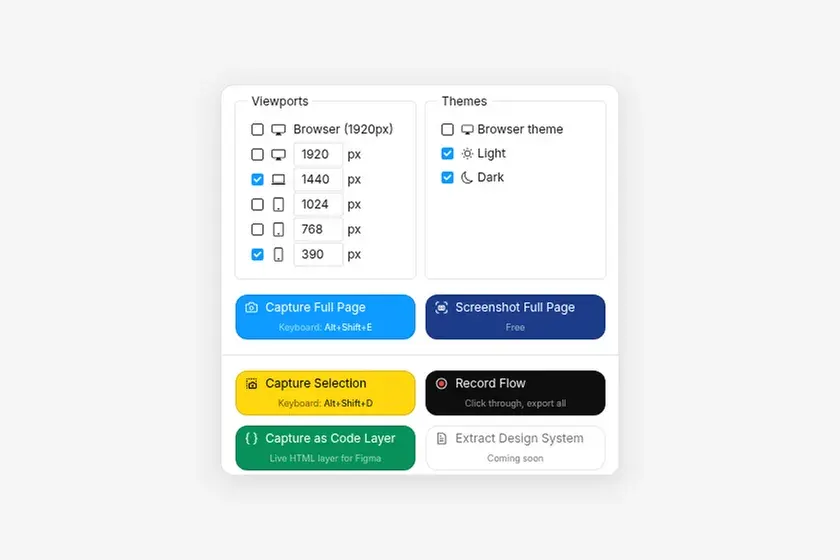
- Viewports and Themes: tick several to capture every combination at once. Viewports are your current Browser width, or
1920,1440,1024,768and390px, each editable. Themes are Browser theme, Light and Dark. - Send automatically: on the result screen, tick Automatically send to Figma after each capture (or download .h2d / .make) to skip that screen next time.
- Autolayout: click Settings under Copy to clipboard to choose between auto layout and absolute positioning for pasted layers.
Want different keyboard shortcuts? Visit chrome://extensions/shortcuts.
To capture a file opened from your computer (file://), open
chrome://extensions, click Details under html.to.design and turn on
Allow access to file URLs.
FAQ
What is the difference between Copy to clipboard and Send to Figma plugin?
Copy to clipboard converts the capture right away and you paste it on any Figma canvas, no plugin needed. Send to Figma plugin stores the capture in the plugin's Extension tab, where you import it with the plugin's import options, such as styles, hover components or high-res images.
Which option keeps my page data on my computer?
Download .h2d file. The file is created in your browser and stays on your computer until you drop it into the Figma plugin.
Why don't my captures show up in the Extension tab?
Sign in to the extension and the plugin with the same account, and keep the plugin open on the Extension tab. Captures sent while signed out cannot reach the plugin.