From Meku.dev to Figma. Import AI-generated designs in minutes
AI app builders have made it faster than ever to go from idea to a working, browser-rendered interface. Meku.dev is one of the most developer-friendly options out there — describe what you want to build, and it generates a production-ready React and Tailwind CSS app with a modern UI, live preview, and one-click deployment, all from a single prompt.
But here’s a workflow challenge that comes up constantly: you’ve got a polished, browser-rendered design in Meku, and you need it in Figma. Maybe for stakeholder review. Maybe to layer in brand assets, connect a design system, or hand off to a team with annotated specs. Whatever the reason, getting AI-generated HTML into Figma as editable layers — without flattening it into a screenshot or rebuilding it by hand — requires the right tool.
html.to.design is that tool. It’s a Chrome extension and Figma plugin that converts any live webpage into fully editable Figma layers, making it one of the cleanest AI-to-Figma pipelines available. Pair it with Meku, and you go from prompt to editable Figma file in under two minutes.
Quick Guide: Meku.dev to Figma
- Build your interface in Meku.dev using a text prompt
- Open the live preview
- Capture the rendered design with the html.to.design Chrome extension
- Import into Figma using the html.to.design Figma plugin
- Edit every layer — text, colors, frames, components — directly in Figma
What is Meku.dev?
Meku.dev is an AI-powered web app and site builder built specifically for developers, founders, and product teams. You describe what you want to build in plain language, and Meku generates a complete React and Tailwind CSS project — frontend layout, UI components, and styling included — with a live preview you can refine through follow-up chat prompts.
It goes well beyond landing pages. Meku can generate full-stack apps with authentication, database integration via Supabase, and ecommerce functionality. Once you’re happy with the result, you can deploy instantly with a free custom domain, push to GitHub, or export the full source code — with no vendor lock-in.
That live browser rendering is what makes the html.to.design workflow so effective here. Because Meku outputs real React and Tailwind code that runs in the browser, html.to.design can read every style rule, spacing value, and typographic detail from the rendered page and reconstruct it as native, editable Figma layers — with full visual fidelity.
Step-by-Step: Importing Meku.dev Designs into Figma
Step 1: Build your design in Meku.dev
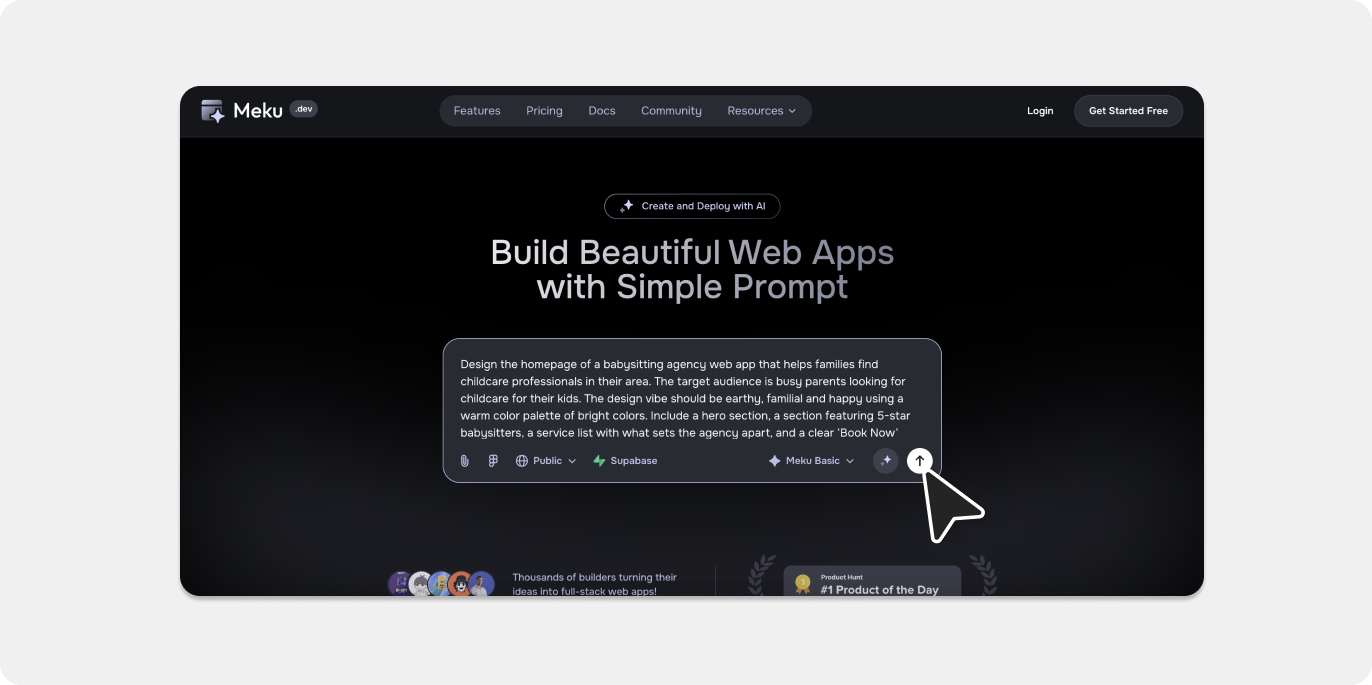
Go to Meku.dev and start a new project. Describe the interface you want to create — be specific about the page type, the sections you need, and the visual direction. Here’s the prompt we used for this guide:
“Design the homepage of a babysitting agency web app that helps families find childcare professionals in their area. The target audience is busy parents looking for childcare for their kids. The design vibe should be earthy, familial and happy using a warm color palette of bright colors. Include a hero section, a section featuring 5-star babysitters, a service list with what sets the agency apart, and a clear ‘Book Now’ button. Ensure it is responsive.”
Meku processes the prompt and generates a live, styled React and Tailwind app in real time — complete with layout, component structure, and visual design. You can refine it further through the chat interface before moving to Figma.
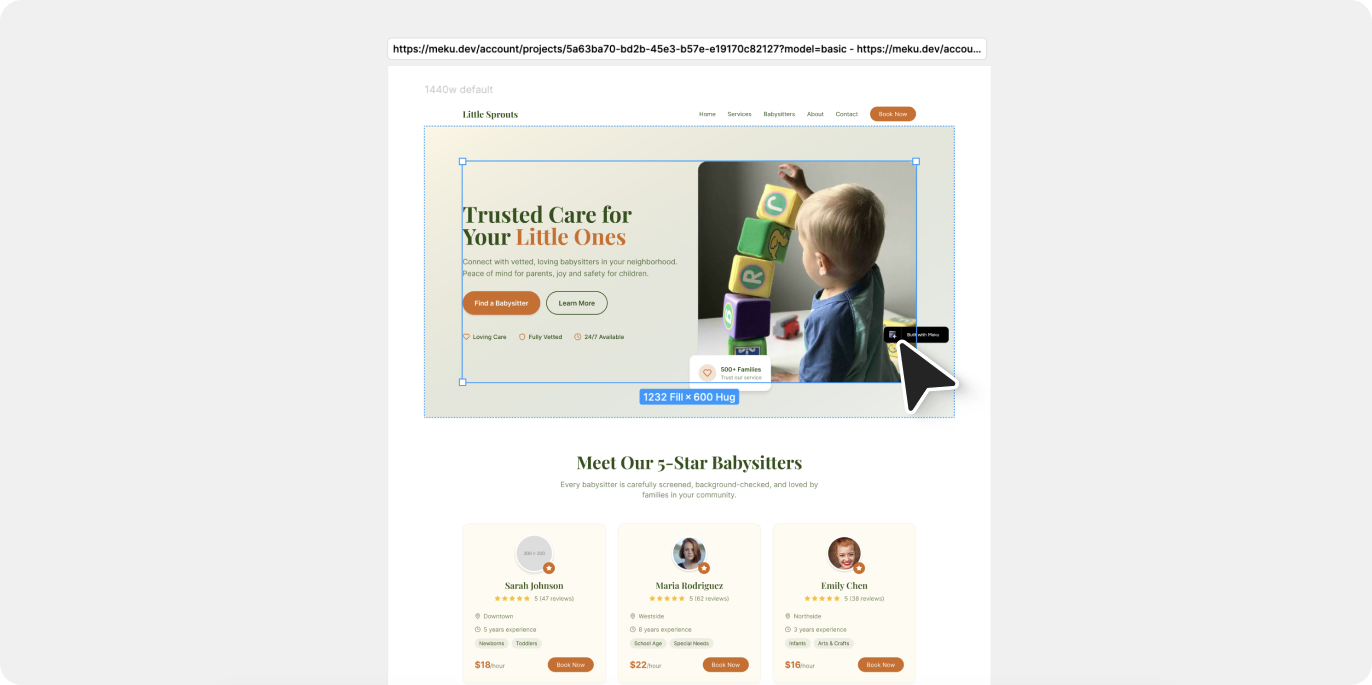
Step 2: Open the live preview
Once you’re happy with the Meku output, open the live preview on the side of the chat. html.to.design will capture only the generated design, even if Meku’s editor UI is still visible.
💡 First time? Install both the html.to.design Chrome extension and the html.to.design Figma plugin before you start. You’ll need both for the end-to-end import.
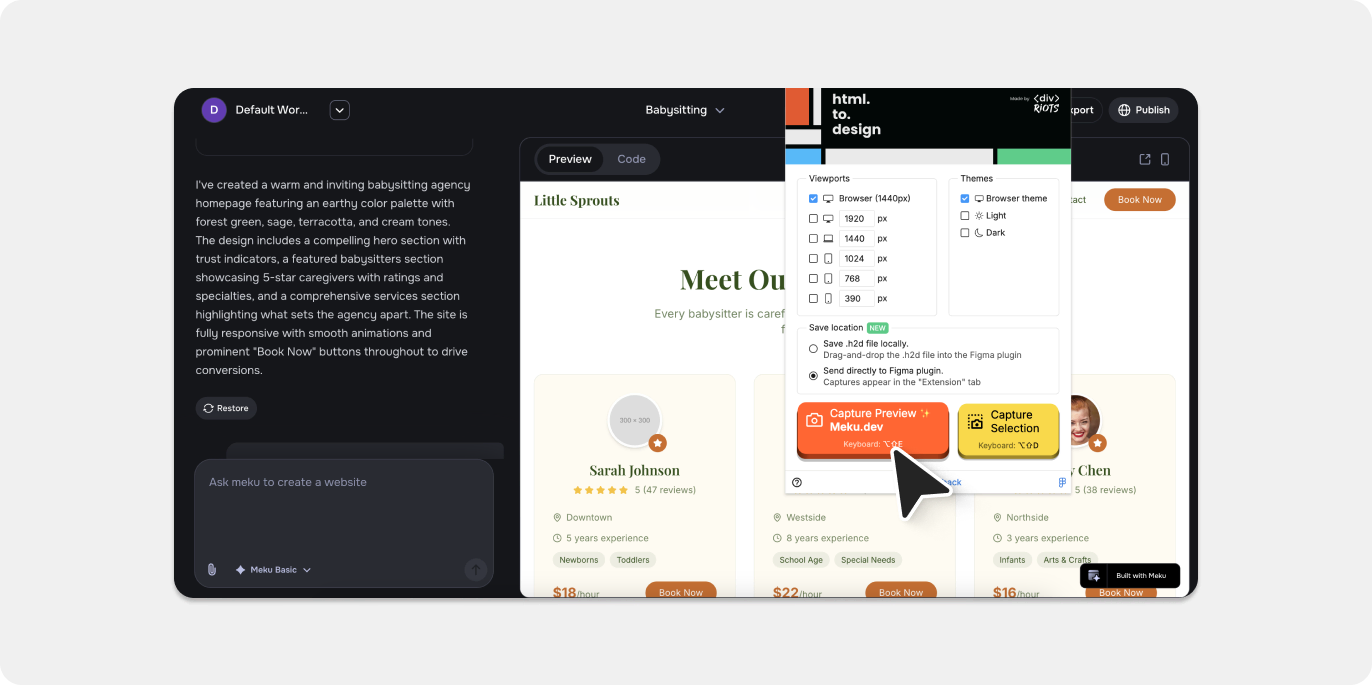
Step 3: Capture the rendered HTML with the browser extension
Click the html.to.design icon in your Chrome toolbar to open the extension. Set your target viewport — desktop (1440px), tablet, or mobile — and hit Capture.
When prompted, select “Send directly to Figma plugin.” The extension reads the live HTML and CSS from the Meku-generated page and packages it for import, preserving every visual detail exactly as rendered in the browser.
💡 Use the extension’s region selector to capture specific sections — a hero block, a pricing table, a nav component — rather than the full page. Useful for pulling individual UI patterns into an existing Figma file.
Step 4: Import into Figma
Switch to Figma with the html.to.design plugin open and navigate to the Extension tab. Your captured Meku design will be queued there. Click the import button and the AI-generated interface is reconstructed as native Figma layers: frames, text nodes, images, and shapes — all grouped and stacked the way they appeared in the browser.
No file exports. No copy-pasting code. No tracing over a screenshot.
💡 Keep the Figma plugin running in the background while you capture in Chrome and the import will start automatically as soon as the capture completes.
Step 5: Refine in Figma
Your Meku design is now a fully editable Figma file. Update copy, adjust the color palette, apply brand typography, restructure layouts with auto-layout, attach components from your design system, or prepare specs for developer handoff. The AI built the structure — Figma is where you make it production-ready.
Why use html.to.design for your AI-to-Figma workflow?
Go further than the live preview
Meku’s live preview is great for iteration and deployment, but Figma is where design collaboration happens. This workflow bridges the two: get the speed of AI generation in Meku, then bring the result into the environment your design team already uses.
Genuine HTML-to-Figma conversion — not a screenshot
Importing a screenshot gives you a flat, uneditable image. html.to.design performs a real HTML-to-Figma conversion: it reads the rendered source of the live page and rebuilds it as actual Figma layers. Every element stays independently editable — text, shapes, images, and all.
Capture at any breakpoint
Need desktop and mobile versions side by side? Capture the same Meku design at different viewport widths and import each into Figma separately. You’ll have responsive variants ready to compare and iterate on without duplicating any work.
Fits the workflow your team already has
Your designers and stakeholders already live in Figma. This workflow doesn’t ask anyone to learn a new tool — it just adds a fast, reliable bridge from AI-generated HTML into the design environment your team uses every day.
Give it a try!
Build an interface in Meku.dev, capture it with the html.to.design Chrome extension, and have it in Figma in minutes.
It’s one of the most efficient AI-to-Figma pipelines available — and because html.to.design works with any live HTML page in the browser, the same workflow applies to other AI builders too. Check out our guides for importing designs from Readdy.ai, Lovable, Claude AI, and more.
FAQ
Q: Does html.to.design work with other AI builders besides Meku?
A: Yes. html.to.design works with any tool that renders a live webpage in the browser — including Meku, Lovable, v0.dev, Bolt.new, and others. If the AI tool outputs real HTML and CSS you can open in a browser tab, html.to.design can convert it to editable Figma layers.
Q: Meku already has a live preview and deployment — why do I need Figma?
A: Meku is built for building and shipping. Figma is built for design collaboration, brand refinement, component systems, and developer handoff. Many teams use both: Meku to generate and iterate quickly, and Figma to polish, align with brand guidelines, and prepare assets for the wider team.
Q: Will Meku’s Tailwind and React styles carry over correctly?
A: Yes. html.to.design captures the computed styles from the live browser-rendered page — not the raw source code. That means the visual output of Meku’s Tailwind classes is what gets translated into Figma, regardless of the underlying framework.
Q: Can I capture just one component or section instead of the whole page?
A: Yes. The html.to.design extension includes a region selection tool that lets you capture specific parts of the page. This is handy for importing individual UI components — a nav, a hero, a pricing block — into an existing Figma file without pulling in the entire layout.