Redesign a website in Figma in just 3 steps
Redesigning an old website can be challenging… Designers must be able to balance the need for a fresh look and feel with the need to keep the website’s existing functionality. In many cases, the website has been built up over time, and there may be a large amount of content to consider. Plus, it’s often the case that the original design files for the website have been deleted, or don’t exist in the current design tools being used, like Figma.
Luckily, there’s a Figma plugin for that and it’s called html.to.design.
What’s needed before redesigning a website?
Before even starting on a redesign project, designers will typically need a few things…
Firstly, they need a clear understanding of the website’s goals and target audience. This will help to make design decisions that support these goals and appeal to the target audience.
Secondly, designers need to know what the website’s technical requirements are. This will help to create designs that are feasible to implement within the website’s existing structure.
Finally, they need to have access to the website’s current content and functionality. This will allow them to determine what can be reused, what needs to be updated, and what can be discarded. Unfortunately, it’s not always easy to get the existing content and design assets, or they’re missing entirely from the design files. This is where a tool like html.to.design can help!
How to redesign a website in 3 steps
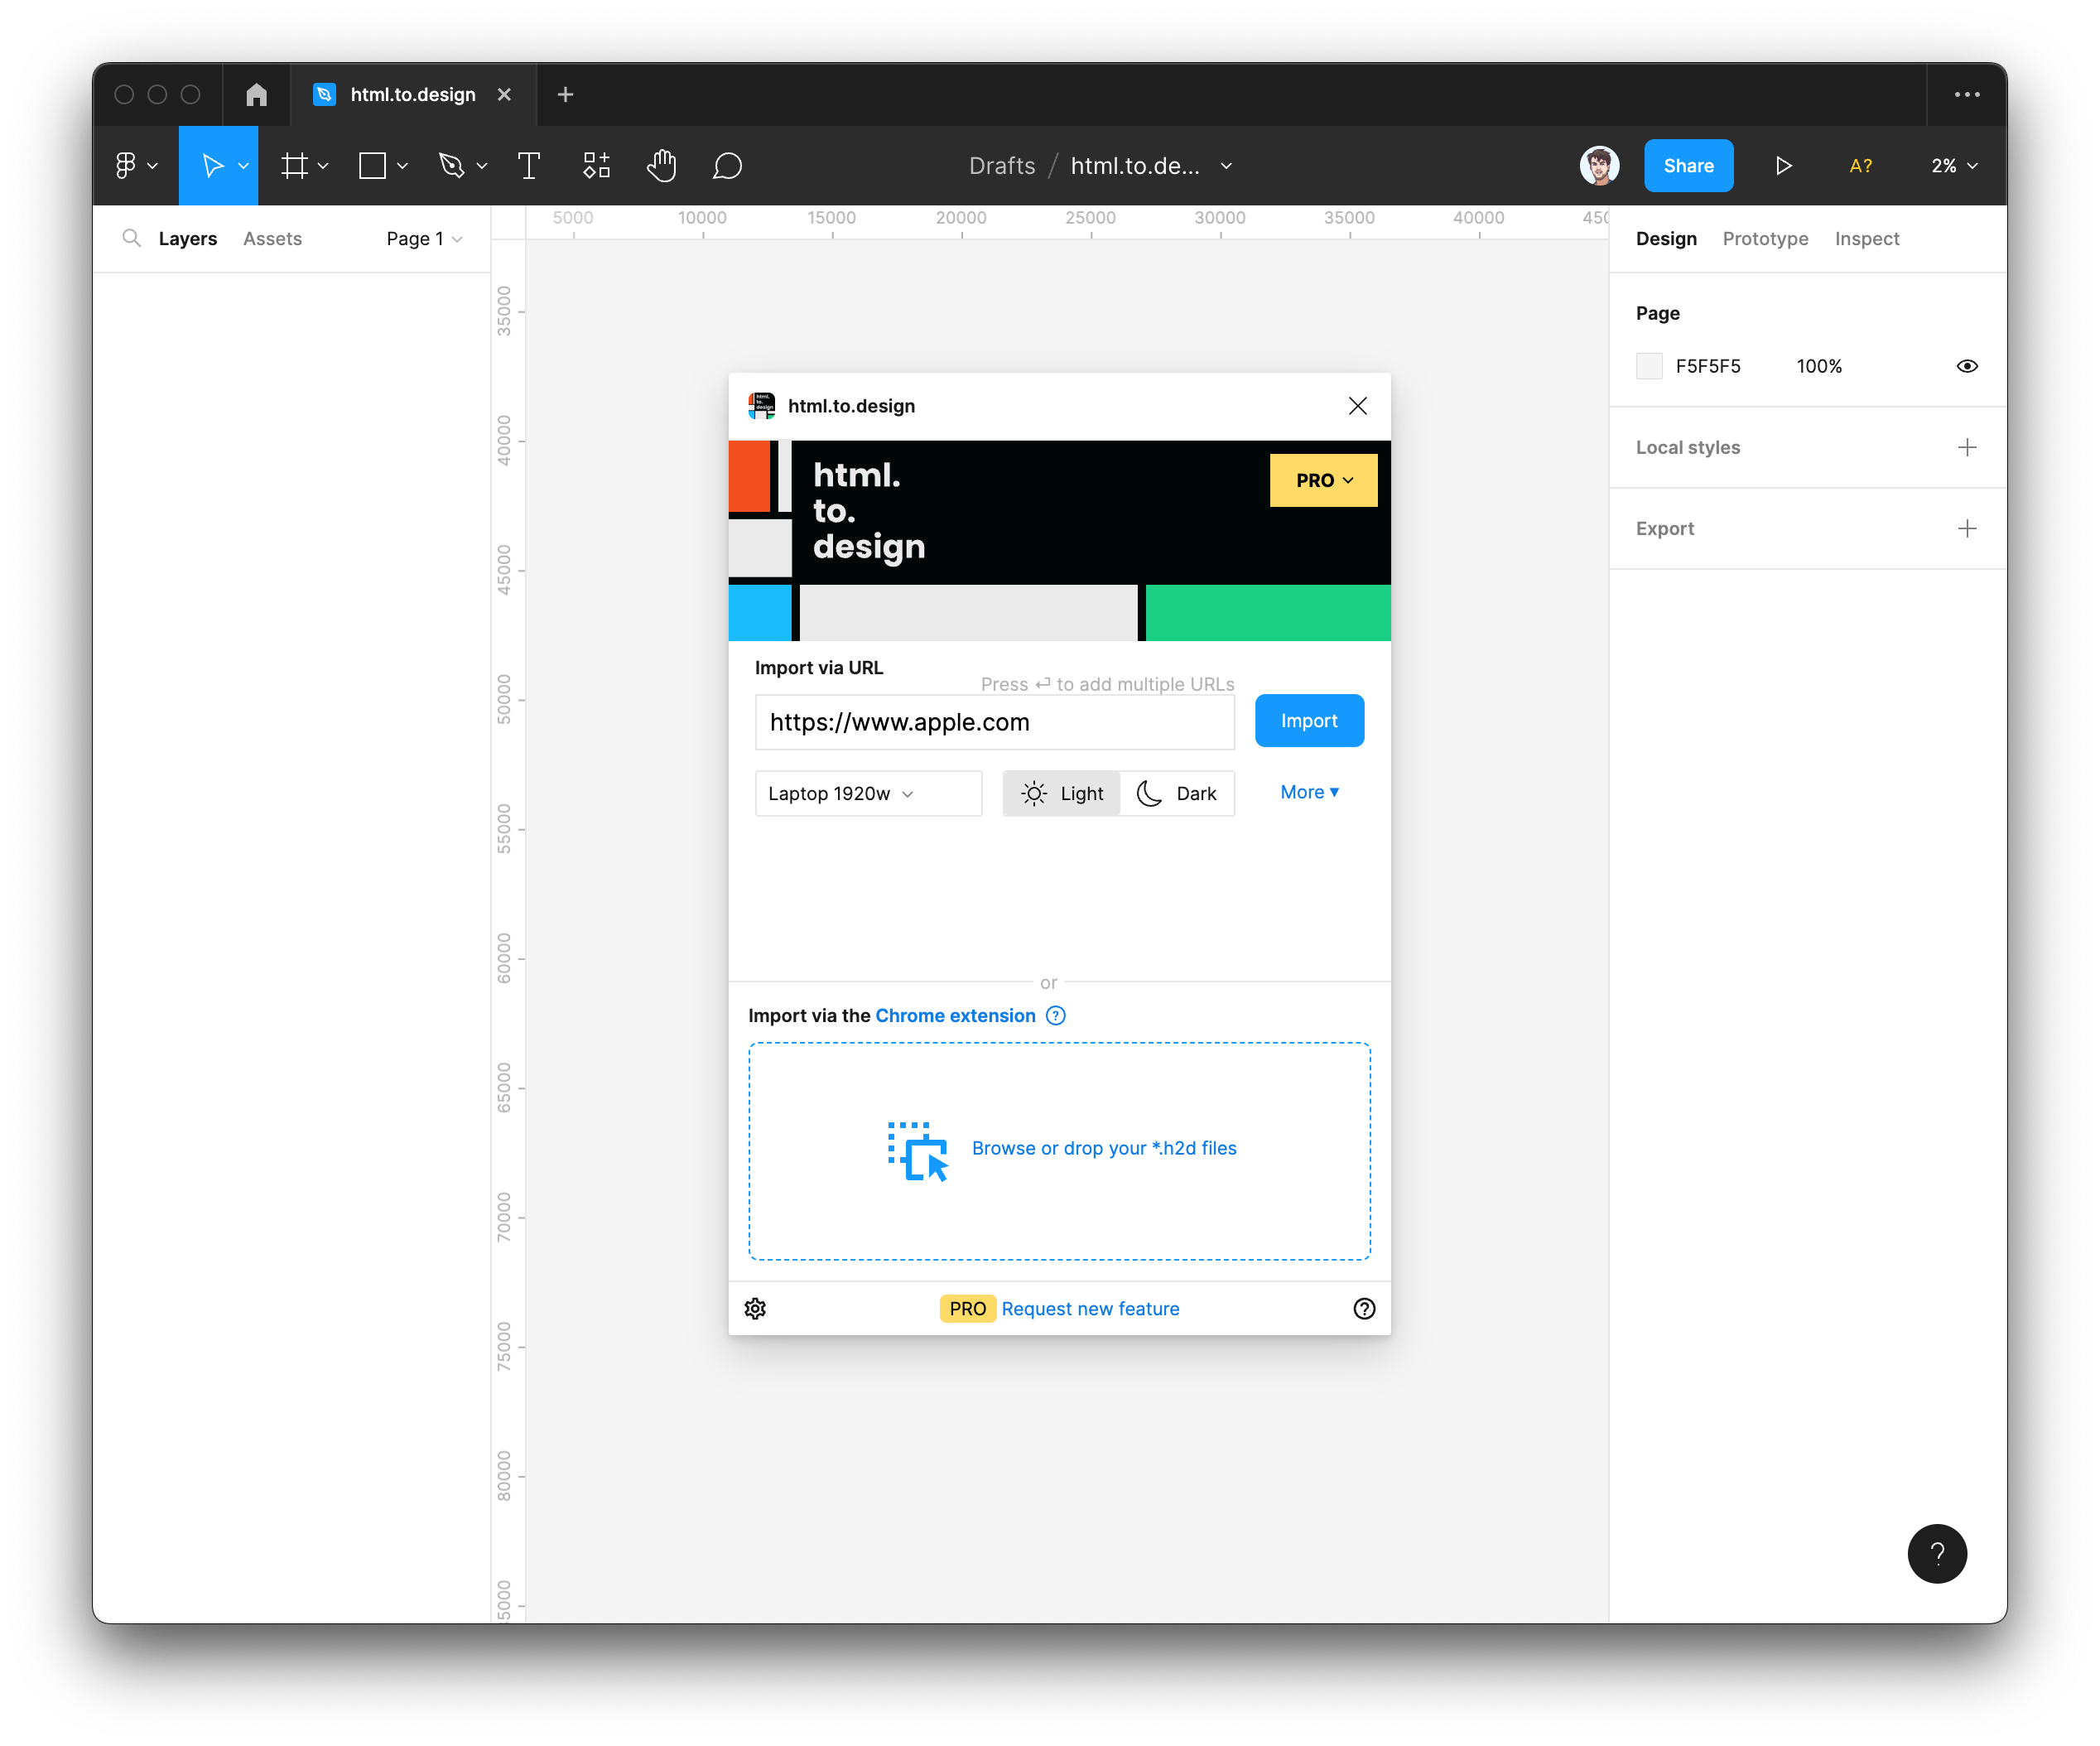
1. Import the webpage you need 🪄
- Run html.to.design in Figma.
- Select the website you want to import and copy its URL, or capture it using the browser extension if it’s a private page.
- Paste the URL or drop the .h2d file into the plugin.
- Select the viewports and themes you want to apply to the imported page. For example, you may need both desktop and mobile versions in both dark and light mode.
- Once you’re ready, click
Import.You’ve just captured a fully editable version of your website and brought it into Figma!
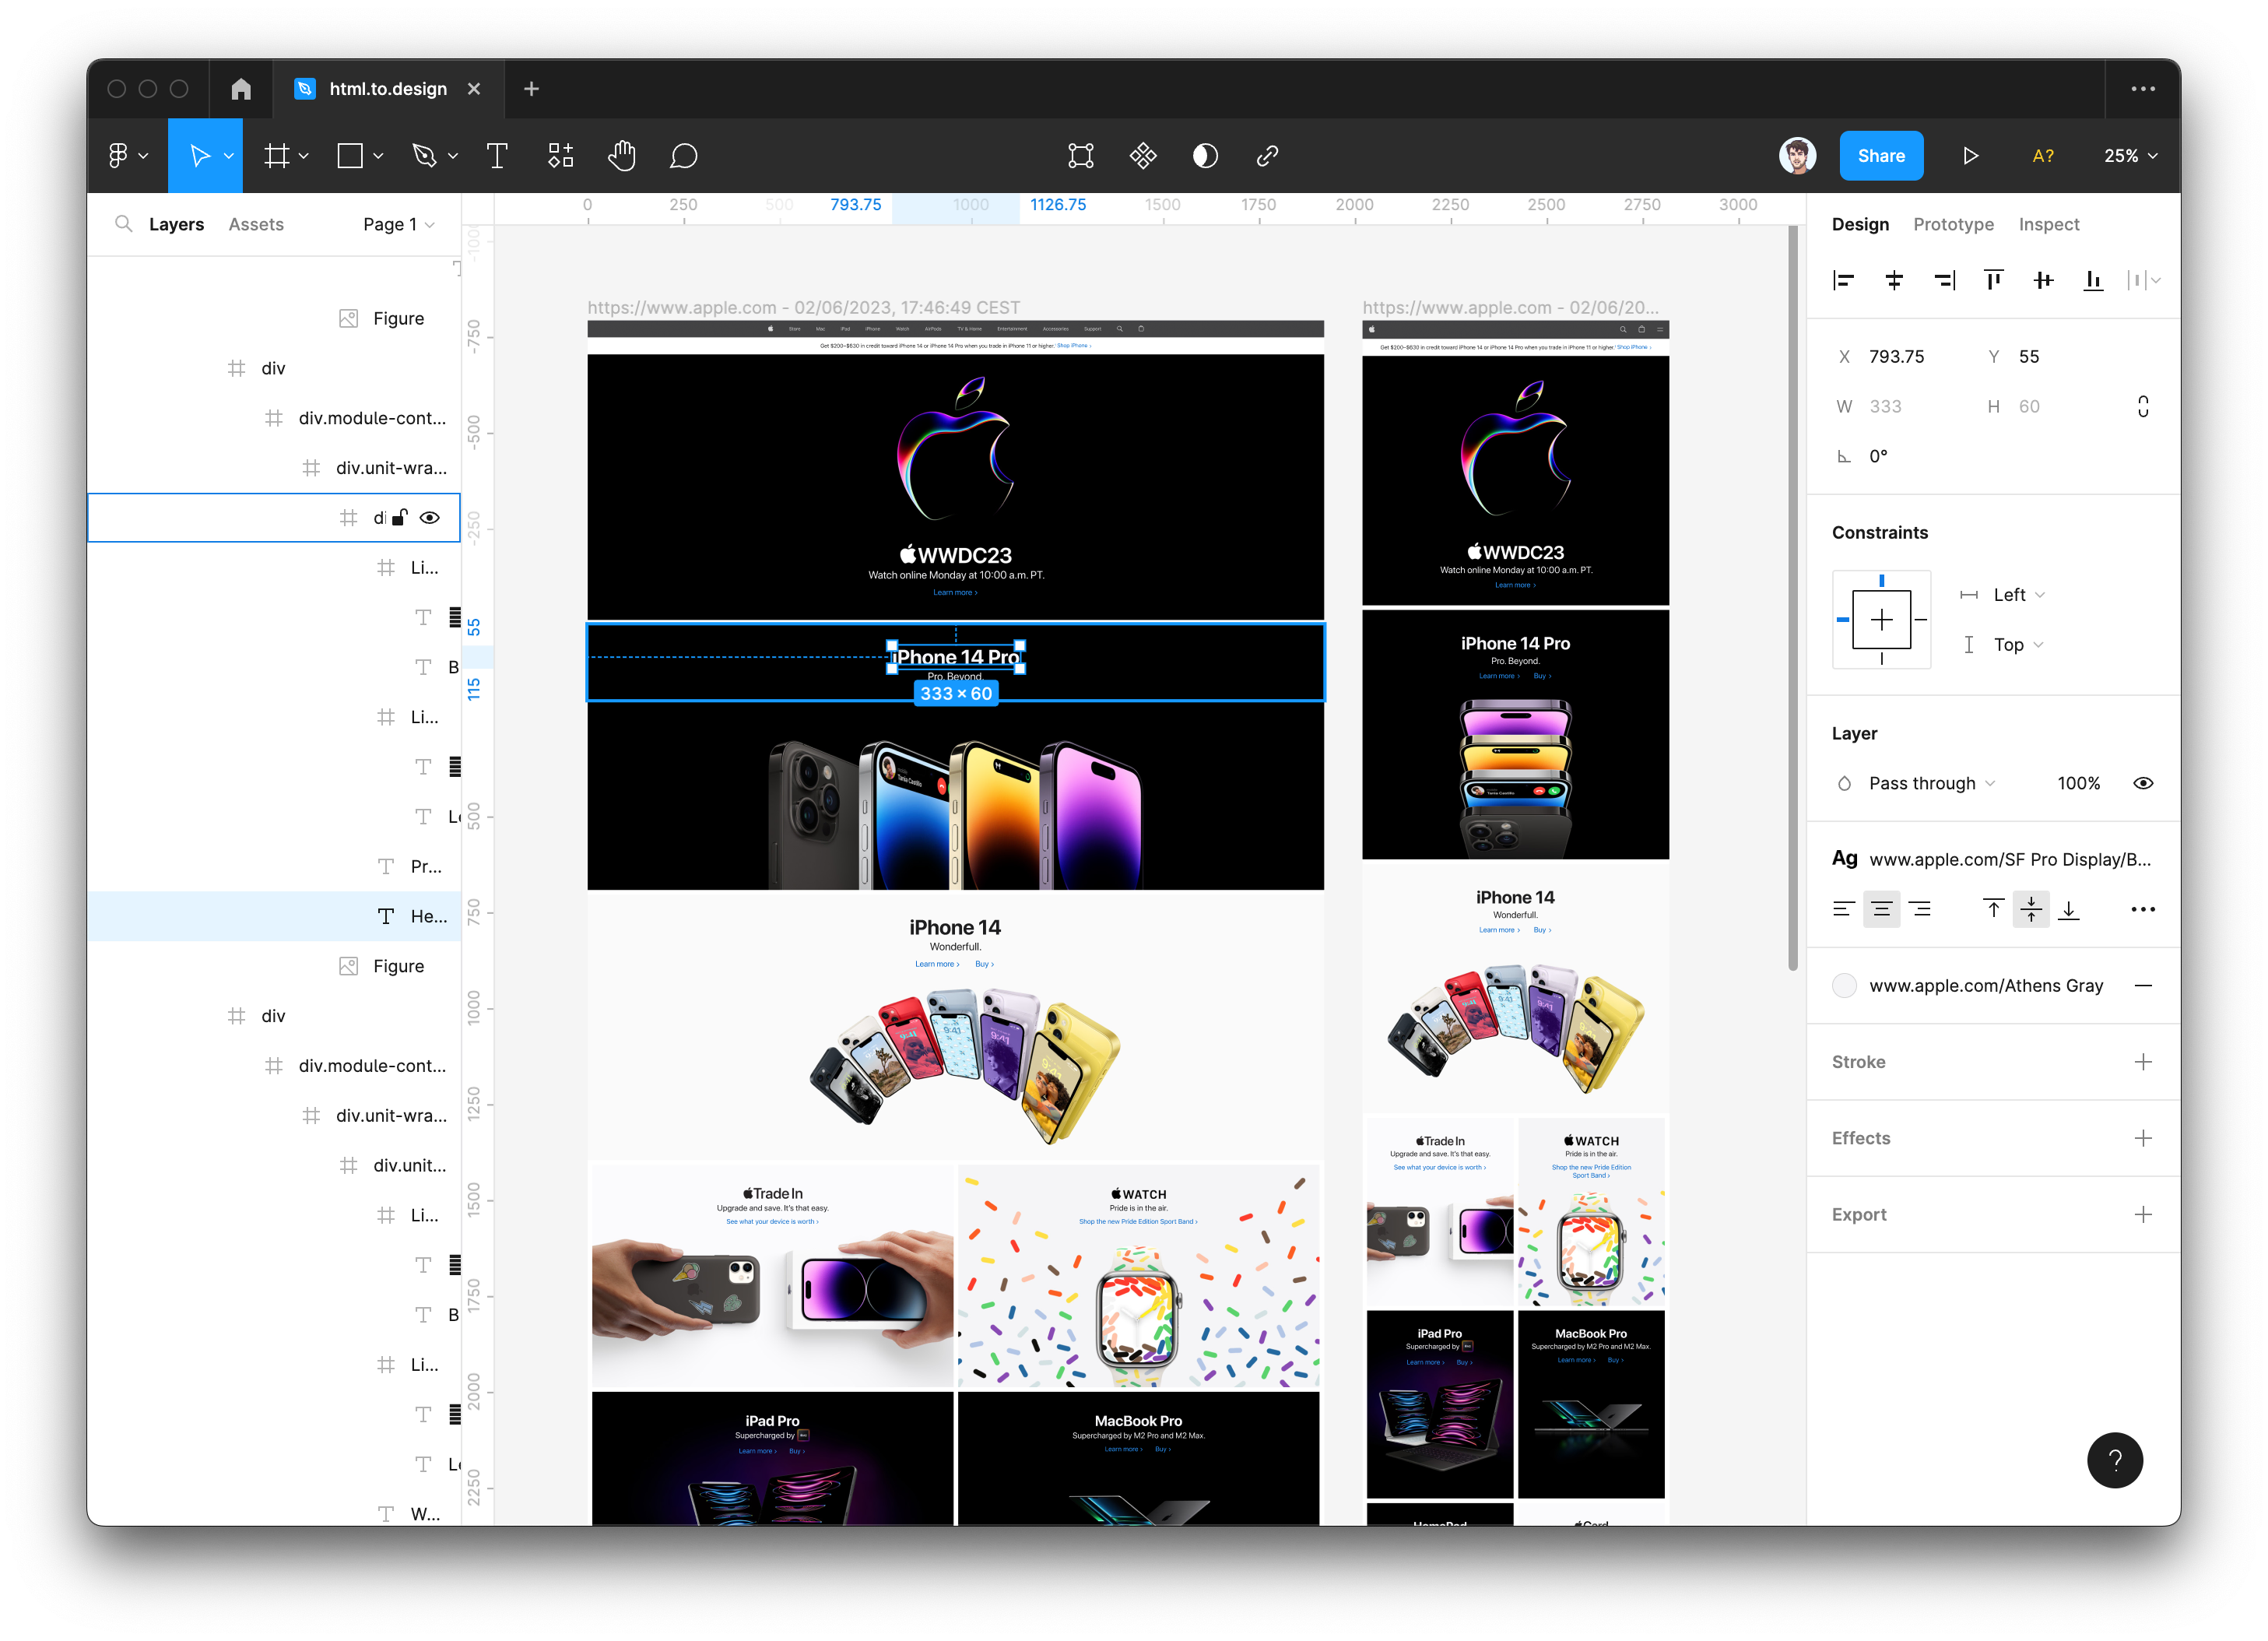
2. Generate local styles for easy replacements 🎨
- Make sure you have the
Create local stylesoption activated in the bottom-left settings menu of the plugin before importing your webpage. - When you import your webpage, html.to.design will take all colors and fonts and automatically generate local Figma styles for you, making them readily available in your right toolbar.
- For easy updates you can apply directly to the entire webpage, simply change the color or font style in your list of local styles found in the right toolbar.

3. Happy redesigning 🙂
- Move elements around to improve the layout
- Change the copy for a fresher tone
- Collaborate with other designers and developers and get feedback as you progress…
- Your redesign projects have never been this easy!
Benefits of redesigning a website with html.to.design
Forget about screenshots! 🖥️
Whether it’s for a redesign project or creating a benchmark, taking screenshots used to be the only way to get the entire webpage into Figma. But with html.to.design, the days of hundreds of screenshots cluttering your desktop are over. html.to.design captures an entire webpage and brings it directly into Figma in seconds. Plus, it’s fully editable, making your whole design process that much easier.
Update colors & fonts in one go 🖌️
When it comes to redesigning a website, a large part of the work involves replacing old styles to update them with more modern fonts and colors. A great feature of html.to.design is the option to automatically capture and create local styles from the fonts and colors of your website. This means you can edit your local styles to apply a new look to the entire website in one go!
Download missing design assets 📥
Depending on how old the website you’re redesigning is, you may no longer have all the design assets readily available in Figma. Even though you’re going to be changing a lot of the website, having those design assets gives you a base to work from.
For example, let’s say you need the font being used on the existing website for your redesign project, but you don’t have this font saved on your machine or in Figma… When importing a webpage with html.to.design, you’ll automatically be alerted of this missing font and given a link to download it to your device and install it on Figma! Learn more about this feature in this post.
html.to.design is one of the fastest ways to bring all design assets used on the site directly into Figma. No need to download each asset one by one. Simply import the webpage and then extract the images, styles and content that you need.
Collaborate more efficiently 🤝
Redesign projects are rarely done in isolation. In most cases, you’ll be collaborating with other designers and developers, and will need feedback from your stakeholders. Figma has great collaboration features such as commenting and live conversations directly in a file…
However, collaborating on a static screenshot or incomplete version of your existing website makes the process more tedious than it needs to be. html.to.design imports fully editable layers of any website. This means you can move things around and change the design, all while in a live collaboration session with your peers.
Ready to redesign?
Redesigning a website doesn’t have to be a challenging, time-consuming task… Thanks to Figma plugins like html.to.design, you’ll no longer have to worry about missing design assets and files, or recreating each component from scratch. What used to take days can now be done in just a few steps, and you’ll be on to a fresher, improved website in no time.
Already redesigned a website with the help of html.to.design? Share it with us on X (previously Twitter) 👉 @html_to_design