From Gemini to Figma. How to supercharge AI web design
Stuck staring at an empty frame? With Gemini and the html.to.design Figma plugin you can fast-forward from idea to design in record time. This streamlined workflow lets you generate UI with AI, capture clean HTML output, and import HTML into Figma as fully editable components—no manual redrawing required.
Quick overview
- Start a new project in Gemini AI
- Fine-tune your design with Gemini’s conversational editor
- Snap a preview using the html.to.design Chrome extension
- Drop it into Figma with the html.to.design plugin
- Make pixel-perfect edits in Figma
From Gemini to Figma in 5 steps
1. Launch a Gemini project
Head to Gemini and create a fresh project. Just describe what you want—a landing page, a login screen, a full dashboard—and Gemini generates a responsive UI layout complete with copy, layout, and structure.
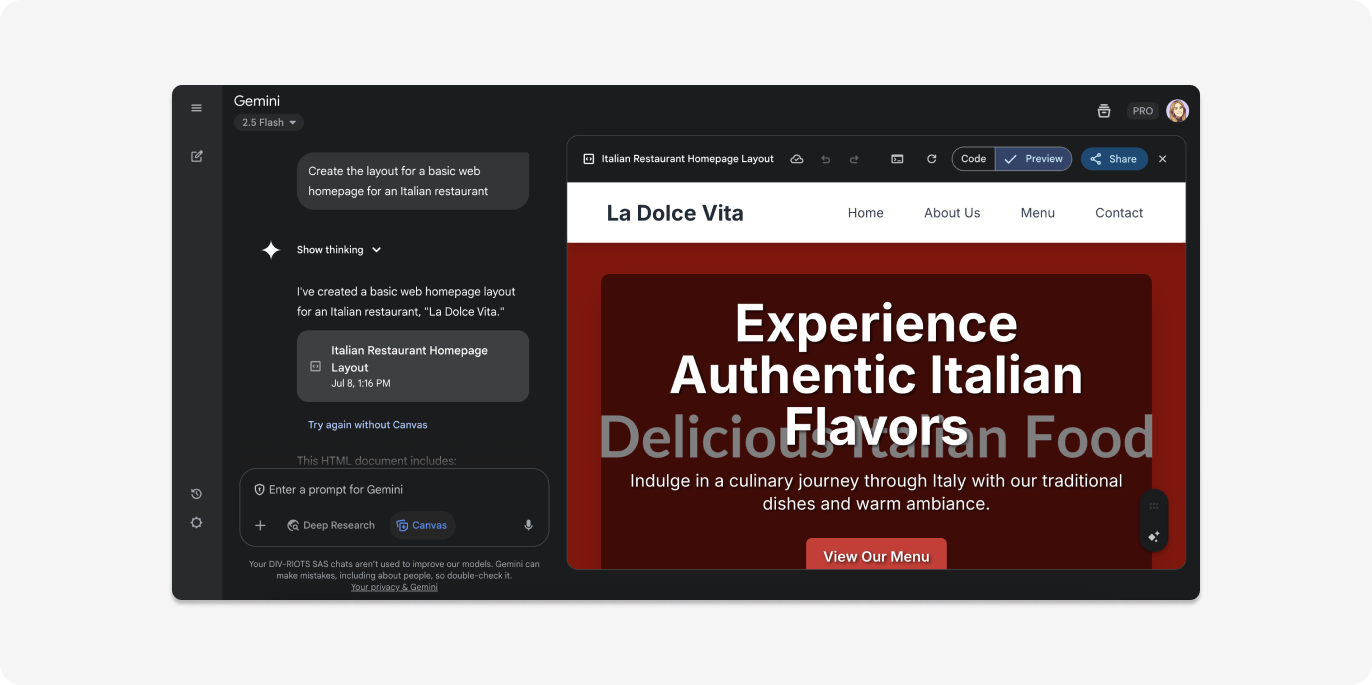
2. Fine-tune with prompts
Gemini’s built-in chat lets you adjust the layout using natural language. Type prompts like:
- “Add a testimonial section.”
- “Change colors to a neutral palette.”
- “Make it more mobile-friendly.”
Each command instantly updates your live preview, so you can shape your design without touching a single line of code.
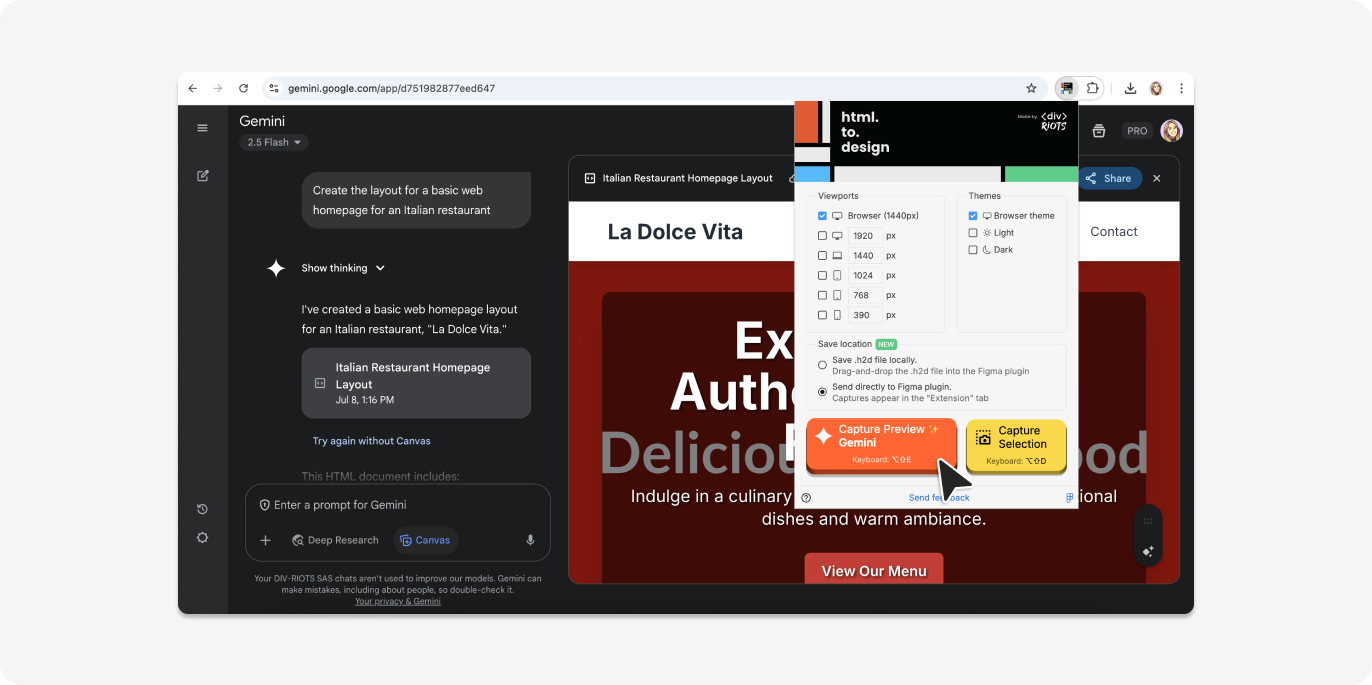
3. Capture the design with html.to.design
In Gemini, select the “Preview” option, then launch the html.to.design Chrome extension. Select your desired viewport and theme, then click “Capture preview.” The tool creates an .h2d file (a clean HTML snapshot of your Gemini design) and sends it directly to Figma—or saves it locally if needed.
🛠️ First time using the extension? Follow our Installation Guide.
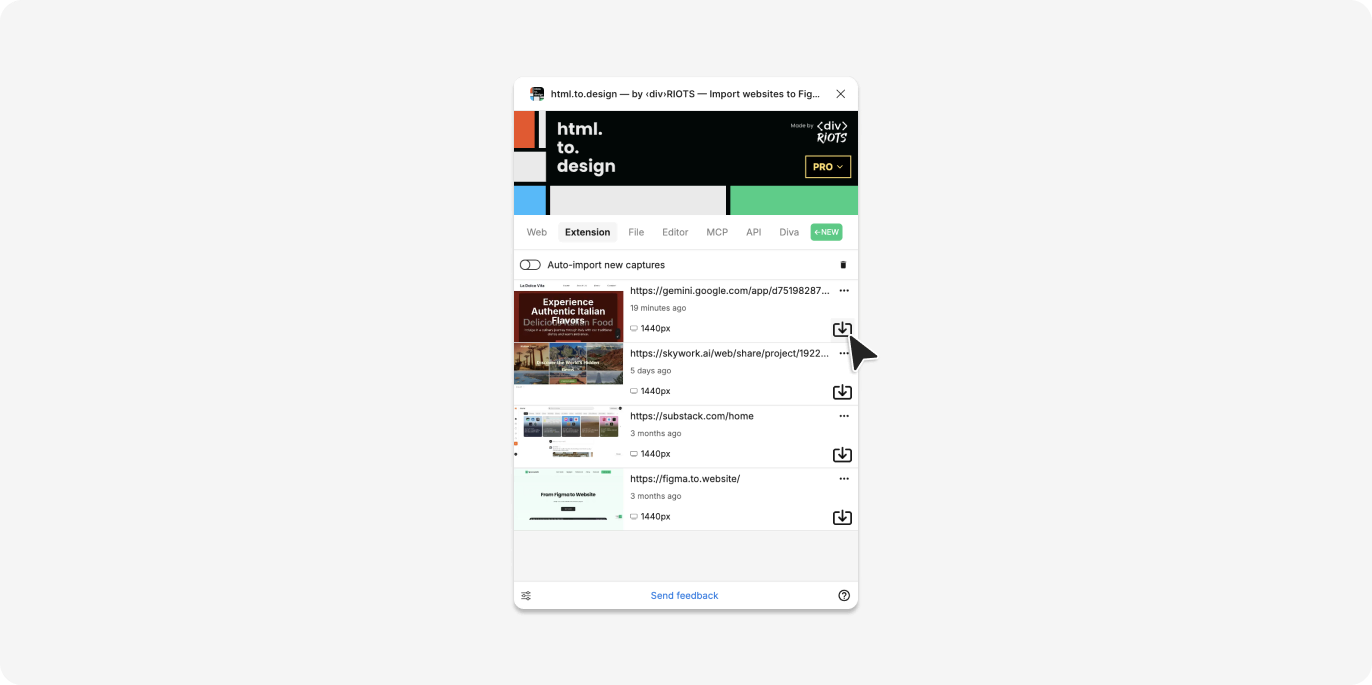
4. Import into Figma
Open Figma and run the html.to.design plugin. If you chose “Send to Figma,” your design will appear under the “Extension” tab. Click the import icon and your Gemini-generated UI becomes a layered, editable Figma file.
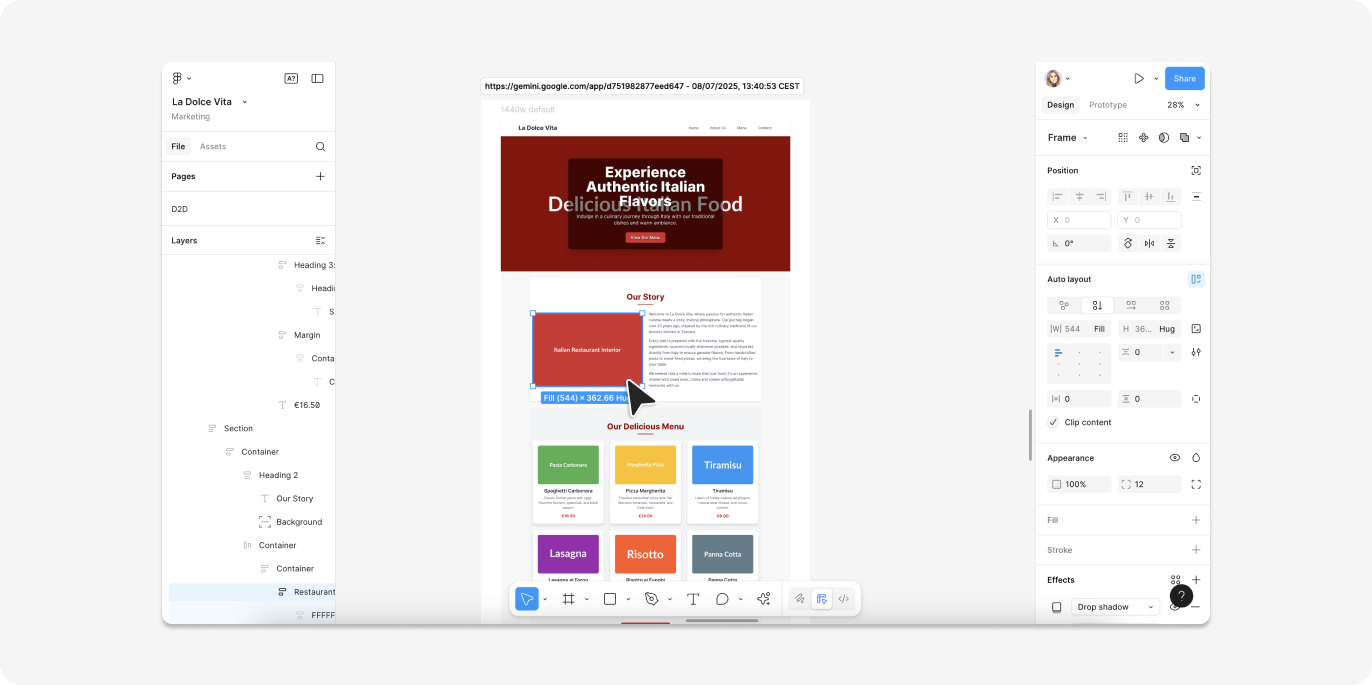
5. Customize in Figma
Now that your layout is in Figma, you can fully customize it. Apply your design system, swap in your components, tweak alignment, and prepare it for dev handoff or prototyping—all within your usual workflow.
Why this AI-to-Figma flow works
This Gemini + html.to.design workflow combines the speed of AI-generated design with the precision of Figma’s layout tools—making it ideal for fast-moving teams.
⚡️ AI-powered speed
Gemini takes care of the heavy lifting. Whether you’re sketching out a site layout, app UI, or onboarding flow, it generates ready-made templates in seconds—giving you a fast starting point that looks great out of the box.
💎 Pixel-perfect imports
Using html.to.design ensures the design you generated looks exactly the same in Figma. No visual drift, no broken spacing—just a clean, editable version of your original layout.
🎨 Full creative control
Once inside Figma, your layout becomes fully editable. You can apply your brand’s fonts, colors, components, and grid systems, as well as adding your own creative magic!
🤝 Built for teamwork
Gemini gets you started fast, Figma helps you finish strong. Share your file, collect feedback, prototype interactions, and move toward production—all inside your familiar design tool.
Try it out!
- Spin up a new project in Gemini
- Capture it with html.to.design
- Import and polish it in Figma
Don’t waste hours dragging boxes or fiddling with code. With Gemini and html.to.design, you can design faster, iterate smarter, and collaborate better—all while keeping full creative control.