
From WordPress to Figma
Rebuilding a website design from scratch in Figma can be a huge time sink. Whether you’re trying to recreate layouts from a client’s WordPress site or reverse-engineer a landing page, you’re often stuck inspecting elements, taking screenshots, or manually aligning components.
But here’s the good news — you can copy any website into Figma, even if it was built in WordPress with the help of a plugin named html.to.design.
⚡ TL;DR: How to copy WordPress websites to Figma
- Copy the URLs of the pages you want to import
- Open the html.to.design Figma plugin
- Paste the URLs and hit Import.
- Adjust the settings (e.g. upload missing fonts or add auto layout)
- Start editing a fully editable version in Figma — including components, styles, and images!
- Bonus: Publish the new site with figma.to.website or Figma Sites.
Step-by-step: How to copy a WordPress website to Figma with html.to.design
We tested importing a few pages from greatquestion.co to Figma by using the html.to.design plugin. Here’s a step-by-step guide on how to do it:
1. Collect the URLs you want to import
You’ve got two options here:
- Use ChatGPT to list the URLs of a domain (e.g. “List the top-level pages from example.com”), then copy them into html.to.design
- Manually go through the site, copy each page URL, and paste them into the plugin.
2. Open the html.to.design plugin in Figma
Open your Figma file and search for html.to.design from the bottom-right side of your screen. Click to launch it. If you haven’t installed the html.to.design plugin, you can search for it using your bottom navbar or in Figma Community, if you’re using a free plan.
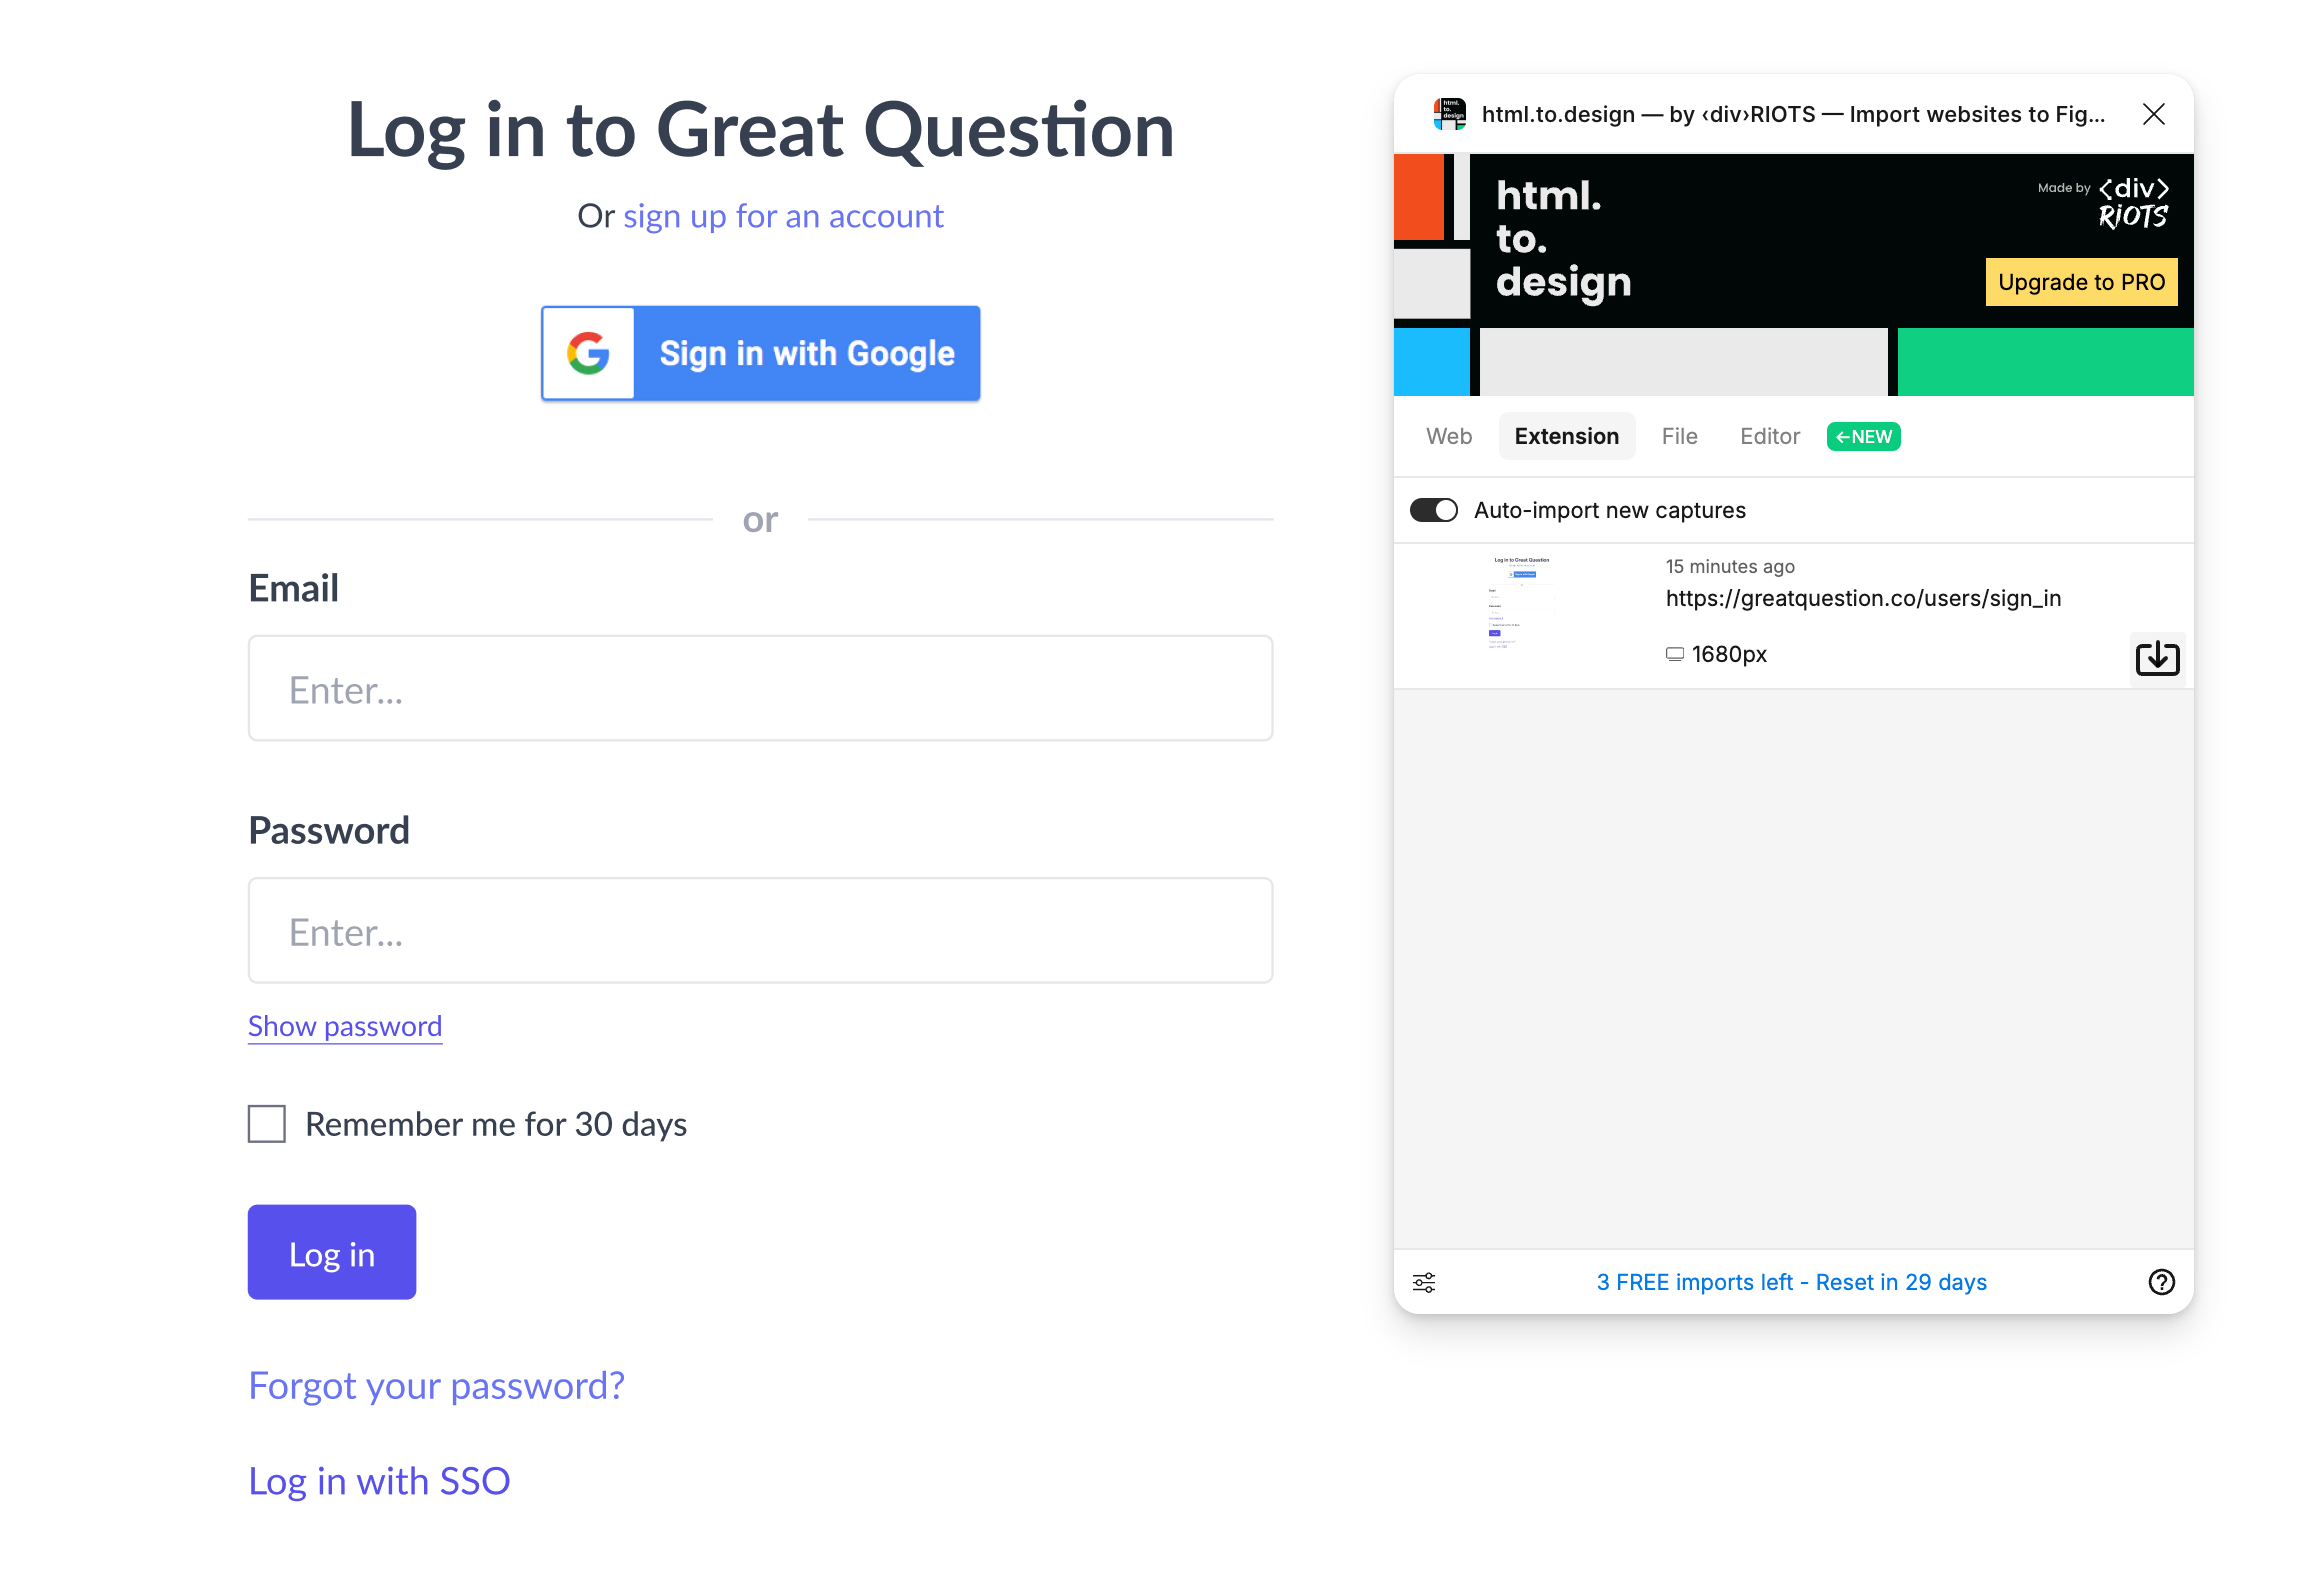
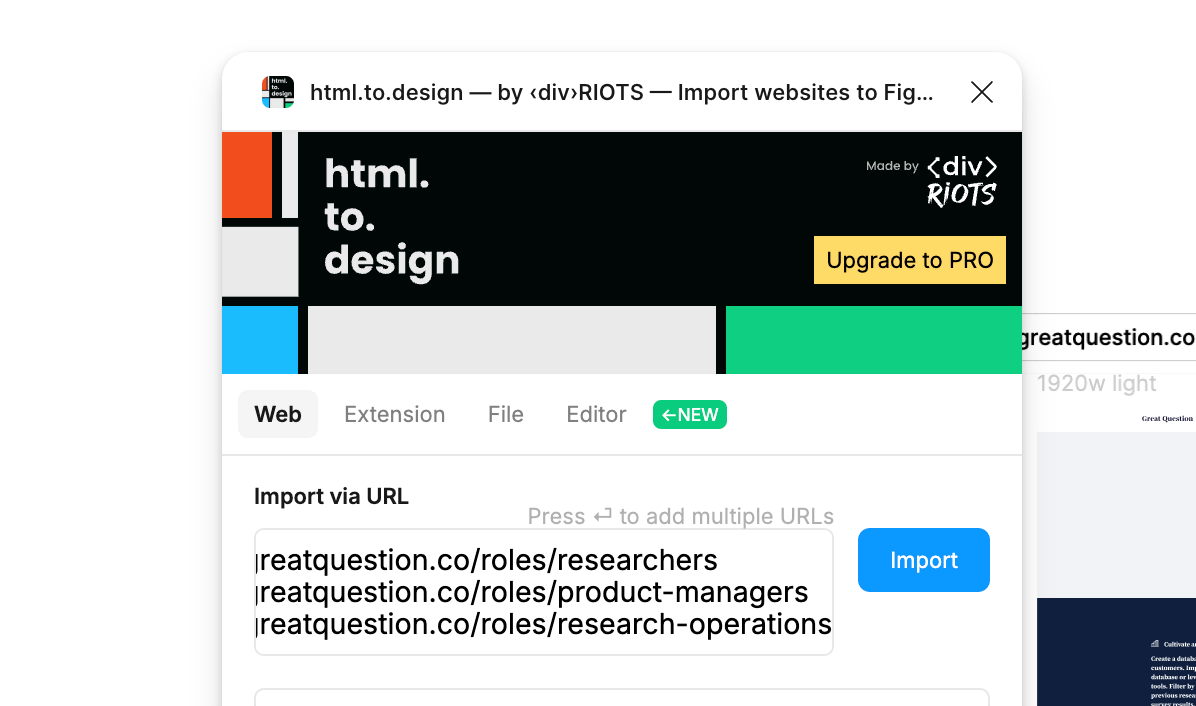
3. Paste the URLs into the plugin and click “Import”
In the “Import via URL” text field, paste one or more page URLs and click Import. You can copy any website to Figma and html.to.design will automatically render the live web pages into fully editable Figma frames in just a few seconds.
Tip
You can use the html.to.design Chrome extension to import webpages as you browse them or to import any webpages behind authentication.
4. Update the newly imported mockup’s settings
During the import process, update the settings to map the font and add autolayout, components, or enhancements.
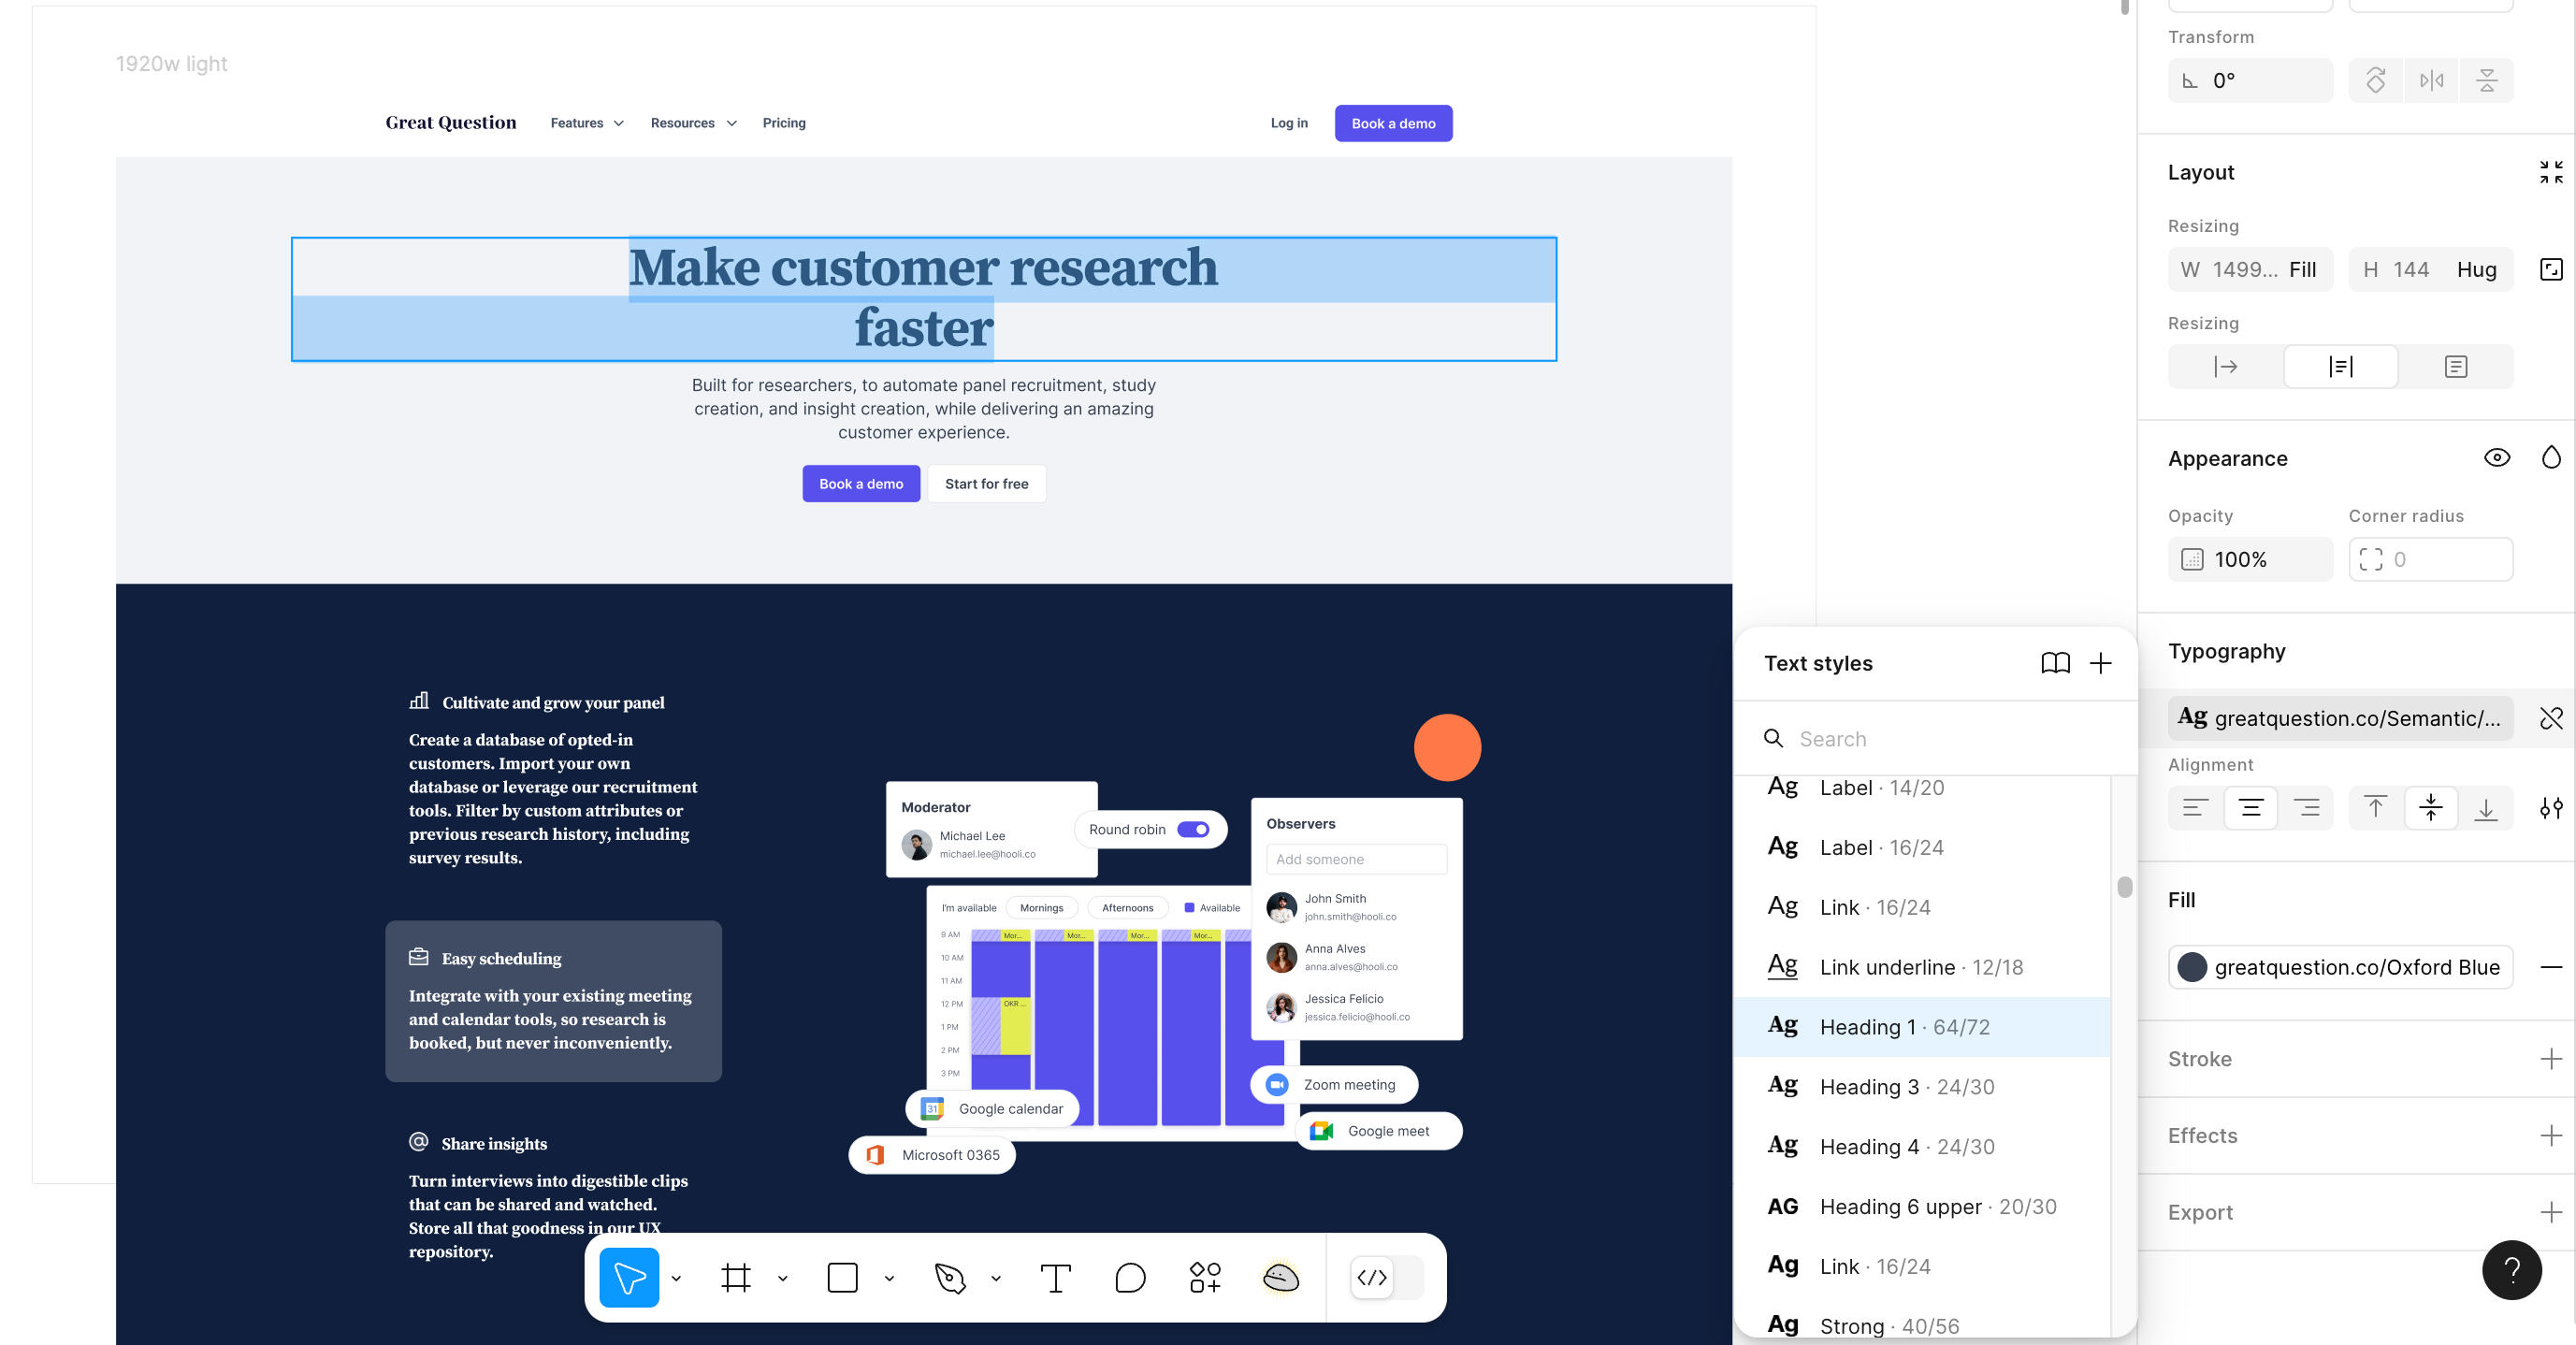
5. Start editing in Figma
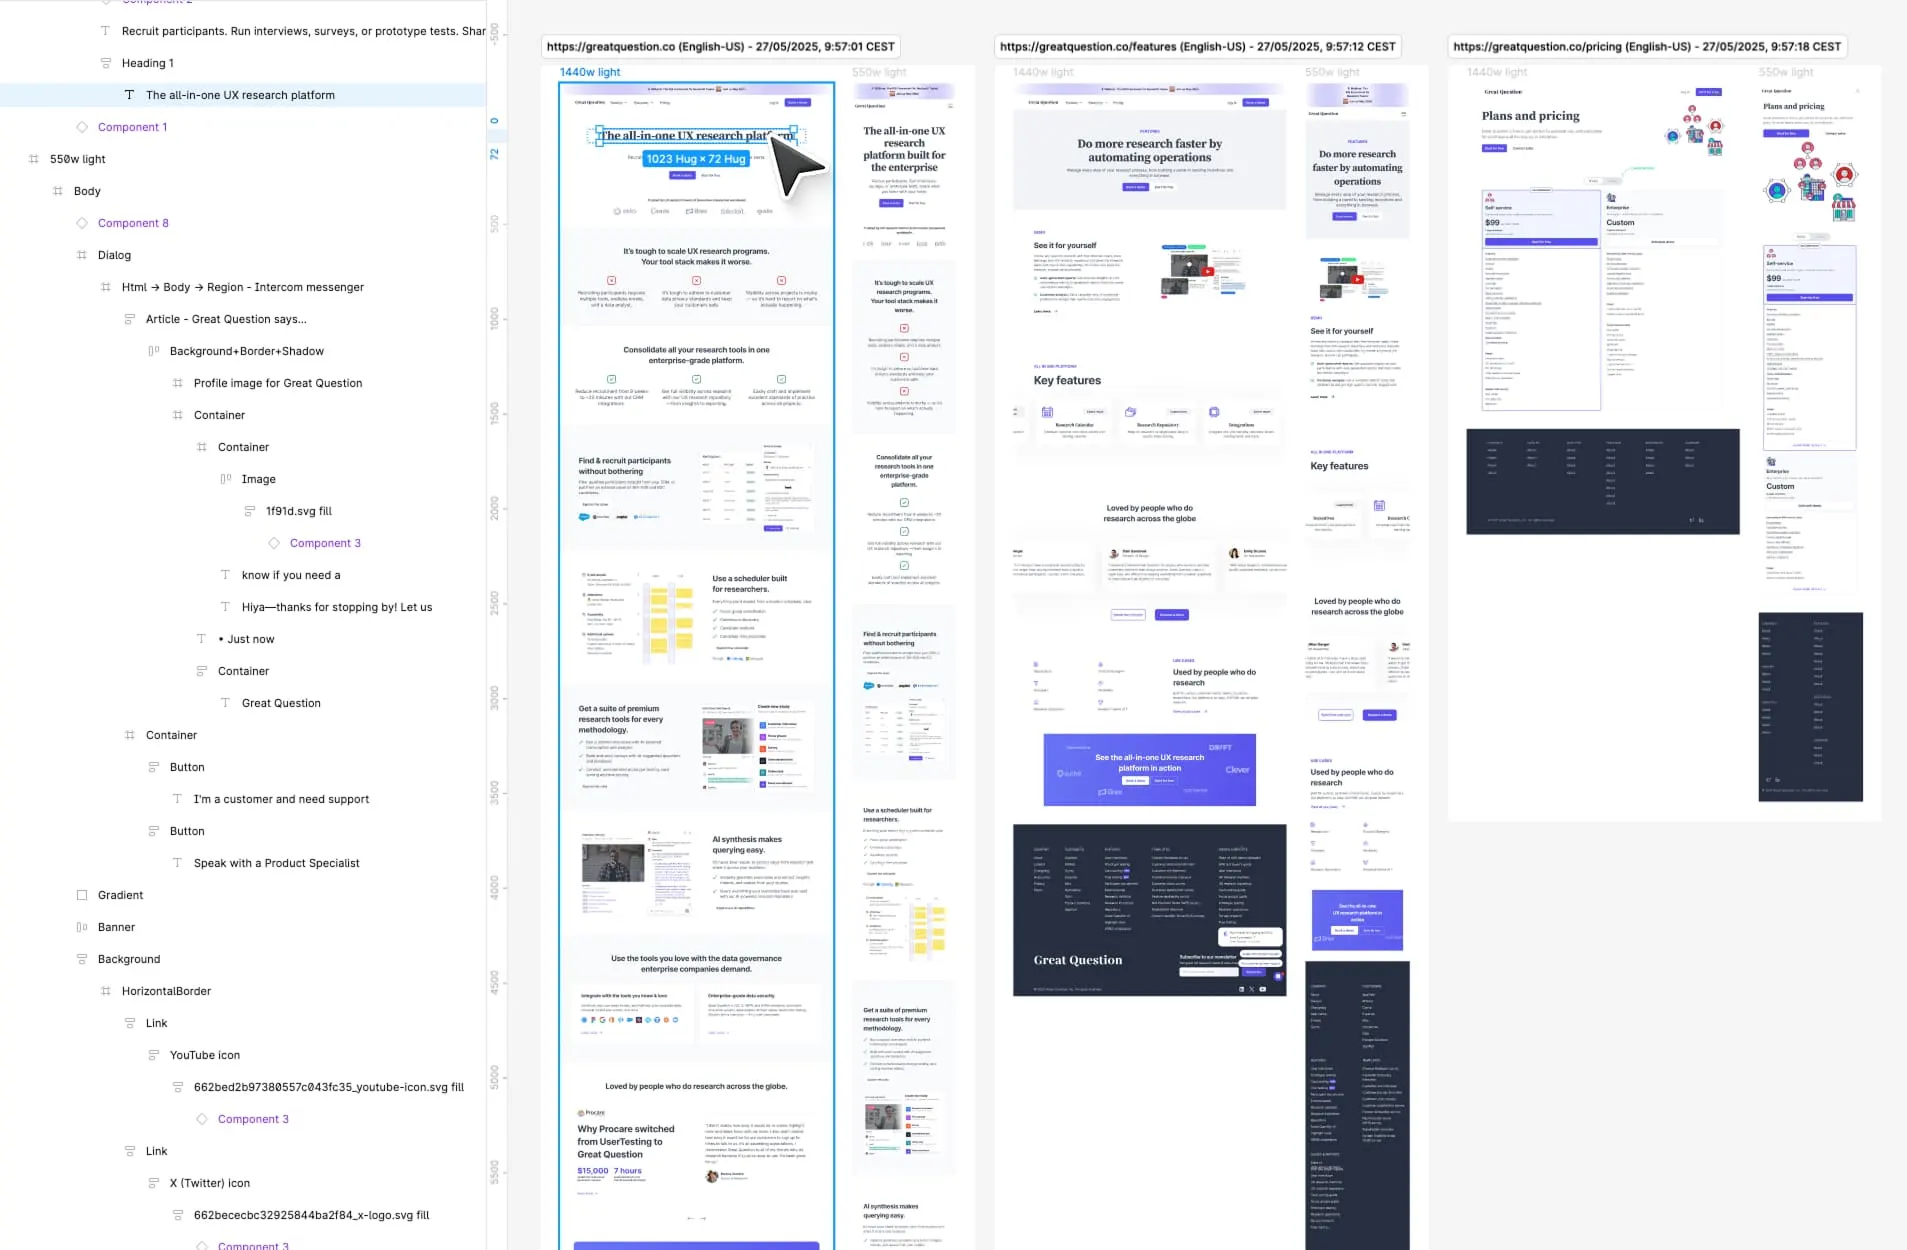
Once you’re done updating the settings, you can now edit your imported webpages.
You’ll get:
- Editable text layers, not just flattened screenshots
- Auto-created components
- Color styles + text styles
- Preserved layout structure
- Clickable links and buttons in prototype
- Support for responsive design previews
Neat, right? For a full feature list, check out html.to.design’s Figma Community page.
6. Publish the new site with figma.to.website or Figma Sites
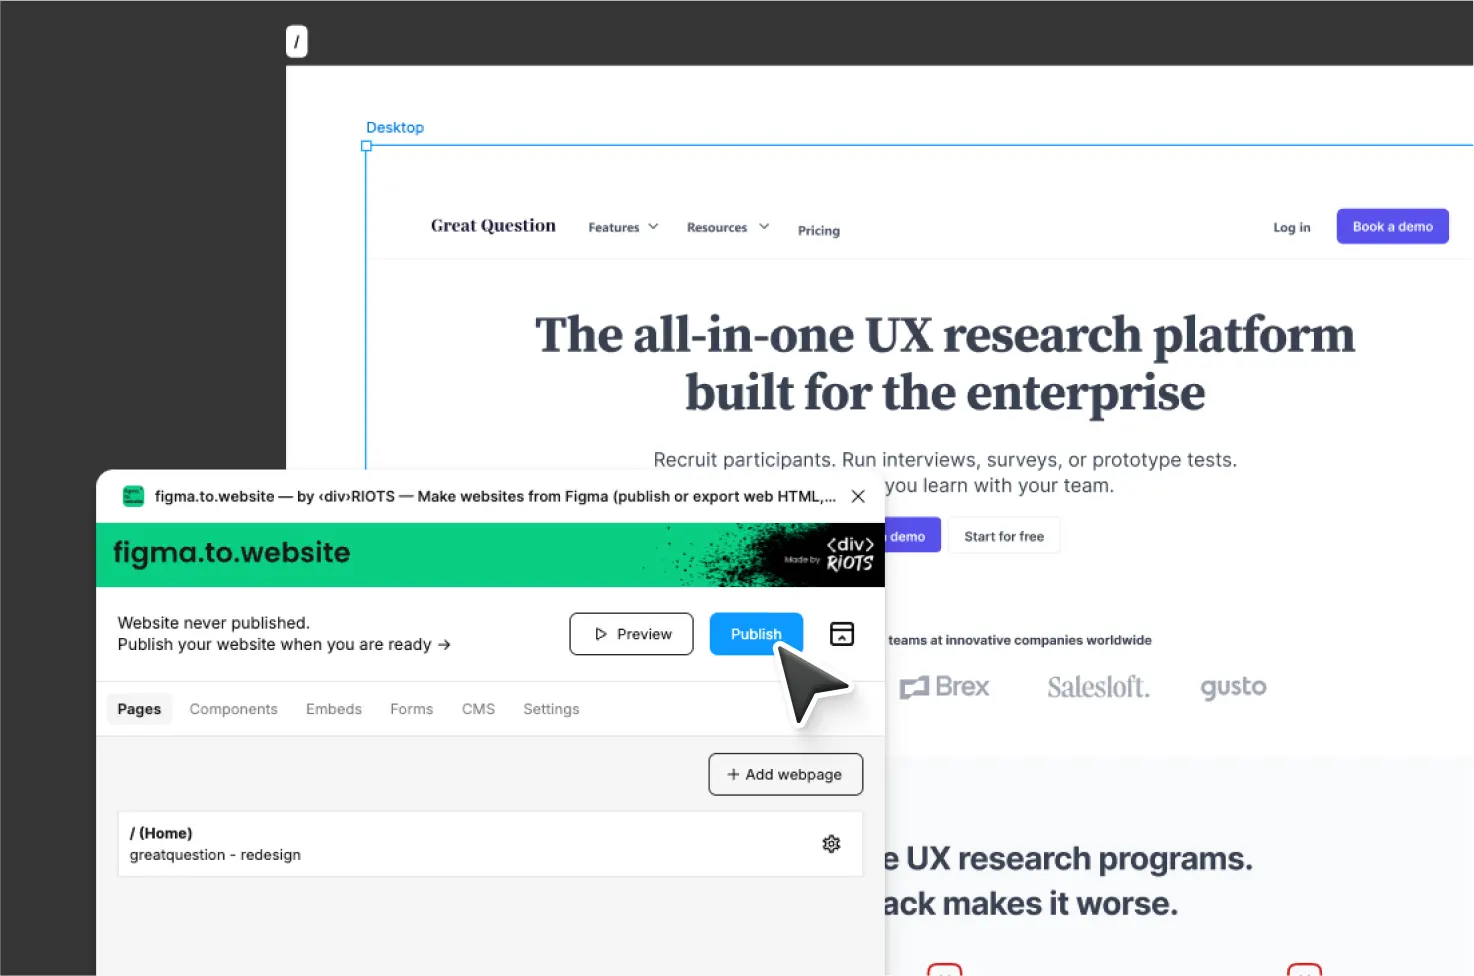
Once you are done with the redesign, you can publish the redesigned website directly from Figma using plugins like figma.to.website.
- Launch the figma.to.website Figma plugin from the menubar
- Select your website frame or section and hit “Publish”
- Done! Your website is live, you can now add your custom domain and go deeper into the CMS, analytics and all the other options.
Alternatively, you can also publish your redesigned WordPress site using Figma Sites.
How html.to.design helps you design faster (and more efficiently)
html.to.design doesn’t just copy what you see—it helps you work smarter in Figma.
1. Access private pages with the Chrome extension

Working on a members-only dashboard or a tool behind a login? The Chrome extension lets you auto-import designs from private or protected pages into Figma—perfect when you don’t have backend access but still need the full layout for redesign work.
2. Import multiple viewports and themes
If you’re working on a mobile-first project or need to support dark mode, you can import the same page in desktop, tablet, or mobile view—and both light and dark themes. With this feature, you’ll be designing with the real user experience in mind from the start.
3. Auto-generate Figma local styles
Instead of manually recreating every font and color, the plugin auto-generates local styles for text and color as you import—great when you’re building a style guide or trying to keep things tidy and consistent across pages.
Instead of manually recreating every font and color, the plugin auto-generates local styles for text and color as you import—great when you’re building a style guide or trying to keep things tidy and consistent across pages.
4. Keep the layout with Figma auto layout

The plugin respects Figma’s auto layout settings during import, so everything from paddings to keep your design responsive. You can easily convert sections into responsive components for your design system.
5. Bulk import in one go
If you have a long list of product pages, blog posts, or landing pages, just paste all the URLs into the plugin and import them all at once. No need to do it one by one, which seriously speeds up big audits and redesigns.
🙋♀️ Frequently Asked Questions (FAQs)
1. Can I use html.to.design to copy WordPress websites to Figma?
Yes! html.to.design is a powerful website-to-Figma plugin that works with all private and public WordPress websites.
2. Will html.to.design copy the entire website design into Figma?
html.to.design imports fully editable designs of each page you select — including layout, images, text, components, and links. Think of it as a perfect front-end snapshot, ready to be redesigned or prototyped in Figma.
3. Is html.to.design free to use?
Yes, html.to.design offers a free version with core features and 10 imports per month. You can import pages one at a time and get editable layers. For batch importing multiple URLs, higher-resolution images, and faster processing, upgrade to the PRO version.
💡 Stop rebuilding websites in Figma from scratch
Use html.to.design to copy any website to Figma — editable, fast, and reliable.