How to design a webpage with Opencode.ai and send it to Figma
There was a time when taking a design idea all the way to a working webpage meant either sitting down to learn HTML and CSS yourself, or handing a brief to a developer. Those days are fading fast. AI-powered coding tools like Opencode.ai have compressed that whole process into a conversation — describe what you want to build, and watch it take shape in real code.
Opencode.ai is an open-source AI coding agent that runs directly in your terminal. It plugs into the models you already use (including Claude and other frontier LLMs), understands the full context of your project folder, and writes production-quality code from plain-English instructions. No boilerplate. No blank-page paralysis. Just describe what you want and let the agent handle the syntax.
To test it out, we built a simple landing page for a fictional local business — Brew & Co., a specialty coffee shop. Here’s exactly how we did it, and how we brought the finished site into Figma as fully editable designs using html.to.design.
Step 1: Build a landing page with Opencode.ai
⚙️ Set up Opencode.ai
Getting started is quick. Opencode is a Node-based CLI tool, so the only prerequisite is a reasonably modern version of Node.js.
-
Make sure Node.js (v18 or later) is installed on your machine.
-
Install Opencode globally:
npm install -g opencode-ai -
Connect your preferred AI provider. Opencode supports multiple model providers — you can authenticate with your Anthropic, OpenAI, or other API keys via:
opencode auth -
Create a new project folder, navigate into it, and start a session:
mkdir brewandco-landing && cd brewandco-landing
opencode
You’re now in an interactive agent session with full awareness of everything in your working directory.
ℹ️ Opencode also has a desktop app you can install (in beta for macOS, Windows and Linux).
✏️ Write a prompt that sets the scene
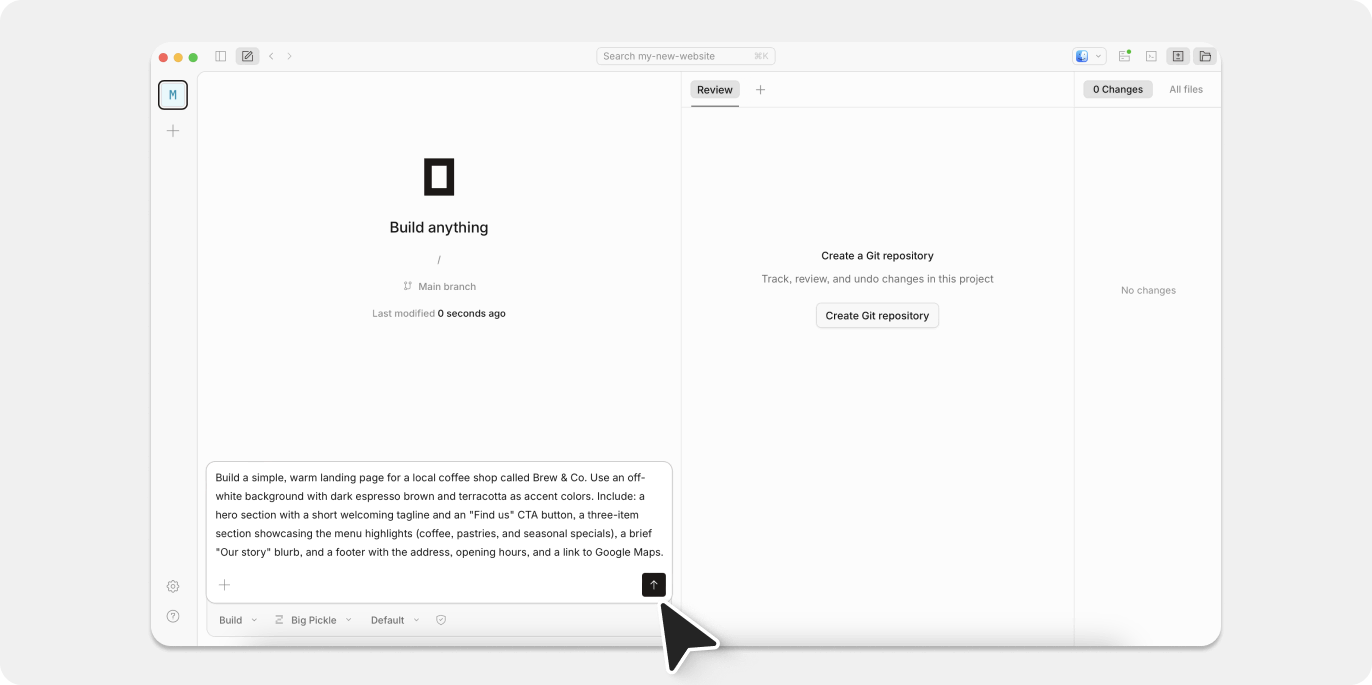
The more detail you put into your prompt, the closer the first output will be to what you actually want. Think of it less like a search query and more like a creative brief. Describe the product, the audience, the visual tone, and the specific sections you need. Here’s the prompt we used:
Build a simple, warm landing page for a local coffee shop called Brew & Co. Use an off-white background with dark espresso brown and terracotta as accent colors. Include: a hero section with a short welcoming tagline and an “Find us” CTA button, a three-item section showcasing the menu highlights (coffee, pastries, and seasonal specials), a brief “Our story” blurb, and a footer with the address, opening hours, and a link to Google Maps.
Opencode reads your entire project directory before responding, which means if you already have a style guide, brand tokens, or existing HTML in the folder, it will factor those in automatically. You’re not pasting context into a chat box — the agent finds it on its own.
👩💻 Get a working website without touching the code yourself
Within moments, Opencode generated a complete index.html with embedded CSS — ready to open straight in the browser. We previewed it immediately by opening the file in Chrome.
If you’d rather have a live-reloading local server (useful for watching changes in real time as you iterate), just ask:
Spin up a local dev server with live reload for this project.
Opencode will write the configuration and give you the exact command to run. No manual setup required.
Step 2: Iterate until it’s right
First drafts from AI tools are starting points, not final deliverables — and Opencode makes the iteration loop extremely tight. Because the agent maintains full context of your project throughout the session, follow-up instructions land precisely rather than blindly overwriting what’s already there.
We ran through a handful of revisions in minutes:
- “Make the hero section feel cozier — add a warm overlay to the background image.”
- “Round the corners on the menu highlight cards and add a soft drop shadow.”
- “Make the footer a dark espresso brown with light text so it feels grounded.”
Each change was applied directly to the source files. A quick browser refresh was all it took to review the result.
💡 Pro tip: Use Opencode to modernize an existing site
Already have a site that needs a facelift? Drop its HTML and CSS files into the project folder and ask Opencode to update the visual style, restructure a section, or bring the layout in line with a new brand direction. Because it reads what’s already there, the output builds on your existing structure rather than discarding it.
Step 3: Bring your Opencode-built site into Figma
Once our webpage was looking polished in the browser, the next move was getting it into Figma — to share with stakeholders, refine the finer visual details, and start extracting a proper design system. This is where html.to.design comes in.
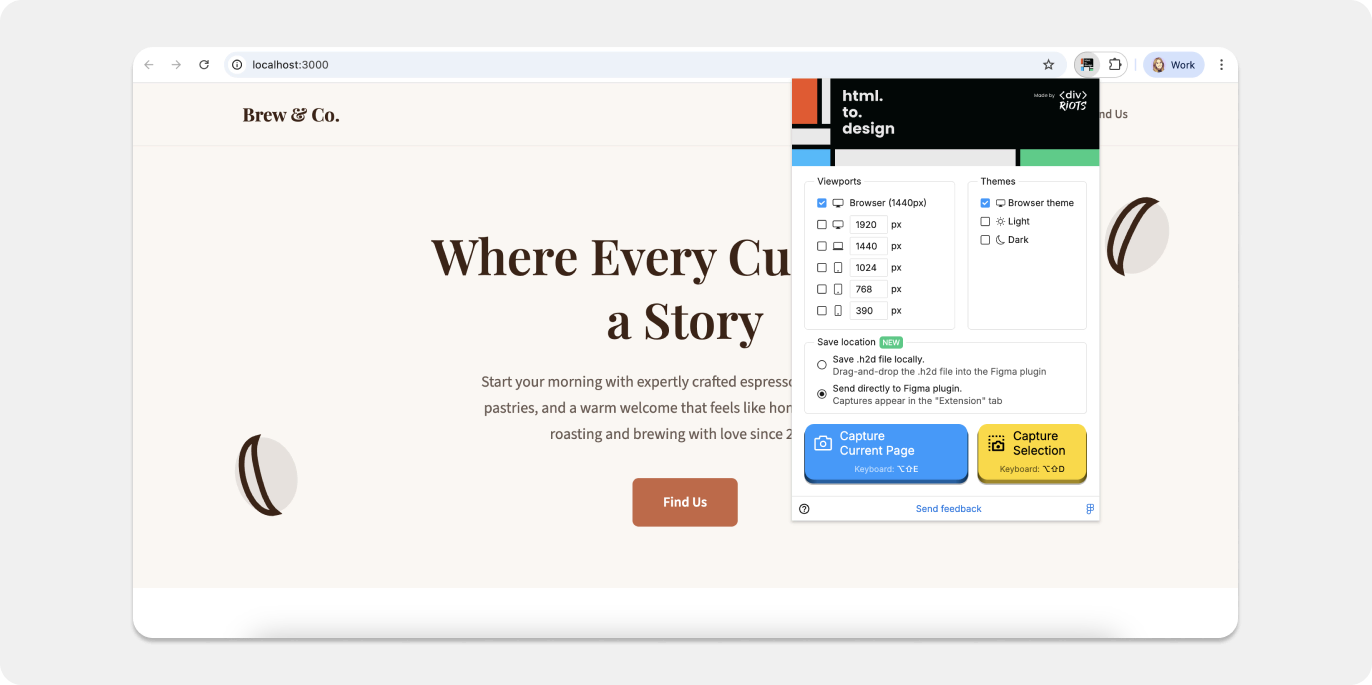
📸 Capture the page with the html.to.design Chrome extension
- Open your Opencode-generated site in Chrome (via local server or by opening the HTML file directly with
File > Open). - Launch the html.to.design Chrome extension.
- Capture the rendered page — either as an
.h2dfile or by pushing it straight into the html.to.design Figma plugin.
One important thing to know: the extension captures the page as the browser renders it, not just the raw source code. That means your custom fonts, CSS variables, hover states, and layout are all preserved exactly as they appear on screen.
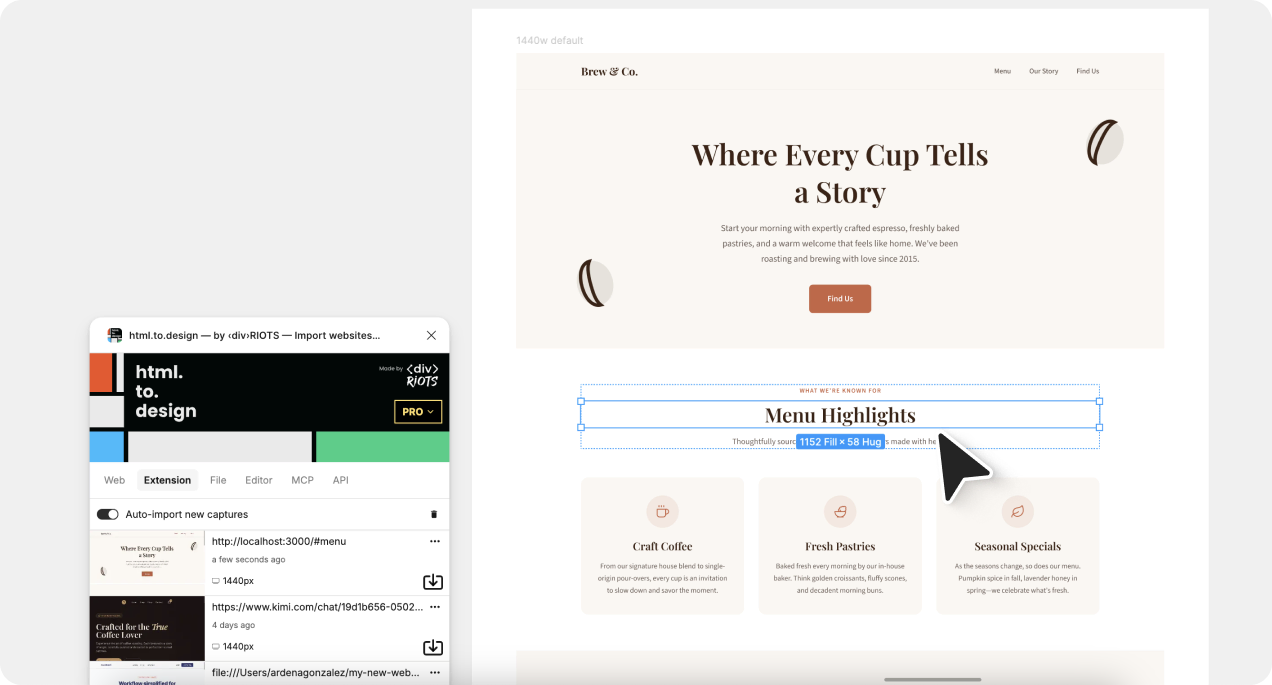
🪄 Import into Figma as a fully editable designs
- Open the html.to.design Figma plugin and import your captured file.
- Your landing page appears as a fully editable Figma frame — with autolayout applied, layers properly named, colors extracted, and every text element editable as a real text node.
From here, the page is yours to refine: adjust spacing, swap fonts, annotate for handoff, or start pulling out components to build a scalable design system around.
Why Opencode.ai is a great fit for web design
No development background required
You don’t need to know the difference between flexbox and grid to get a professional result. Opencode handles the technical decisions — you just describe what you want to see.
Full project awareness
Most AI tools only work with what you explicitly paste into them. Opencode reads your entire working directory, which means it can reference your existing files, stay consistent with your naming conventions, and make edits that fit coherently into whatever is already there.
Model flexibility
Opencode isn’t locked to a single AI provider. You can run it against Claude, GPT-4o, or other frontier models depending on your preference and API access. That means you can pick the model that gives you the best output for the kind of UI you’re building.
Clean, portable code
The output is standard HTML, CSS, and JavaScript. Any developer on your team can open it, understand it immediately, and take it further without having to fight the tooling.
Fast, conversational iteration
Refining a design is as quick as typing a sentence. There’s no context to re-establish between messages — Opencode holds the full picture of your project throughout the session.
The Opencode.ai + Figma workflow, end to end
Pairing Opencode with html.to.design gives you a complete path from idea to design asset:
- Prototype without committing to production code — spin up a concept, validate it visually, and get stakeholder feedback before anything goes near a real codebase.
- Your browser output becomes a Figma file — what would otherwise live only in a terminal and a browser tab becomes something your whole team can open, comment on, and build on.
- Jump-start your design system — the imported Figma frames give you a solid foundation for extracting reusable components, color styles, and text styles without starting from scratch.
From idea to Figma, without writing a single line of code
Opencode.ai takes the friction out of the gap between your design idea and the working webpage. Describe what you want, review it in the browser, refine with follow-up prompts, and keep iterating until it feels right.
Then capture it with html.to.design, and your AI-generated prototype becomes a fully editable Figma file — ready for collaboration, annotation, and design system work.
👉 Get started with Opencode.ai and try html.to.design to bring your AI-built pages straight into Figma.