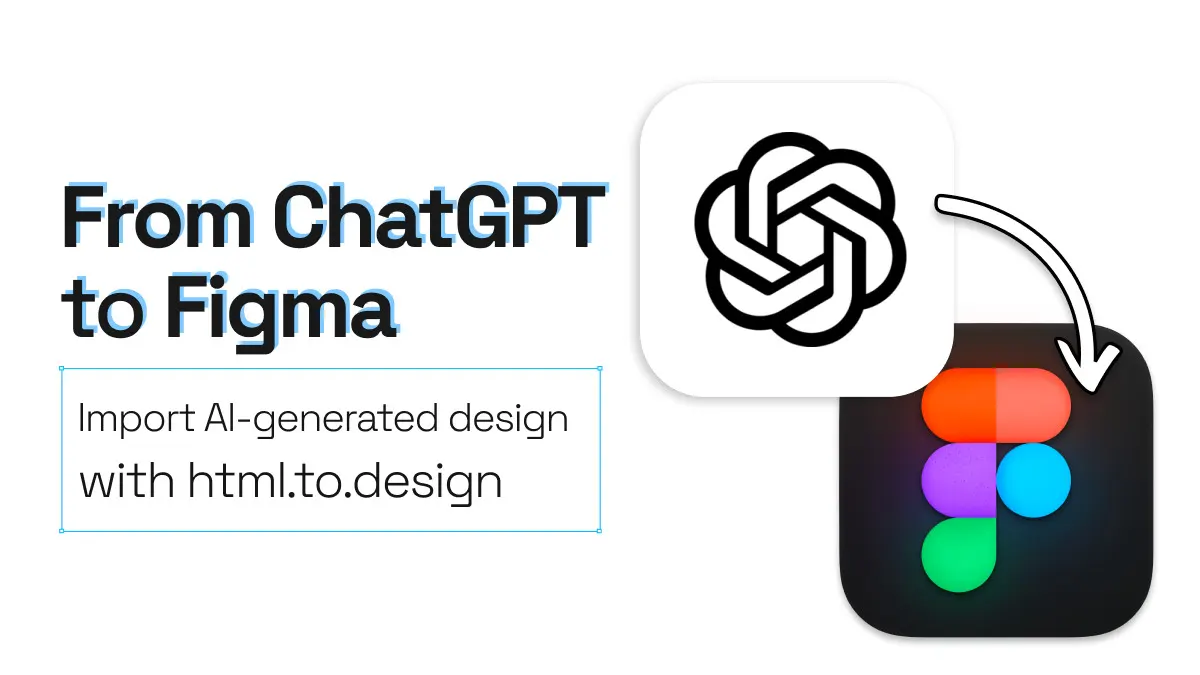
How to import AI-coded design from ChatGPT to Figma
AI is changing the way we design. Whether you’re prototyping a new landing page or reimagining your product dashboard, tools like ChatGPT are making it possible to go from prompt to pixels in record time.
But here’s the catch: ChatGPT gives you HTML and CSS, not editable layers. So how do you take that code and turn it into something visual, flexible, and collaborative inside Figma?
Let’s walk through how to import AI-coded designs from ChatGPT into Figma—step by step.
From ChatGPT to Figma quick guide
- Generate your design code using ChatGPT
- Install the html.to.design Chrome extension
- Automatically capture and import your design into Figma with the extension
- Edit and enhance your design in Figma
Step-by-step: How to import AI-generated code into Figma
Using ChatGPT, we tried creating a landing page design to then import into Figma with the help of html.to.design. Here’s a step by step breakdown of how we did it:
1. Generate your design code using ChatGPT
Start with a clear prompt inside ChatGPT for web design. For example:
“Generate a CSS and HTML code for a landing page. I want it to have a clean and modern layout with a strong hero section, clear value proposition, and a call-to-action above the fold. Please include sections for social proof (like testimonials or client logos), features or benefits, and a final CTA at the bottom. The goal of the page is to get visitors to sign up for a free trial. The tone should be professional but friendly, and the design should feel trustworthy and easy to read.”
ChatGPT will return responsive, semantic code you can build on.
2. Install the html.to.design Chrome extension
The magic happens with the html.to.design Chrome extension. Here’s how to set it up:
- Install the extension from the Chrome Web Store
- Pin it to your browser for easy access
- Navigate to your ChatGPT conversation where you generated the code
- Click the extension icon - it will automatically detect the HTML/CSS code in ChatGPT’s response
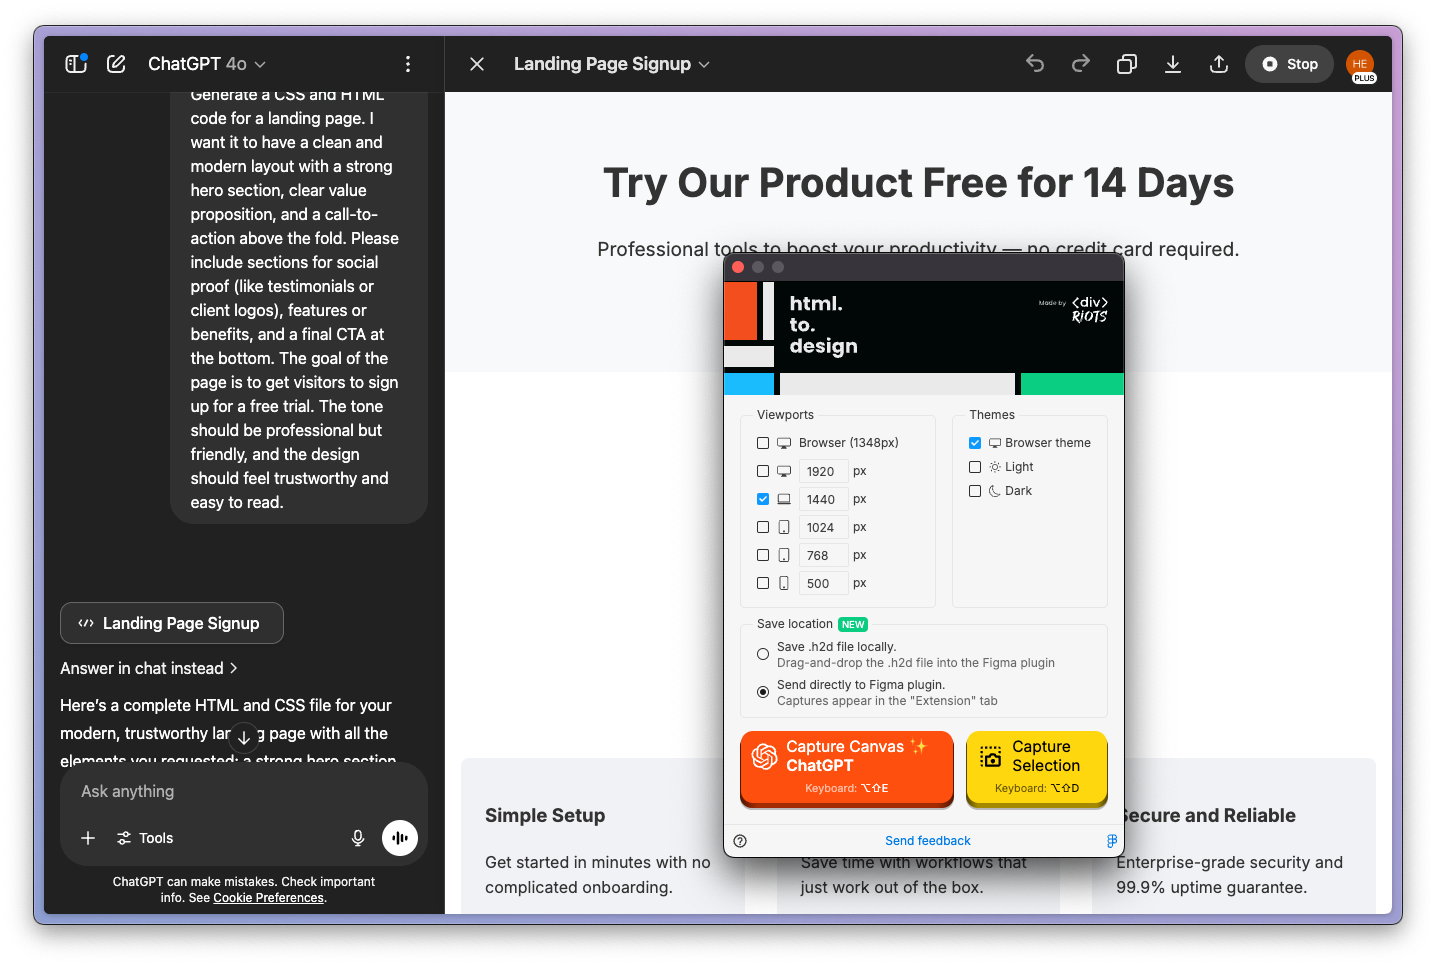
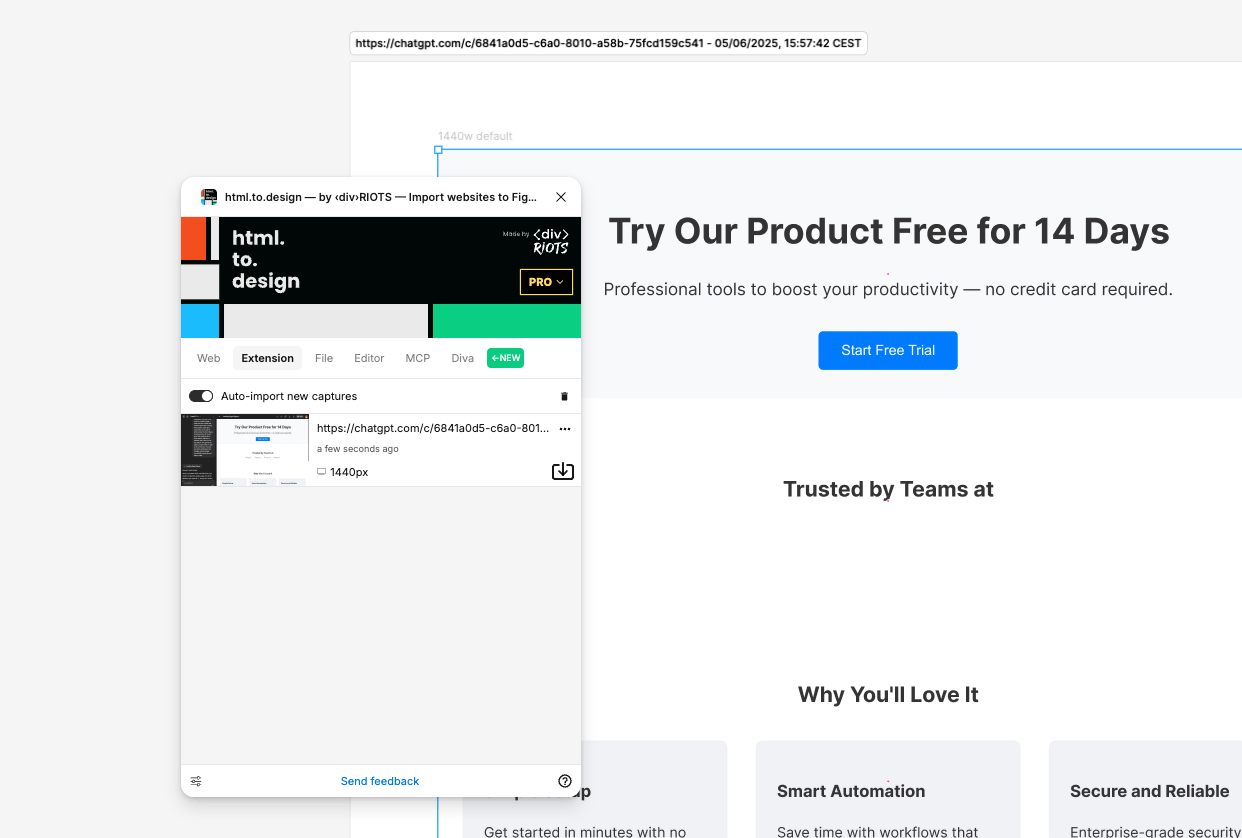
3. Automatically import your design into Figma
With both Figma and the html.to.design plugin open…
- Click “Capture Canvas ChatGPT” in the extension pop-up
- Watch as your design appears in the Figma plugin
- Click to import these designs as fully editable layers in your Figma canvas
No more copying, pasting, or switching between tabs. The extension handles the entire import process seamlessly, converting your ChatGPT-generated code into a fully editable Figma design.
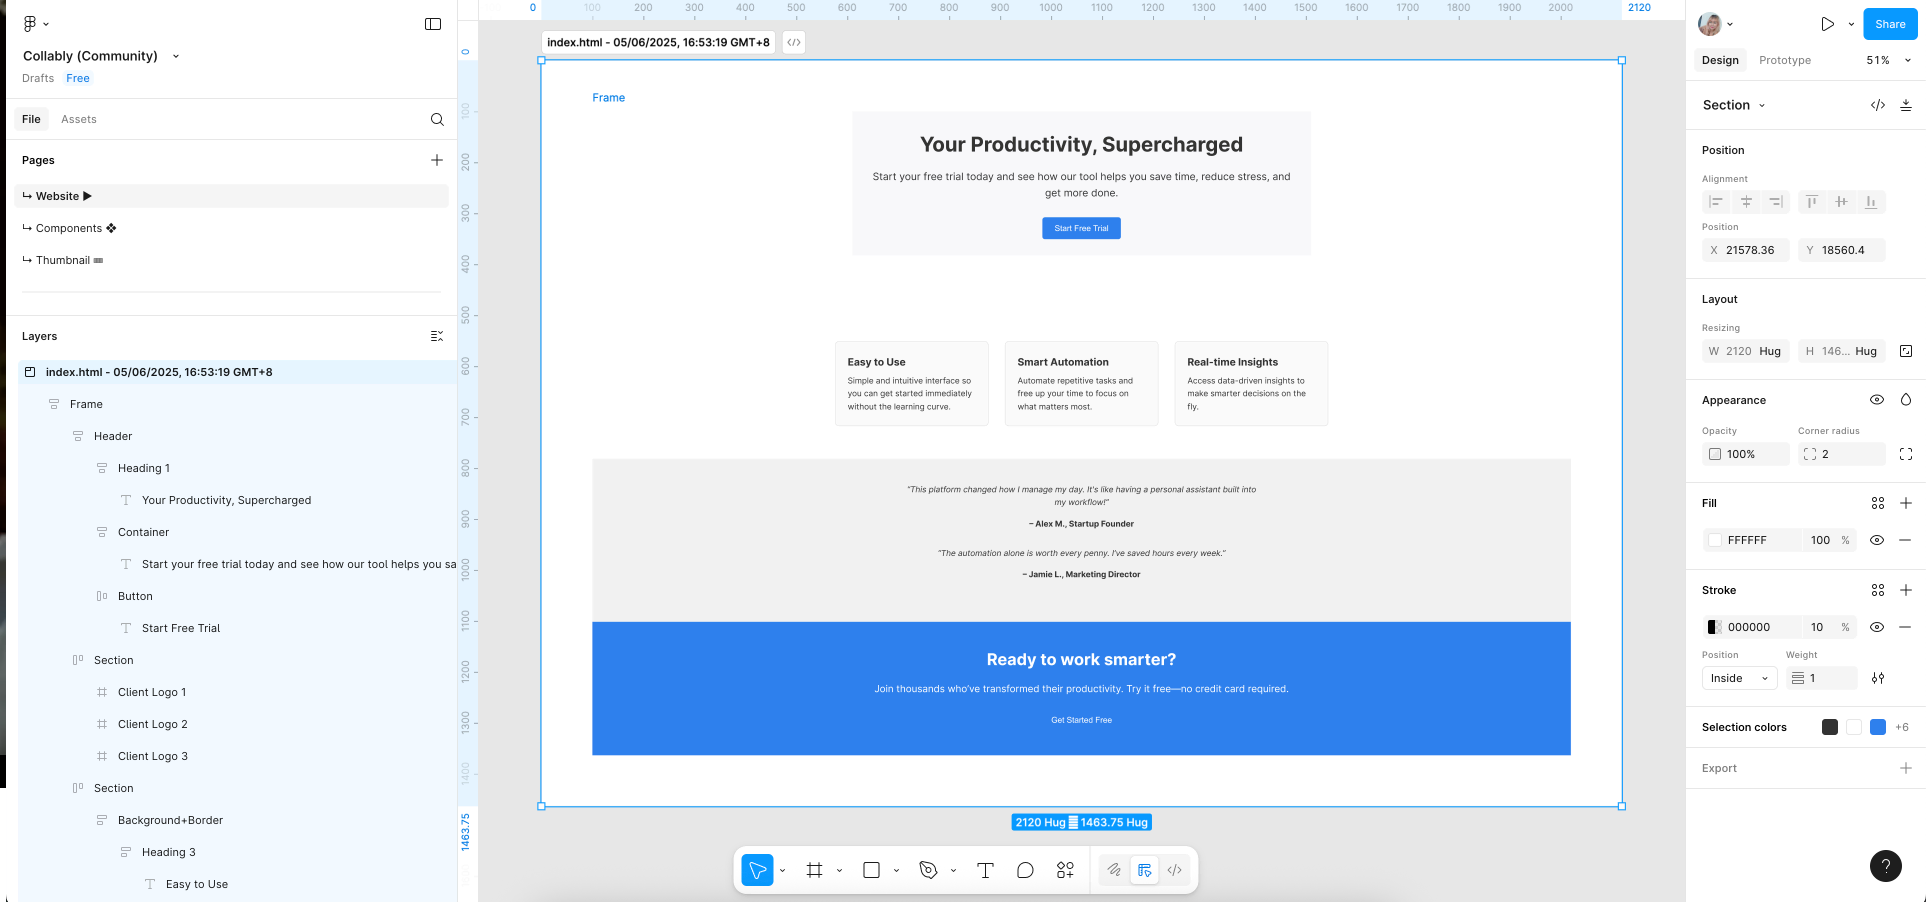
4. Edit and enhance in Figma
Now that the base design is in, you can refine it:
- Update text, images, or spacing
- Apply auto layout or variants
- Use or create your Figma components
- Polish it to match your design system
Best practices for the ChatGPT to Figma workflow
To maximize your productivity with the new automated workflow, here are some pro tips:
A. Be specific in your ChatGPT prompts
The more detailed your prompt, the better your results. Include specific requirements like “mobile-responsive,” “clean typography,” “modern color scheme,” or “include hover states.” The extension works best when ChatGPT generates complete, well-structured code from comprehensive prompts.
B. Use multiple ChatGPT conversations for complex projects
Instead of trying to build everything in one massive prompt, break complex designs into components. Generate a header in one conversation, a feature section in another, then import each piece separately. This gives you more control and cleaner Figma layers.
C. Keep the extension pinned and ready
Pin the html.to.design extension to your browser toolbar for instant access. This eliminates the need to hunt for it in your extensions menu every time you want to import a design from ChatGPT.
You can also use the extension shortcuts to double the productivity.
D. Set up your Figma workspace beforehand
Before you start prompting, create a dedicated Figma file or page for your AI-generated designs. Having your workspace ready means you can import designs immediately without interrupting your creative flow.
E. Iterate directly in ChatGPT when needed
If an import doesn’t look quite right, go back to ChatGPT and refine your prompt rather than making major structural changes in Figma. It’s often faster to regenerate the code with tweaks than to rebuild components manually.
This streamlined approach turns design iteration into a rapid-fire process—perfect for exploring multiple concepts quickly.
Why use the ChatGPT to Figma workflow?
Plugins like html.to.design can bridge the gap between code and canvas, converting AI-coded output (like a ChatGPT UI design) into editable Figma layers you can work with.
- 🚀 Generate mockups faster than ever
- 🧠 Let ChatGPT handle the structure, so you can focus on creativity
- 🤝 Great for developer handoffs or UX prototyping
- 🔁 Iterate rapidly inside Figma with auto layout and components
This is where the power of using a ChatGPT UI design prompt really shines: code-level precision meets visual flexibility.
👉 Ready to bring your AI-powered designs to life?
With ChatGPT and the html.to.design plugin, you can create, import, and iterate faster—all inside Figma. From idea to editable design, it’s never been easier to go from text prompt to prototype.
Prep your ChatGPT UI prompt, generate your layout using html.to.design, and bring it straight into Figma. Start small. Iterate fast. Your next design project is just a prompt away.